Seven years ago, in the earliest days of my blog, I published a tutorial for felt succulents. But like all the blog posts of that time, the photos were dark, blurry, and otherwise terrible. So, I decided to re-do the entire project, and let me tell you- I am IN LOVE with the results.
In addition to those reasons, I just love to create faux plants in general- such as these wooden cacti. Since Cottonball likes to eat real plants, fake ones are my best alternative!
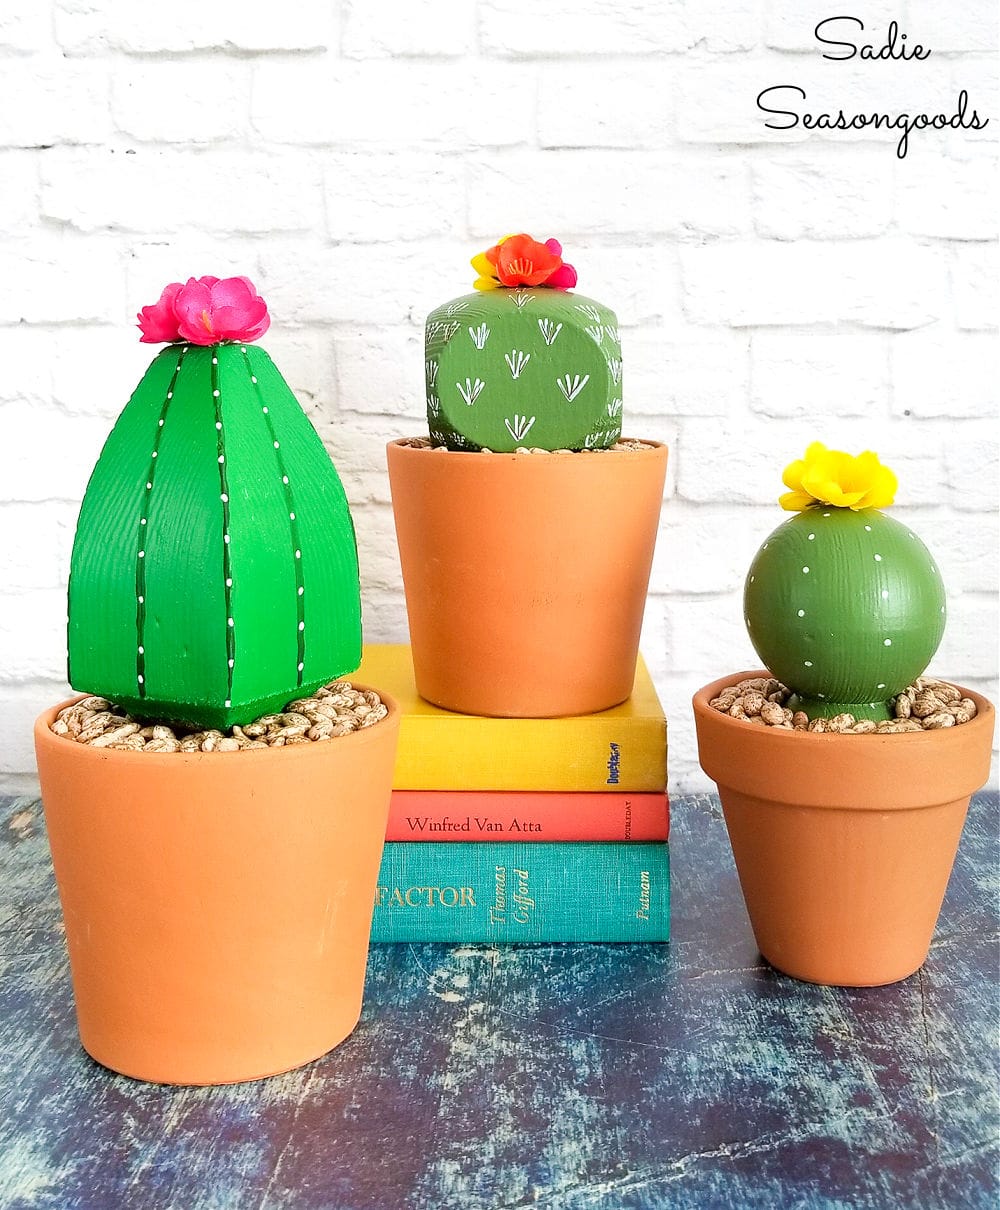
Image credit: Sadie Seasongoods.
But, back to my current project! Not only are the felt succulents absolutely adorable, but I thrifted for interesting “planters” for them. Such as this snail basket…

Image credit: Sadie Seasongoods.
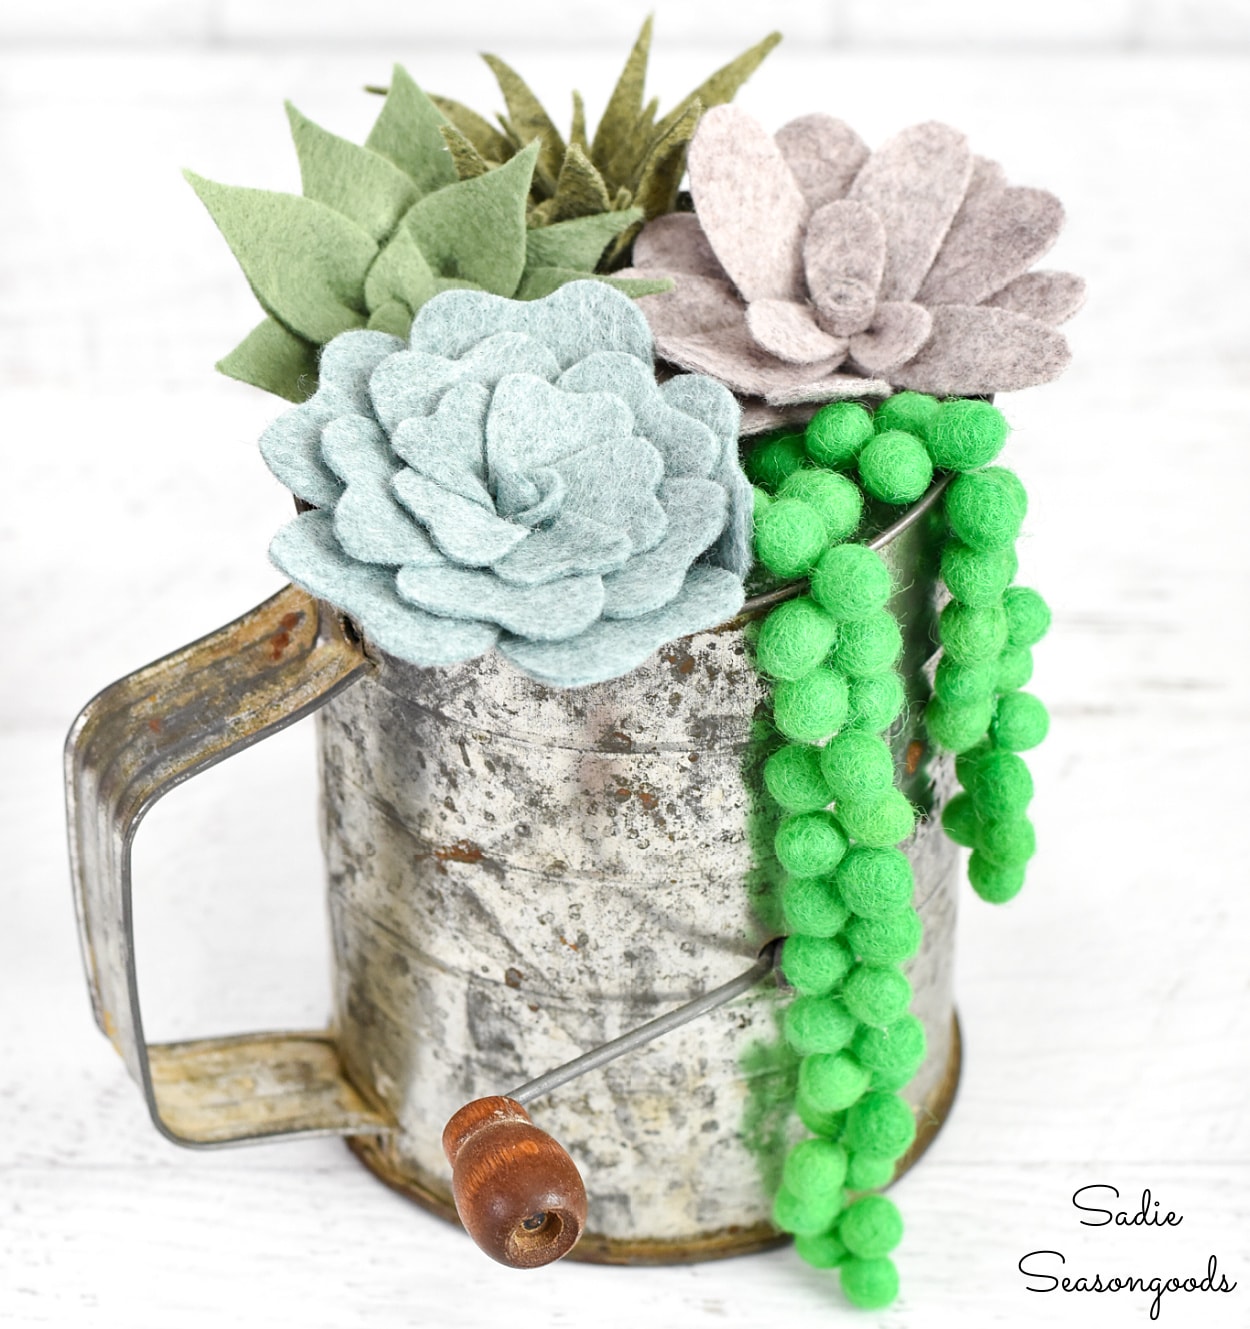
And a vintage flour sifter.

Image credit: Sadie Seasongoods.
Once I had those, and some special wool blend felt (more on that in a moment), I was ready to once again, try my hand at making some DIY felt succulents.
This post contains affiliate links for your crafting convenience. As an Amazon Affiliate, I earn from qualifying purchases. All blue, bold, and underlined text is a clickable link, either to a product or to a related post.
The Art of the Felt Succulent
First, the felt. I wanted more natural colors than what craft stores typically offer. And I found just what I was looking for from this Etsy shop.

Image credit: Sadie Seasongoods.
Those colors came from two different packs: The Succulent Collection and The Earthy Heathers Collection. If those sets are out of stock, this set looks like it has great succulent colors in it, too.
To get started, I only needed a sheet of felt, some sharp scissors, and my hot glue gun.

Image credit: Sadie Seasongoods.
You could use other glues, like a fast-drying craft glue, but hot glue is my favorite for this project.
First, I cut out a 1” wide strip of felt that was about 3” to 3½” long. I rolled it up tightly and hot glued the flap to keep it in place.

Image credit: Sadie Seasongoods.
This will be the center of the felt succulent. It also acts as a “handle” to hold onto when you add leaves to it.
Next, I cut out four identical leaves that were fairly small, about ¾” tall.

Image credit: Sadie Seasongoods.
Building the Felt Succulents
Then, I simply drew a line of hot glue along the very bottom of each leaf and attached it the center coil, overlapping as I went.

Image credit: Sadie Seasongoods.
I did the same thing again, but with 4 identical leaves that were larger in size. I glued them offset to the previous leaves, so that they were fully visible between two of the smaller leaves.

Image credit: Sadie Seasongoods.
And again…you get the picture.

Image credit: Sadie Seasongoods.
Each layer included a set of progressively larger leaves. And if you look at the sheet of felt there, you’ll see that I used less than half to make this little guy!

Image credit: Sadie Seasongoods.
I stopped when I was satisfied- but you can literally go as long as you want. Your felt succulent just gets bigger and bigger, and I wanted fairly dainty felt succulents.

Image credit: Sadie Seasongoods.
When I was done, I turned the plant over and snipped off the excess “coil” so that it had a nice flat bottom.
Faux String of Pearls Plant
As cute as my star succulent was, I have a real soft spot for the trailing succulents, like string of pearls. And I desperately wanted to make a version out of felt.
But how? How would I get the dimension right, since string of pearls have little round or oblong leaves?
I turned back to Etsy and found what I needed: Felted Wool Beads (Size 1cm)!

Image credit: Sadie Seasongoods.
After grabbing some coordinating embroidery floss and an embroidery needle, though, I proceeded to “massage” each bead. I wanted them to be a little more oblong, closer to teardrops than spheres.
So, I simply rolled them in my hand and between my fingers to do so.

Image credit: Sadie Seasongoods.
Next, I threaded my needle with a strand of floss and strung them along. I offset each one slightly and secured it in place with a tiny stitch.

Image credit: Sadie Seasongoods.
I had ordered 50 beads and ended up making two strands- one of 30 and one of 20.

Image credit: Sadie Seasongoods.
Oh my gosh, it turned out cuter than I had hoped!
Succulent Display Ideas
I made one felt succulent after another, using different techniques (such as this version I found on YouTube). As I got the hang of them, I got creative with the technique.
For instance, I pinched the leaves together with a little glue for some of them first, which added more dimension.
In the end, though, this was my collection of felt succulents (and yes, I have a TON of felt left).

Image credit: Sadie Seasongoods.
Aren’t they THE CUTEST? I can’t decide on a favorite…
To display my felt succulents in my unusual planters, I used floral foam. I cut the foam to fit inside the planters.
But instead of using hot glue to fix the felt succulents in place, I used extra long straight pins! I simply pierced each felt succulent through one of the lowest leaves and stuck it to the foam.

Image credit: Sadie Seasongoods.
It was just a matter of layering them together in each planter. I couldn’t be happier with how they turned out.

Image credit: Sadie Seasongoods.
Using the long straight pins to attach them to the foam means I can change them up at any time!
Felt Succulents in Thrifted Planters
And just like that, I had some of the CUTEST little succulents I had ever seen. Whimsical planters and felt succulents were MEANT to go together.

Image credit: Sadie Seasongoods.
I mean…can you stand it? The cuteness? And that they will never die or rot!

Image credit: Sadie Seasongoods.
I know I’m including a LOT of photos of these felt succulents, but I’m just absolutely in love with them.

Image credit: Sadie Seasongoods.
Ok, I’m done- I’ll spare you any more photos. But tell me, will you be making some felt succulents soon now?
You’ll love them- I promise! And funky or silly planters from the thrift store (or from the back of your cupboard) just put the cuteness over the top!
For instance, check out the desktop Zen garden with felt succulents that I made for Habitat ReStore in Charlotte, NC! I upcycled a mini muffin tin as the “planter”.

Image credit: Sadie Seasongoods.
And if you enjoyed this craft idea for biophilic decor, then you may also be interested in this botanical decor idea from the thrift store!
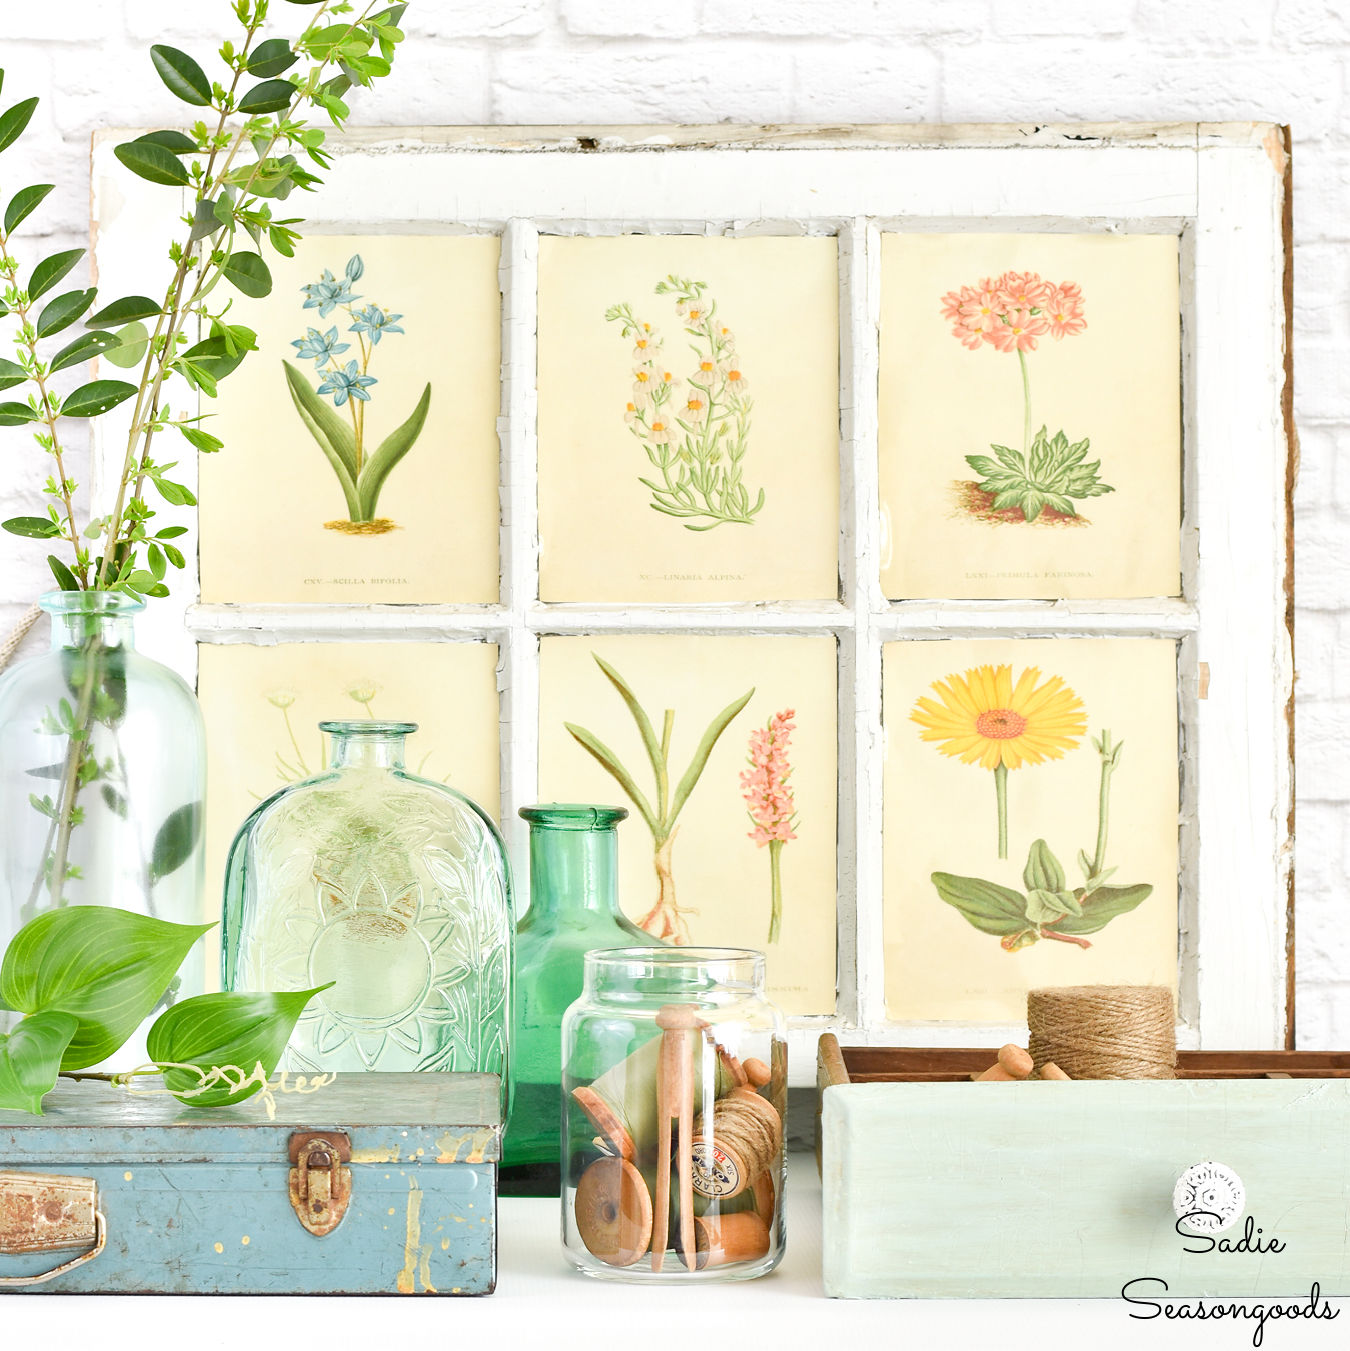
Image credit: Sadie Seasongoods.
Craft on!
S
Want to be notified when I publish my next upcycling project tutorial?
Join me on Social Media:


PIN ME!

Image credit: Sadie Seasongoods.

Image credit: Sadie Seasongoods.

Image credit: Sadie Seasongoods.
Sarah Ramberg is the owner of Sadie Seasongoods, a website that celebrates all things secondhand. From upcycling ideas and thrifted decor to vintage-centric travel itineraries, Sadie Seasongoods is a one-stop shop for anyone who loves thrifting and approachable repurposing ideas. Sarah is also the author of “Crafting with Flannel” and has been featured in numerous media outlets and magazines.


I love these!! Definitely going to try this!!
Tania
Thanks, Tania! They’re addictive to make!
These are absolutely adorable!!! I can’t wait to tackle making them! I love household plants but our cat loves them too and I now live plantless! This changes things! Thank you!
Yes!! Cottonball won’t leave real plants alone, either. These are an adorable alternative!
Super cute! And that wicker turtle!
Right?? He’s just so cute.
I have a very large glass shell I wanted to fill with actual succulents maybe this is a better idea. I definitely wouldn’t have to do much to take care of them. Is there anything you cannot do, you are extremely talented.
:* Thank you, Rita!!
Cute idea!
Thank you!
As always your creativity is fantastic. I love receiving your posts. It doesn’t matter what sort of day I am having when I see your email I open it joyfully anticipating the pleasure of viewing your projects. Thank you 🙂
I *really* struggled whether to share this yesterday or not, given everything that had happened. But it was already scheduled to publish, so I let it go.
Oh, my favorite is that purple “aloe” looking one! How cute. My summertime pot of succulents are slowly losing the bottom leaves–and the aloes just turned to green slime. SOOO sad! I love plants that I can’t kill! And that can even be vacuumed!
Thank you!
Love love those beautiful felt succulents & flowers you made! Love the unique planters together!!
Thank you, Michelle!
These are adorable. I still use my sifter. It is nearly sixty years old and looks it. I may decided to give it a new purpose.
Thank you, Sonja!
I bet I wouldn’t overwater these! Love them!
Ha, SAME!! Thanks, April!
Love these! And so happy you are getting better.
😀 Thanks!
I absolutely love these. They are beautiful. Thank you for sharing,
Thank you so much, Cheryl!
Love that snail basket! I found a squirrel one in my mom’s garage a couple of years ago.