Usually when I think of doing a summer décor project, the colors lean into typical coastal hues. Aqua, tan, white…you get the picture. But this time was a little different- because I wanted to create a summer garland of sorts, but with a nautical theme.
And I planned on making it from my stash of vintage wooden spools.
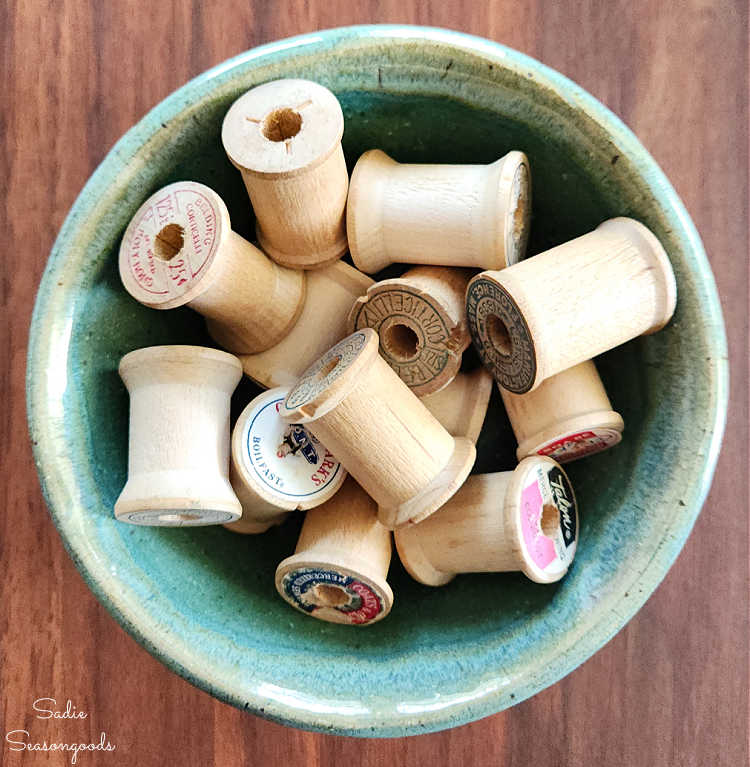
Image credit: Sadie Seasongoods.
My plan? To transform some of my smaller spools into buoys, strung along on some craft rope. And I’d use the colors of nautical flags for their makeovers.
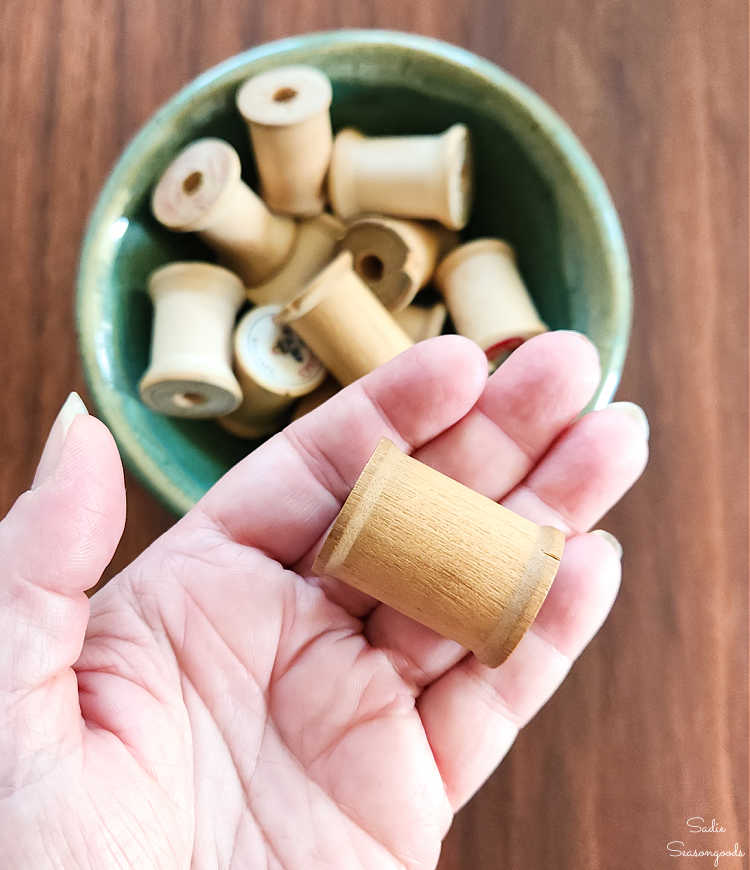
Image credit: Sadie Seasongoods.
Simple…using supplies I already had on hand…and a nautical departure from my usual tropical/coastal summer style. Sound fun to you? Then, let’s get this (nautical) party started!
This post contains affiliate links for your crafting convenience. As an Amazon Affiliate, I earn from qualifying purchases. All blue, bold, and underlined text is a clickable link, either to a product or to a related post.
Painting the Wooden Spools with Nautical Colors
First things first, I gathered up the supplies I needed. These included a handful of smaller wooden spools, craft paints in nautical colors, small brushes, and craft rope (leftover from this beachy project).
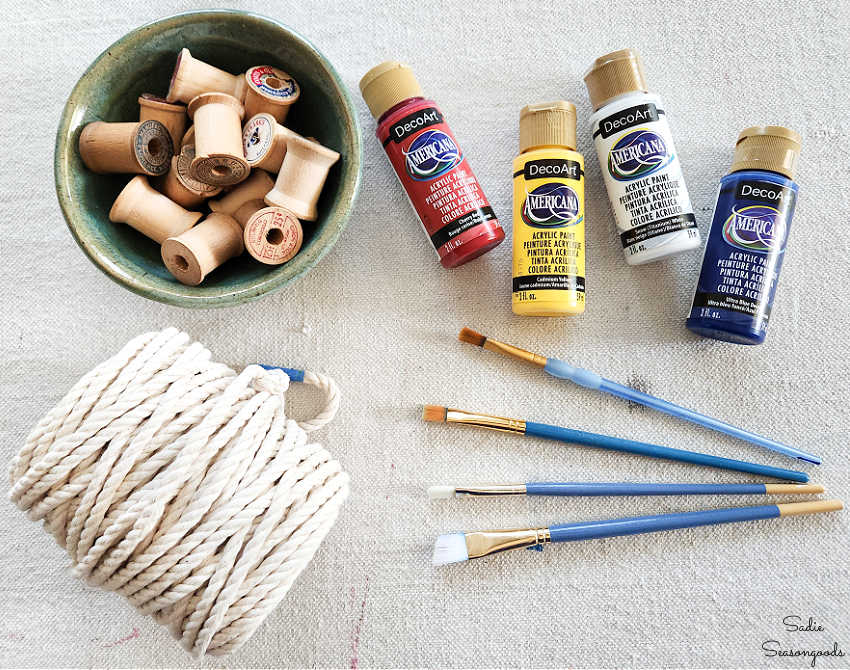
Image credit: Sadie Seasongoods.
The nice thing about vintage spools is that they’re easy to paint by just holding their ends. And the wood is just grabby enough to take on paint really well! So, I simply brushed different colors on each spool.
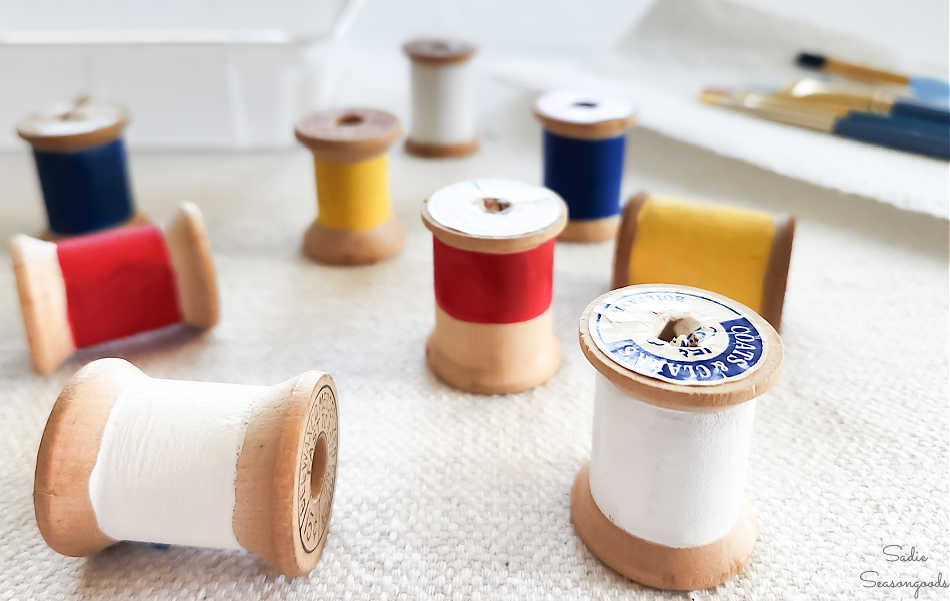
Image credit: Sadie Seasongoods.
Most of the time, I painted the entire mid-section of each spool. But sometimes I left half of it unpainted- in case I wanted to paint the other half a lighter color later on.
Once the first layers of paint had dried, I grabbed some painter’s tape and scissors. With varying widths of tape, I cut out mini stencils so I could add stripes to some of my spools. Well, stripes and boundaries, basically.

Image credit: Sadie Seasongoods.
And while I wasn’t following actual nautical flags, per se, the idea of those were the inspiration behind my summer garland. Ultimately, my collection of spool “buoys” looked like this when I was done painting them.
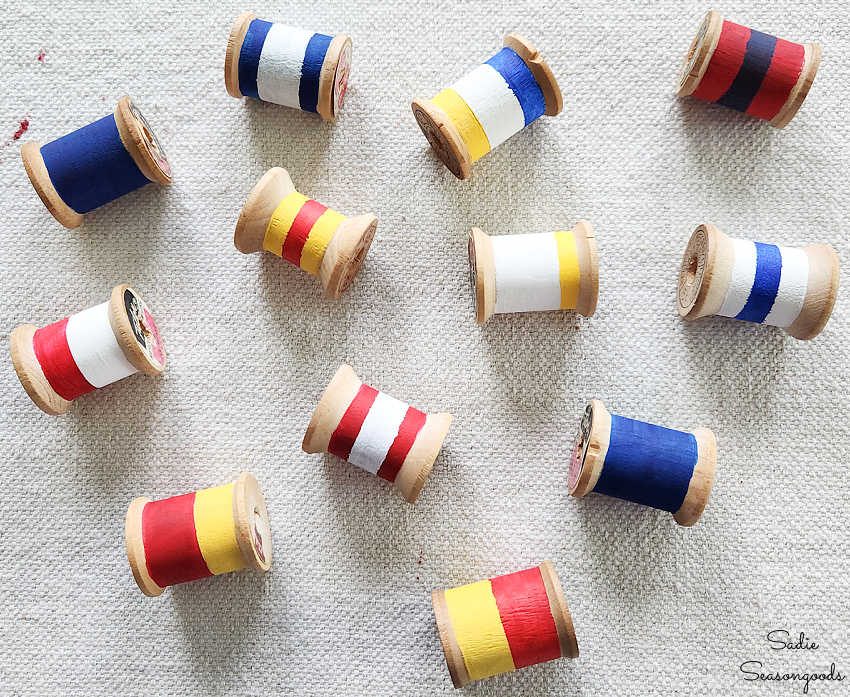
Image credit: Sadie Seasongoods.
Not a single one was “perfect” or had super clean lines. Just like a lot of older buoys that have been beaten and battered by the sea over the years. Nor did I seal them with Mod Podge or some other clear coat.
Next, it was time to string my spools into a garland with the rope!
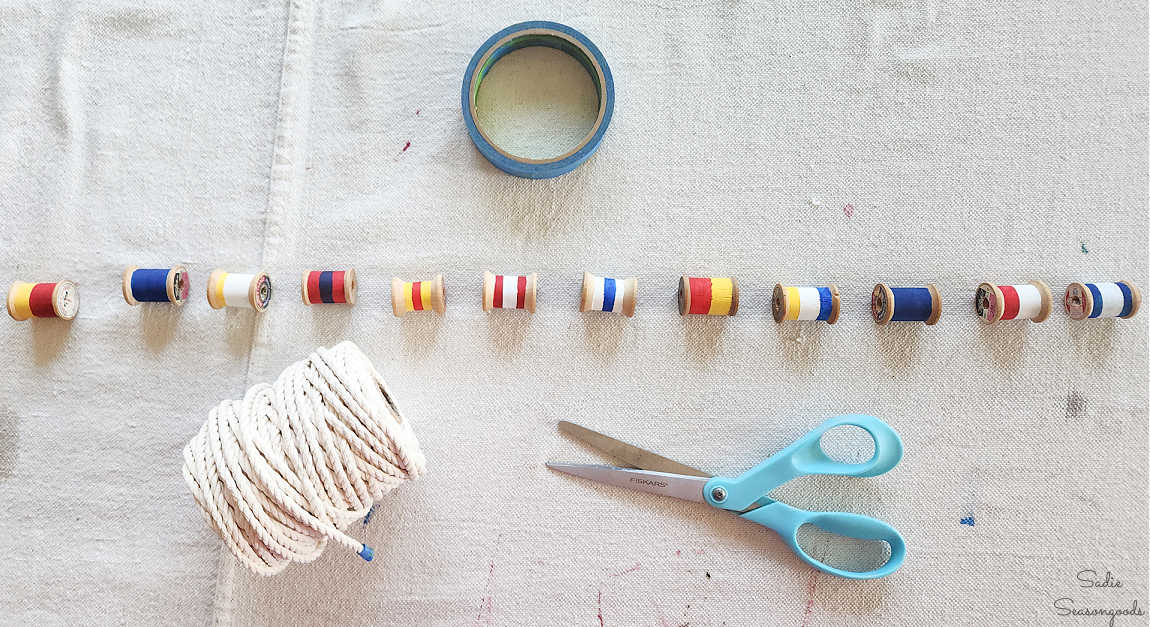
Image credit: Sadie Seasongoods.
Assembling a Summer Garland
After spacing out the spools in an order I was happy with, I needed to cut off a length of twine/rope. I used a 2.5x length of rope based on how I spaced out the spools- just to be on the safe side.
From there, I simply tied a knot, added a spool, and tied another knot next to it.
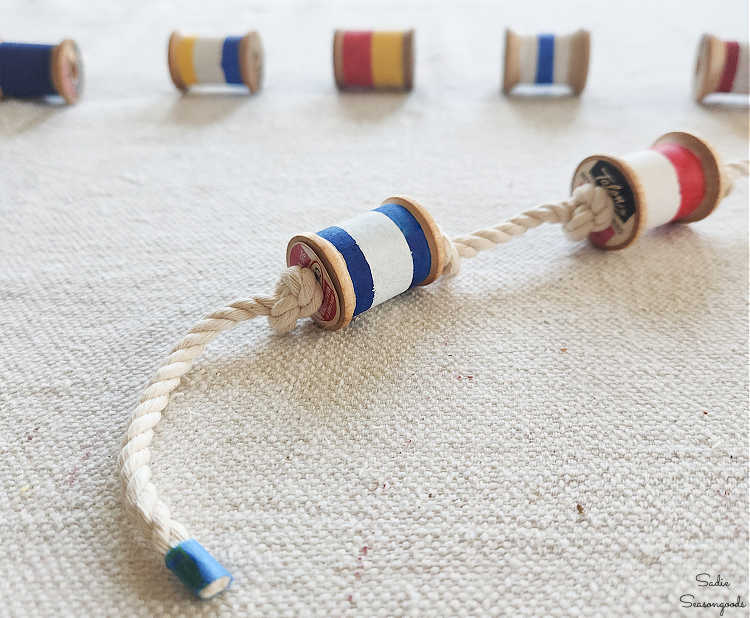
Image credit: Sadie Seasongoods.
I left some space after the second knot and repeated the process over and over again. Of course, our little Pixie kept trying to steal the spools. (Now that Cottonball would rather nap during craft time, Pixie has picked up the mantle.)
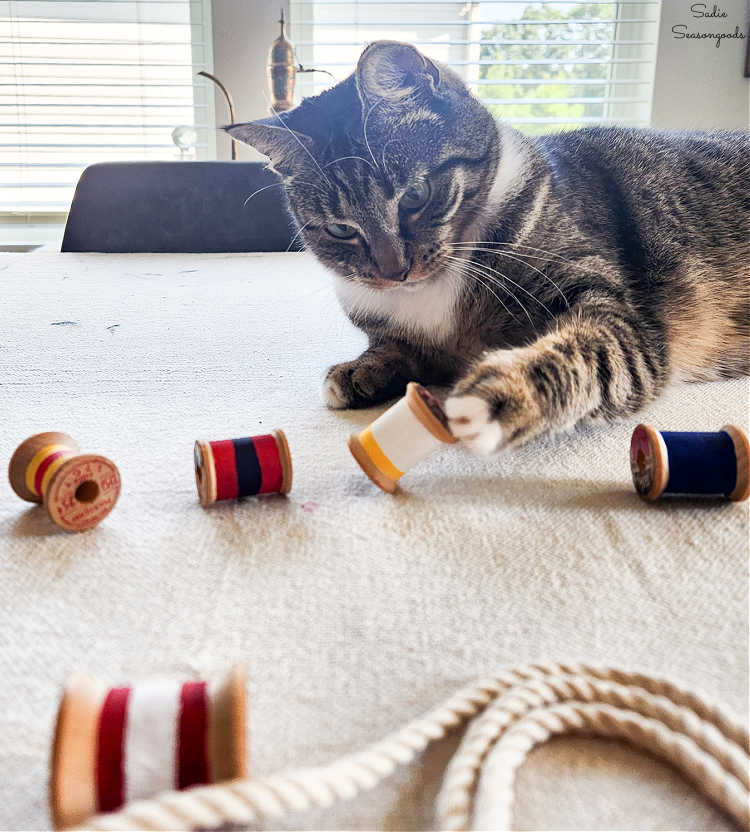
Image credit: Sadie Seasongoods.
When I was done stringing the summer garland together (leaving 4-5” tails on either end), this is how it looked.
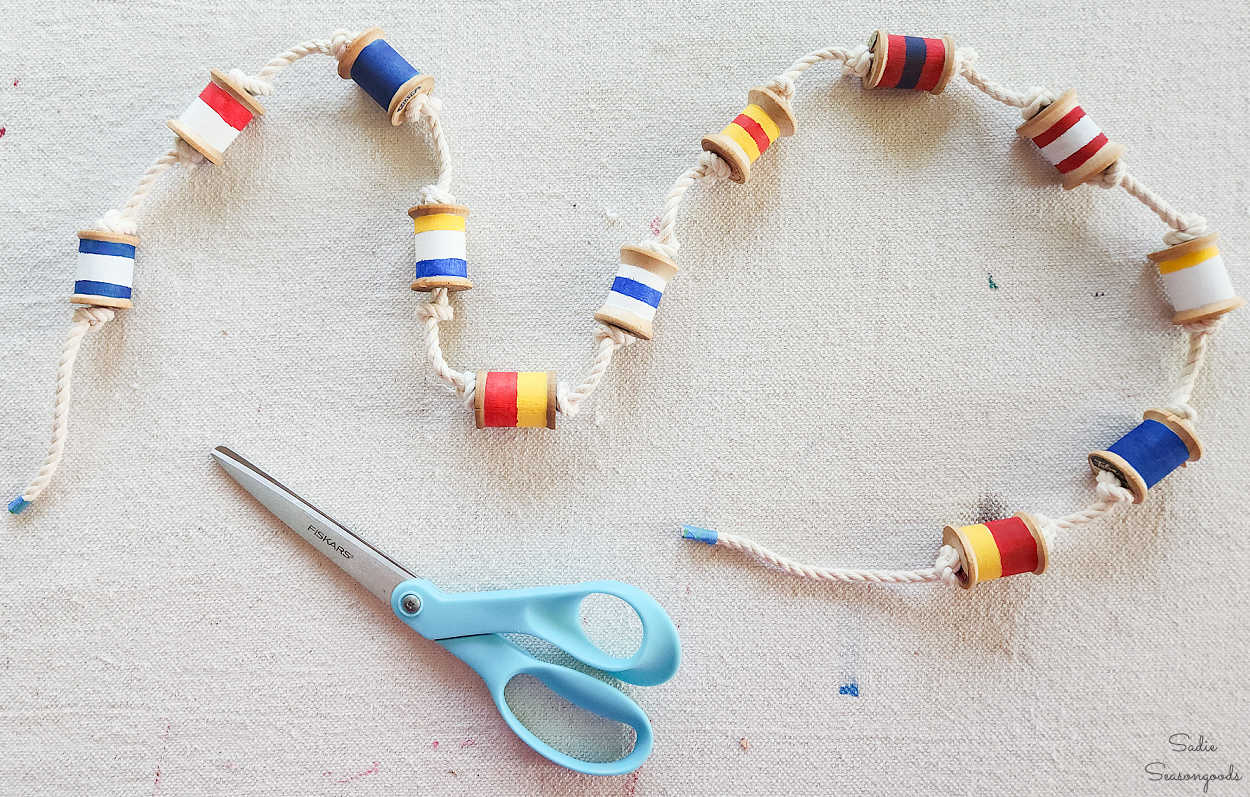
Image credit: Sadie Seasongoods.
Speaking of those tails, I took one final step. I snipped off the taped end and unraveled the strands like this.

Image credit: Sadie Seasongoods.
Then, I used a macrame brush (like a small slicker brush for pets) and brushed out the rope strands. This gave them the tassel look that I was going for.
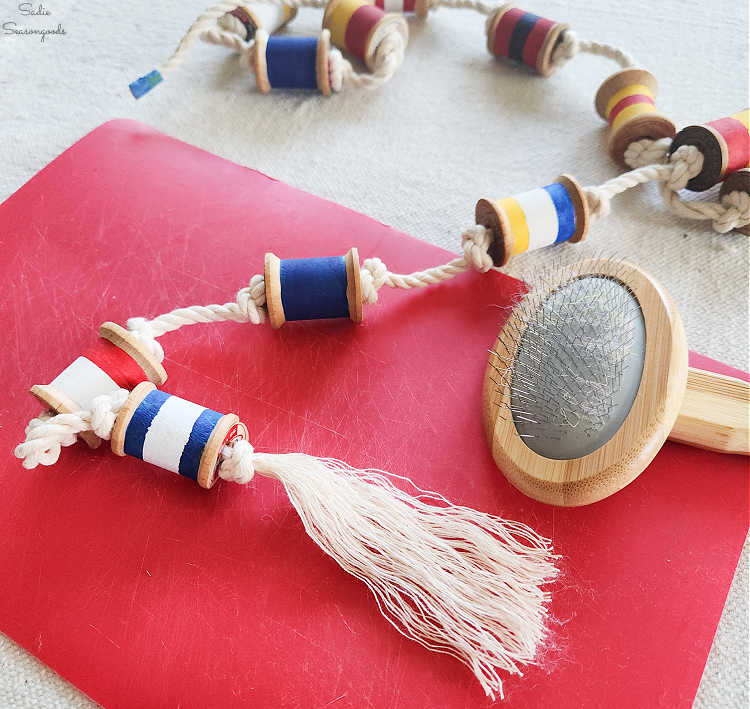
Image credit: Sadie Seasongoods.
And I brushed them on a smooth plastic surface so that the macrame brush didn’t snag anything underneath. After I snipped fresh ends along each tassel to even them up, I was done!
Nautical Style Summer Garland
Even with all the wobbly paint lines and perhaps not perfectly even spacing, I love how it turned out.
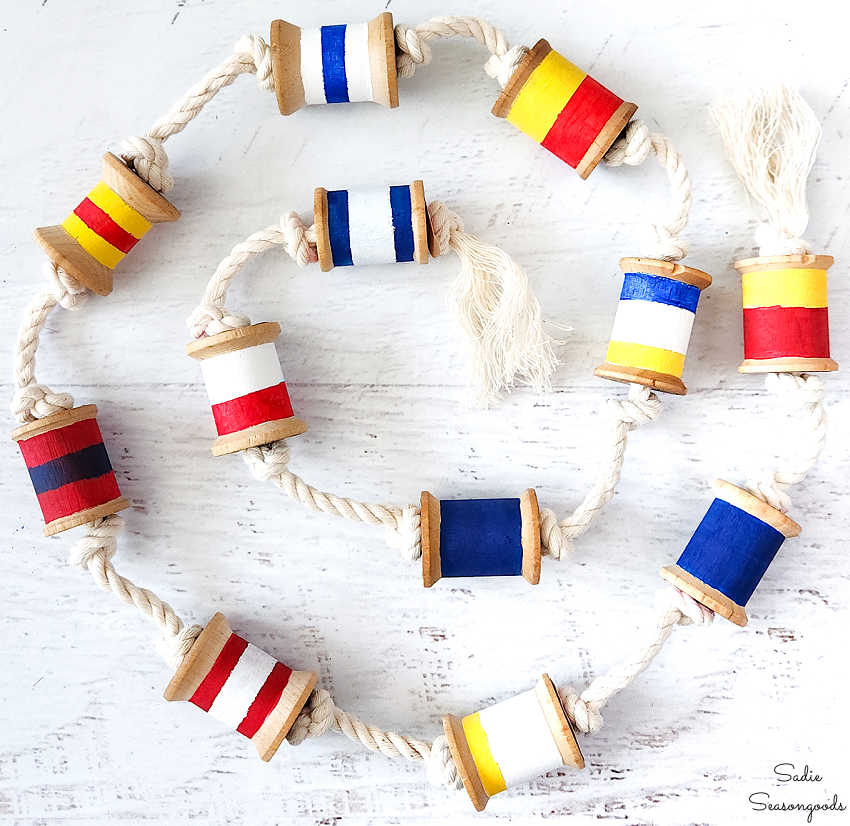
Image credit: Sadie Seasongoods.
I was inspired to create this summer garland from seeing similar versions made from wine corks. And while I love a wine cork craft, I figured spools were a fun alternative. Besides, no drilling required with spools!
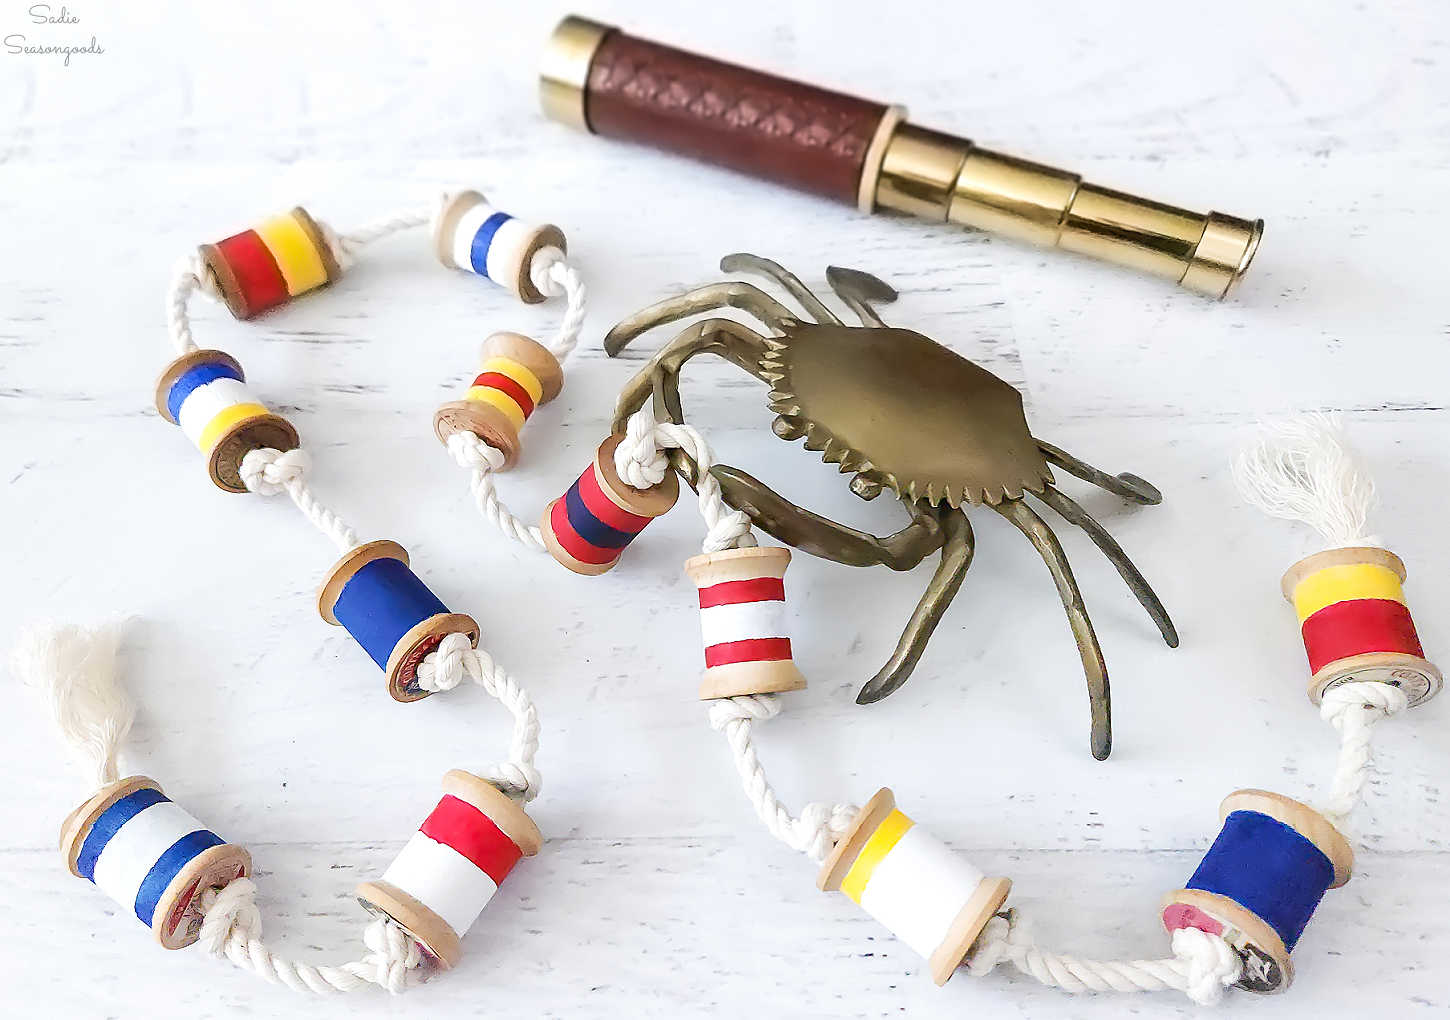
Image credit: Sadie Seasongoods.
Either way, it was the perfect summer craft to do inside during the hottest part of the season. And truly a fun departure from the beachy-colored crafts I’ve made in the past.
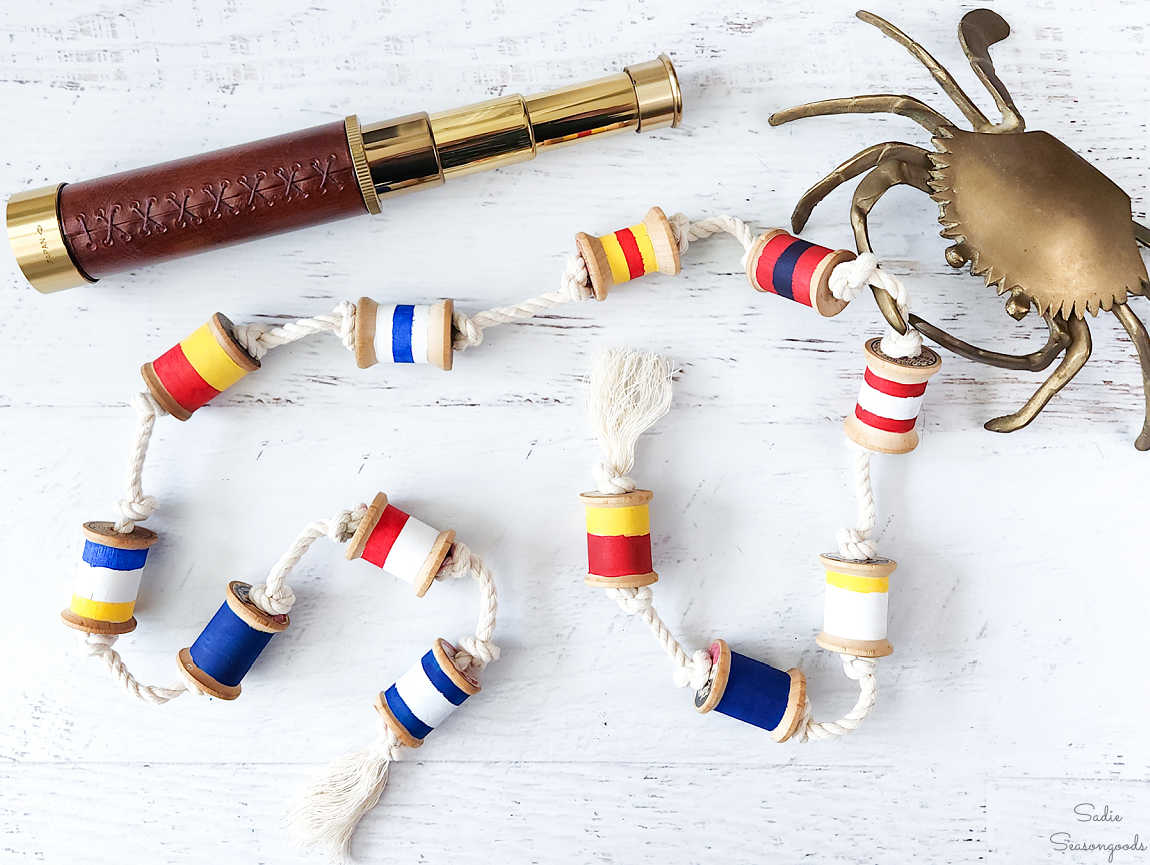
Image credit: Sadie Seasongoods.
But if you’re more interested in breezy, coastal projects, I’ve got plenty of those to inspire you in this collection!

Image credit: Sadie Seasongoods.
And the same goes for vintage wooden spool crafts, too.
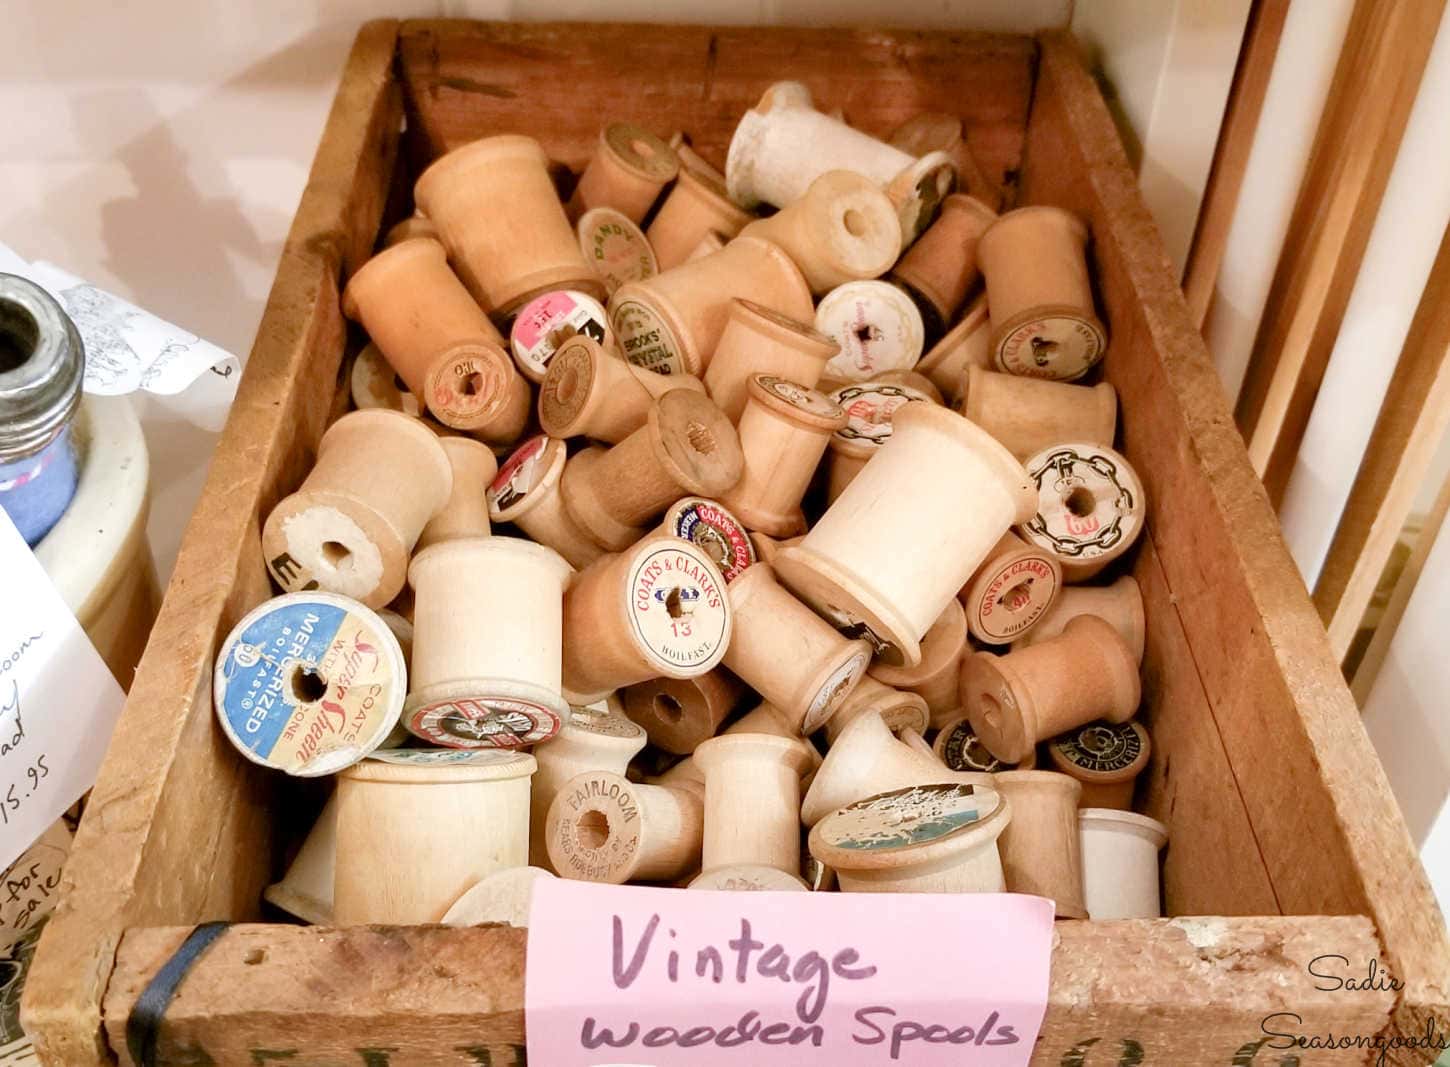
Image credit: Sadie Seasongoods.
Craft on!
S
Want to be notified when I publish my next upcycling project tutorial?
Join me on Social Media:


PIN ME!
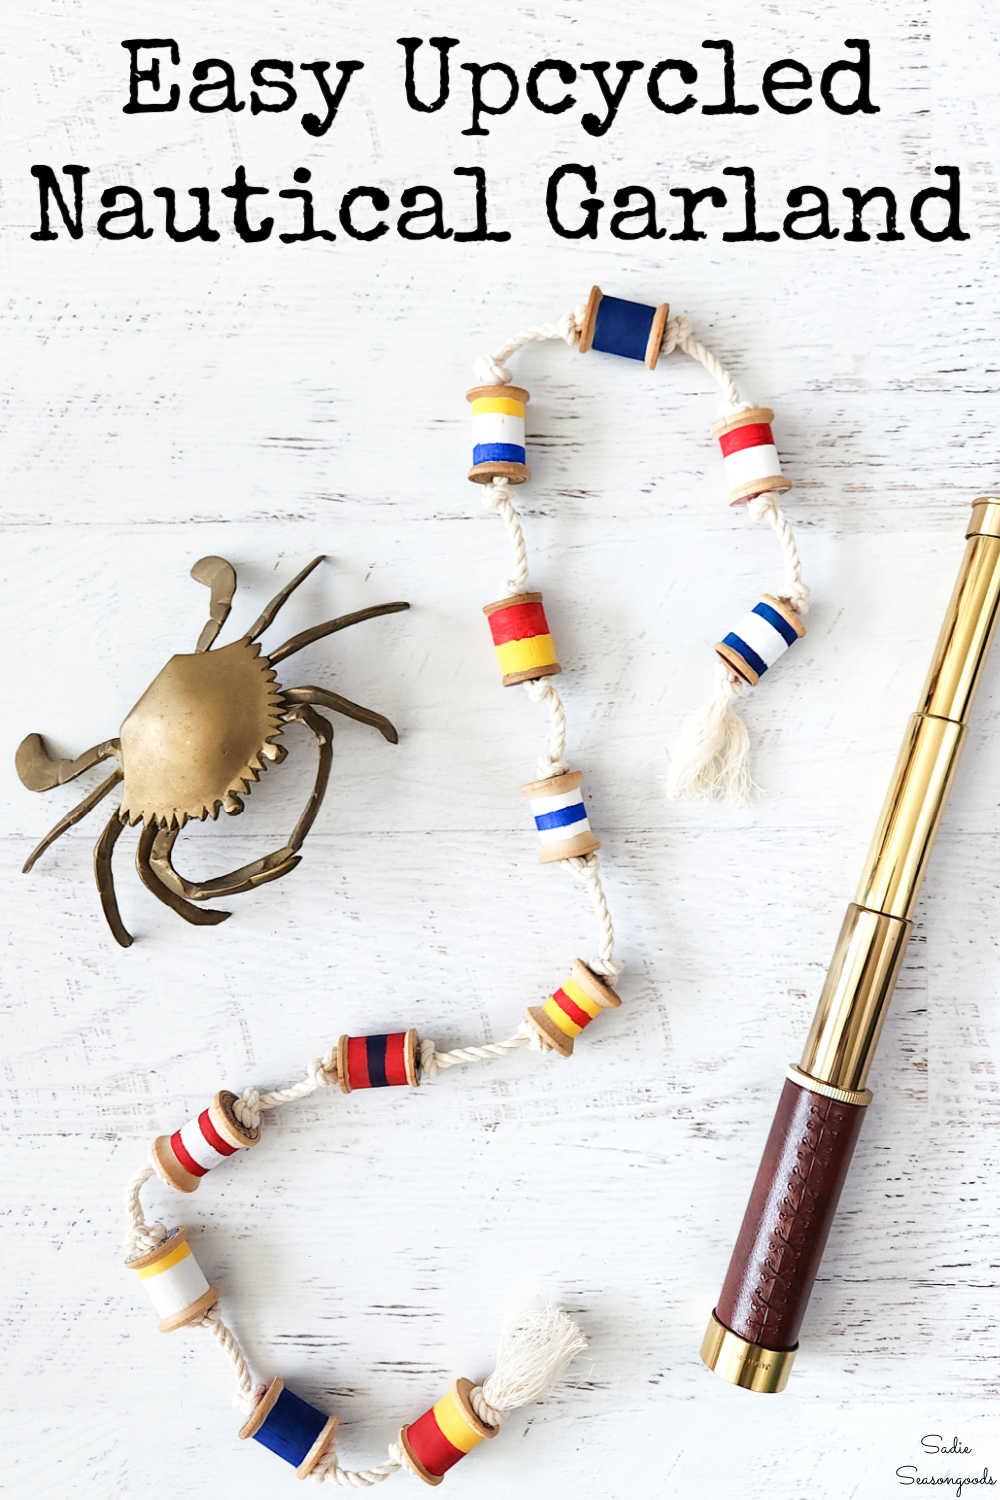
Image credit: Sadie Seasongoods.
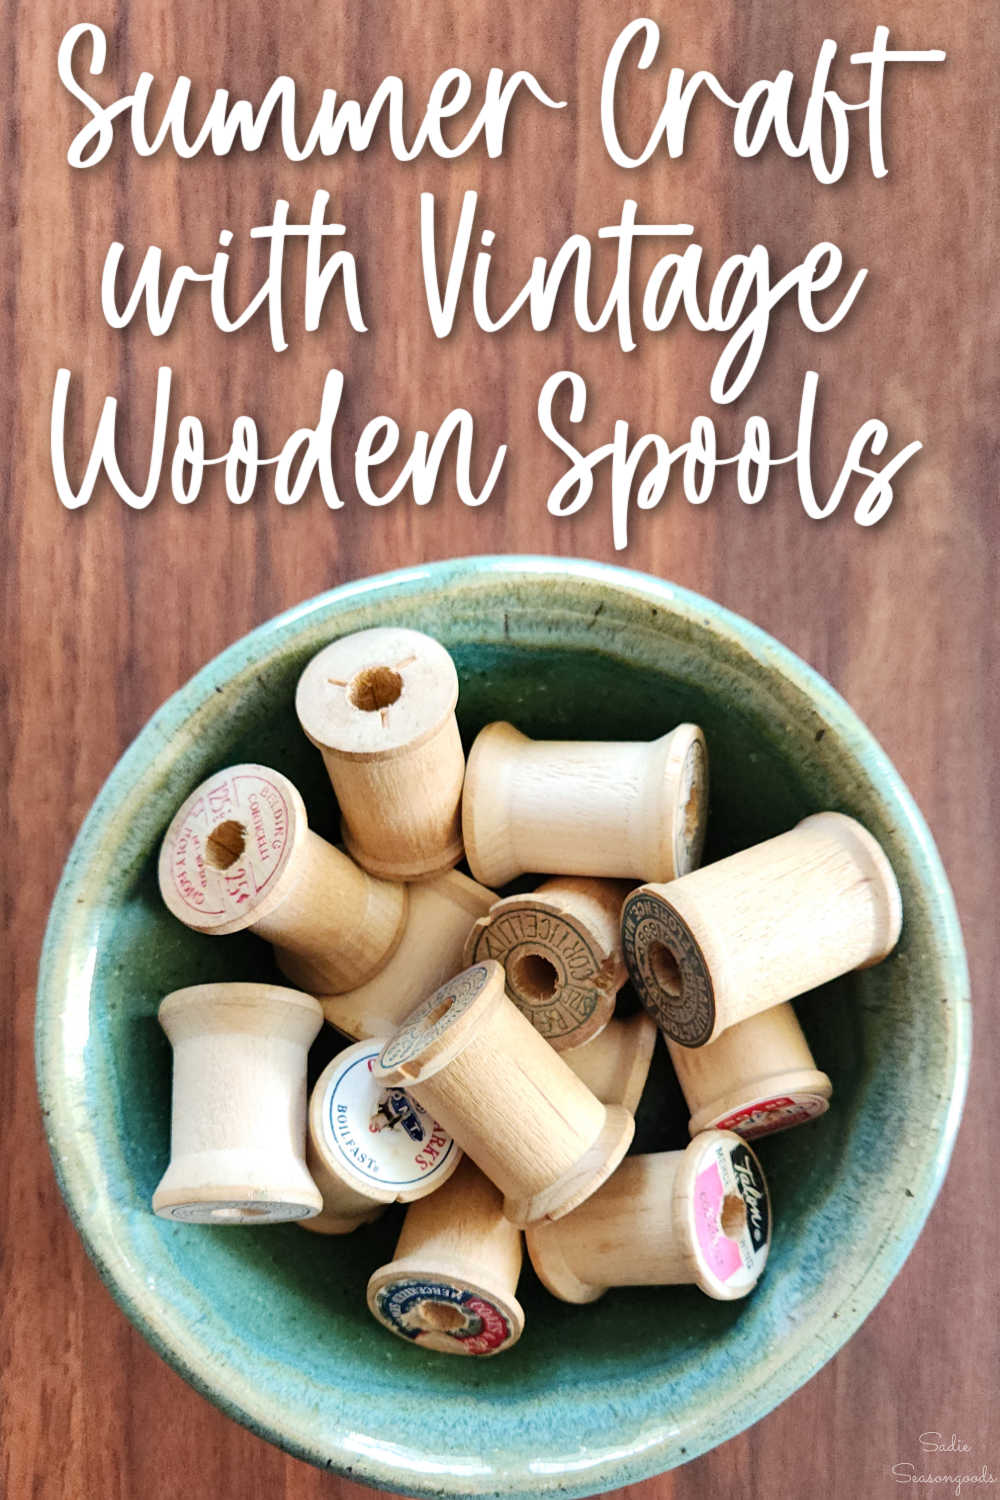
Image credit: Sadie Seasongoods.
Sarah Ramberg is the owner of Sadie Seasongoods, a website that celebrates all things secondhand. From upcycling ideas and thrifted decor to vintage-centric travel itineraries, Sadie Seasongoods is a one-stop shop for anyone who loves thrifting and approachable repurposing ideas. Sarah is also the author of “Crafting with Flannel” and has been featured in numerous media outlets and magazines.
- Sarah Ramberg
- Sarah Ramberg
- Sarah Ramberg
- Sarah Ramberg
- Sarah Ramberg
- Sarah Ramberg
- Sarah Ramberg
- Sarah Ramberg
- Sarah Ramberg
- Sarah Ramberg
- Sarah Ramberg
- Sarah Ramberg
- Sarah Ramberg
- Sarah Ramberg
- Sarah Ramberg
- Sarah Ramberg
- Sarah Ramberg
- Sarah Ramberg
- Sarah Ramberg
- Sarah Ramberg
- Sarah Ramberg
- Sarah Ramberg
- Sarah Ramberg
- Sarah Ramberg
- Sarah Ramberg
- Sarah Ramberg
- Sarah Ramberg
- Sarah Ramberg
- Sarah Ramberg
- Sarah Ramberg
- Sarah Ramberg
- Sarah Ramberg
- Sarah Ramberg
- Sarah Ramberg
- Sarah Ramberg
- Sarah Ramberg
- Sarah Ramberg
- Sarah Ramberg
- Sarah Ramberg
- Sarah Ramberg
- Sarah Ramberg
- Sarah Ramberg
- Sarah Ramberg
- Sarah Ramberg
- Sarah Ramberg
- Sarah Ramberg
- Sarah Ramberg
- Sarah Ramberg
- Sarah Ramberg
- Sarah Ramberg
- Sarah Ramberg
- Sarah Ramberg
- Sarah Ramberg
- Sarah Ramberg
- Sarah Ramberg
- Sarah Ramberg
- Sarah Ramberg
- Sarah Ramberg
- Sarah Ramberg
- Sarah Ramberg
- Sarah Ramberg
- Sarah Ramberg
- Sarah Ramberg
- Sarah Ramberg
- Sarah Ramberg
- Sarah Ramberg
- Sarah Ramberg
- Sarah Ramberg
- Sarah Ramberg
- Sarah Ramberg
- Sarah Ramberg
- Sarah Ramberg
- Sarah Ramberg
- Sarah Ramberg
- Sarah Ramberg
- Sarah Ramberg
- Sarah Ramberg
- Sarah Ramberg
- Sarah Ramberg
- Sarah Ramberg
- Sarah Ramberg
- Sarah Ramberg
- Sarah Ramberg
- Sarah Ramberg
- Sarah Ramberg
- Sarah Ramberg
- Sarah Ramberg
- Sarah Ramberg
- Sarah Ramberg
- Sarah Ramberg
- Sarah Ramberg
- Sarah Ramberg
- Sarah Ramberg
- Sarah Ramberg
- Sarah Ramberg
- Sarah Ramberg
- Sarah Ramberg
- Sarah Ramberg
- Sarah Ramberg
- Sarah Ramberg
- Sarah Ramberg
- Sarah Ramberg
- Sarah Ramberg
- Sarah Ramberg
- Sarah Ramberg
- Sarah Ramberg
- Sarah Ramberg
- Sarah Ramberg
- Sarah Ramberg
- Sarah Ramberg
- Sarah Ramberg
- Sarah Ramberg
- Sarah Ramberg
- Sarah Ramberg
- Sarah Ramberg
- Sarah Ramberg
- Sarah Ramberg
- Sarah Ramberg
- Sarah Ramberg
- Sarah Ramberg
- Sarah Ramberg
- Sarah Ramberg
- Sarah Ramberg
- Sarah Ramberg
- Sarah Ramberg
- Sarah Ramberg
- Sarah Ramberg
- Sarah Ramberg
- Sarah Ramberg
- Sarah Ramberg
- Sarah Ramberg
- Sarah Ramberg
- Sarah Ramberg
- Sarah Ramberg
- Sarah Ramberg
- Sarah Ramberg
- Sarah Ramberg
- Sarah Ramberg
- Sarah Ramberg
- Sarah Ramberg
- Sarah Ramberg
- Sarah Ramberg
- Sarah Ramberg
- Sarah Ramberg
- Sarah Ramberg
- Sarah Ramberg
- Sarah Ramberg
- Sarah Ramberg
- Sarah Ramberg
- Sarah Ramberg
- Sarah Ramberg
- Sarah Ramberg
- Sarah Ramberg
- Sarah Ramberg
- Sarah Ramberg
- Sarah Ramberg
- Sarah Ramberg
- Sarah Ramberg
- Sarah Ramberg
- Sarah Ramberg
- Sarah Ramberg
- Sarah Ramberg
- Sarah Ramberg
- Sarah Ramberg
- Sarah Ramberg
- Sarah Ramberg
- Sarah Ramberg
- Sarah Ramberg
- Sarah Ramberg
- Sarah Ramberg
- Sarah Ramberg
- Sarah Ramberg
- Sarah Ramberg
- Sarah Ramberg
- Sarah Ramberg
- Sarah Ramberg
- Sarah Ramberg
- Sarah Ramberg
- Sarah Ramberg
- Sarah Ramberg
- Sarah Ramberg
- Sarah Ramberg
- Sarah Ramberg
- Sarah Ramberg
- Sarah Ramberg
- Sarah Ramberg
- Sarah Ramberg
- Sarah Ramberg
- Sarah Ramberg
- Sarah Ramberg
- Sarah Ramberg
- Sarah Ramberg
- Sarah Ramberg
- Sarah Ramberg
- Sarah Ramberg
- Sarah Ramberg
- Sarah Ramberg
- Sarah Ramberg
- Sarah Ramberg
- Sarah Ramberg
- Sarah Ramberg
- Sarah Ramberg
- Sarah Ramberg
- Sarah Ramberg
- Sarah Ramberg
- Sarah Ramberg
- Sarah Ramberg
- Sarah Ramberg
- Sarah Ramberg
- Sarah Ramberg
- Sarah Ramberg
- Sarah Ramberg
- Sarah Ramberg
- Sarah Ramberg
- Sarah Ramberg
- Sarah Ramberg
- Sarah Ramberg
- Sarah Ramberg
- Sarah Ramberg
- Sarah Ramberg
- Sarah Ramberg
- Sarah Ramberg
- Sarah Ramberg
- Sarah Ramberg
- Sarah Ramberg
- Sarah Ramberg
- Sarah Ramberg
- Sarah Ramberg
- Sarah Ramberg
- Sarah Ramberg
- Sarah Ramberg
- Sarah Ramberg
- Sarah Ramberg
- Sarah Ramberg
- Sarah Ramberg
- Sarah Ramberg
- Sarah Ramberg
- Sarah Ramberg
- Sarah Ramberg
- Sarah Ramberg
- Sarah Ramberg
- Sarah Ramberg
- Sarah Ramberg
- Sarah Ramberg
- Sarah Ramberg
- Sarah Ramberg
- Sarah Ramberg
- Sarah Ramberg
- Sarah Ramberg
- Sarah Ramberg
- Sarah Ramberg
- Sarah Ramberg
- Sarah Ramberg
- Sarah Ramberg
- Sarah Ramberg
- Sarah Ramberg
- Sarah Ramberg
- Sarah Ramberg
- Sarah Ramberg
- Sarah Ramberg
- Sarah Ramberg
- Sarah Ramberg
- Sarah Ramberg
- Sarah Ramberg
- Sarah Ramberg
- Sarah Ramberg
- Sarah Ramberg
- Sarah Ramberg
- Sarah Ramberg
- Sarah Ramberg
- Sarah Ramberg
- Sarah Ramberg
- Sarah Ramberg
- Sarah Ramberg
- Sarah Ramberg
- Sarah Ramberg
- Sarah Ramberg
- Sarah Ramberg
- Sarah Ramberg
- Sarah Ramberg
- Sarah Ramberg
- Sarah Ramberg
- Sarah Ramberg
- Sarah Ramberg
- Sarah Ramberg
- Sarah Ramberg
- Sarah Ramberg
- Sarah Ramberg
- Sarah Ramberg
- Sarah Ramberg
- Sarah Ramberg
- Sarah Ramberg
- Sarah Ramberg
- Sarah Ramberg
- Sarah Ramberg
- Sarah Ramberg
- Sarah Ramberg
- Sarah Ramberg
- Sarah Ramberg
- Sarah Ramberg
- Sarah Ramberg
- Sarah Ramberg
- Sarah Ramberg
- Sarah Ramberg
- Sarah Ramberg
- Sarah Ramberg
- Sarah Ramberg
- Sarah Ramberg
- Sarah Ramberg
- Sarah Ramberg
- Sarah Ramberg
- Sarah Ramberg
- Sarah Ramberg
- Sarah Ramberg
- Sarah Ramberg
- Sarah Ramberg
- Sarah Ramberg
- Sarah Ramberg
- Sarah Ramberg
- Sarah Ramberg
- Sarah Ramberg
- Sarah Ramberg
- Sarah Ramberg
- Sarah Ramberg
- Sarah Ramberg
- Sarah Ramberg
- Sarah Ramberg
- Sarah Ramberg
- Sarah Ramberg
- Sarah Ramberg
- Sarah Ramberg
- Sarah Ramberg
- Sarah Ramberg
- Sarah Ramberg
- Sarah Ramberg
- Sarah Ramberg
- Sarah Ramberg
- Sarah Ramberg
- Sarah Ramberg
- Sarah Ramberg
- Sarah Ramberg
- Sarah Ramberg
- Sarah Ramberg
- Sarah Ramberg
- Sarah Ramberg
- Sarah Ramberg
- Sarah Ramberg
- Sarah Ramberg
- Sarah Ramberg
- Sarah Ramberg
- Sarah Ramberg
- Sarah Ramberg
- Sarah Ramberg
- Sarah Ramberg
- Sarah Ramberg
- Sarah Ramberg
- Sarah Ramberg
- Sarah Ramberg
- Sarah Ramberg
- Sarah Ramberg
- Sarah Ramberg
- Sarah Ramberg
- Sarah Ramberg
- Sarah Ramberg
- Sarah Ramberg
- Sarah Ramberg
- Sarah Ramberg
- Sarah Ramberg
- Sarah Ramberg
- Sarah Ramberg
- Sarah Ramberg
- Sarah Ramberg
- Sarah Ramberg
- Sarah Ramberg
- Sarah Ramberg
- Sarah Ramberg
- Sarah Ramberg
- Sarah Ramberg
- Sarah Ramberg
- Sarah Ramberg
- Sarah Ramberg
- Sarah Ramberg
- Sarah Ramberg
- Sarah Ramberg
- Sarah Ramberg
- Sarah Ramberg
- Sarah Ramberg
- Sarah Ramberg
- Sarah Ramberg
- Sarah Ramberg
- Sarah Ramberg
- Sarah Ramberg
- Sarah Ramberg
- Sarah Ramberg
- Sarah Ramberg
- Sarah Ramberg
- Sarah Ramberg
- Sarah Ramberg
- Sarah Ramberg
- Sarah Ramberg
- Sarah Ramberg
- Sarah Ramberg
- Sarah Ramberg
- Sarah Ramberg
- Sarah Ramberg
- Sarah Ramberg
- Sarah Ramberg
- Sarah Ramberg
- Sarah Ramberg
- Sarah Ramberg
- Sarah Ramberg
- Sarah Ramberg
- Sarah Ramberg
- Sarah Ramberg
- Sarah Ramberg
- Sarah Ramberg
- Sarah Ramberg
- Sarah Ramberg
- Sarah Ramberg
- Sarah Ramberg
- Sarah Ramberg
- Sarah Ramberg
- Sarah Ramberg
- Sarah Ramberg
- Sarah Ramberg
- Sarah Ramberg
- Sarah Ramberg
- Sarah Ramberg
- Sarah Ramberg
- Sarah Ramberg
- Sarah Ramberg
- Sarah Ramberg
- Sarah Ramberg
- Sarah Ramberg
- Sarah Ramberg
- Sarah Ramberg
- Sarah Ramberg
- Sarah Ramberg
- Sarah Ramberg
- Sarah Ramberg
- Sarah Ramberg
- Sarah Ramberg
- Sarah Ramberg
- Sarah Ramberg
- Sarah Ramberg
- Sarah Ramberg
- Sarah Ramberg
- Sarah Ramberg
- Sarah Ramberg
- Sarah Ramberg
- Sarah Ramberg
- Sarah Ramberg
- Sarah Ramberg
- Sarah Ramberg
- Sarah Ramberg
- Sarah Ramberg
- Sarah Ramberg
- Sarah Ramberg
- Sarah Ramberg
- Sarah Ramberg
- Sarah Ramberg
- Sarah Ramberg
- Sarah Ramberg
- Sarah Ramberg
- Sarah Ramberg
- Sarah Ramberg
- Sarah Ramberg
- Sarah Ramberg
- Sarah Ramberg
- Sarah Ramberg
- Sarah Ramberg
- Sarah Ramberg
- Sarah Ramberg
- Sarah Ramberg
- Sarah Ramberg
- Sarah Ramberg
- Sarah Ramberg
- Sarah Ramberg
- Sarah Ramberg
- Sarah Ramberg
- Sarah Ramberg
- Sarah Ramberg
- Sarah Ramberg
- Sarah Ramberg
- Sarah Ramberg
- Sarah Ramberg
- Sarah Ramberg
- Sarah Ramberg
- Sarah Ramberg
- Sarah Ramberg
- Sarah Ramberg
- Sarah Ramberg
- Sarah Ramberg
- Sarah Ramberg
- Sarah Ramberg
- Sarah Ramberg
- Sarah Ramberg
- Sarah Ramberg
- Sarah Ramberg
- Sarah Ramberg
- Sarah Ramberg
- Sarah Ramberg
- Sarah Ramberg
- Sarah Ramberg
- Sarah Ramberg
- Sarah Ramberg
- Sarah Ramberg
- Sarah Ramberg
- Sarah Ramberg
- Sarah Ramberg
- Sarah Ramberg
- Sarah Ramberg
- Sarah Ramberg
- Sarah Ramberg
- Sarah Ramberg
- Sarah Ramberg
- Sarah Ramberg
- Sarah Ramberg
- Sarah Ramberg
- Sarah Ramberg
- Sarah Ramberg
- Sarah Ramberg
- Sarah Ramberg
- Sarah Ramberg
- Sarah Ramberg
- Sarah Ramberg
- Sarah Ramberg
- Sarah Ramberg
- Sarah Ramberg
- Sarah Ramberg
- Sarah Ramberg
- Sarah Ramberg
- Sarah Ramberg
- Sarah Ramberg
- Sarah Ramberg
- Sarah Ramberg
- Sarah Ramberg
- Sarah Ramberg
- Sarah Ramberg
- Sarah Ramberg
- Sarah Ramberg
- Sarah Ramberg
- Sarah Ramberg
- Sarah Ramberg
- Sarah Ramberg
- Sarah Ramberg
- Sarah Ramberg
- Sarah Ramberg
- Sarah Ramberg
- Sarah Ramberg
- Sarah Ramberg
- Sarah Ramberg
- Sarah Ramberg
- Sarah Ramberg
- Sarah Ramberg
- Sarah Ramberg
- Sarah Ramberg
- Sarah Ramberg
- Sarah Ramberg
- Sarah Ramberg
- Sarah Ramberg
- Sarah Ramberg
- Sarah Ramberg
- Sarah Ramberg
- Sarah Ramberg
- Sarah Ramberg
- Sarah Ramberg
- Sarah Ramberg
- Sarah Ramberg
- Sarah Ramberg
- Sarah Ramberg
- Sarah Ramberg
- Sarah Ramberg
- Sarah Ramberg
- Sarah Ramberg
- Sarah Ramberg
- Sarah Ramberg
- Sarah Ramberg
- Sarah Ramberg
- Sarah Ramberg
- Sarah Ramberg
- Sarah Ramberg
- Sarah Ramberg
- Sarah Ramberg
- Sarah Ramberg
- Sarah Ramberg
- Sarah Ramberg
- Sarah Ramberg
- Sarah Ramberg
- Sarah Ramberg
- Sarah Ramberg
- Sarah Ramberg
- Sarah Ramberg
- Sarah Ramberg
- Sarah Ramberg
- Sarah Ramberg
- Sarah Ramberg
- Sarah Ramberg
- Sarah Ramberg
- Sarah Ramberg
- Sarah Ramberg
- Sarah Ramberg
- Sarah Ramberg
- Sarah Ramberg
- Sarah Ramberg
- Sarah Ramberg
- Sarah Ramberg
- Sarah Ramberg
- Sarah Ramberg
- Sarah Ramberg
- Sarah Ramberg
- Sarah Ramberg
- Sarah Ramberg
- Sarah Ramberg
- Sarah Ramberg
- Sarah Ramberg
- Sarah Ramberg
- Sarah Ramberg
- Sarah Ramberg
- Sarah Ramberg
- Sarah Ramberg
- Sarah Ramberg
- Sarah Ramberg
- Sarah Ramberg
- Sarah Ramberg
- Sarah Ramberg
- Sarah Ramberg
- Sarah Ramberg
- Sarah Ramberg
- Sarah Ramberg
- Sarah Ramberg
- Sarah Ramberg
- Sarah Ramberg
- Sarah Ramberg
- Sarah Ramberg
- Sarah Ramberg
- Sarah Ramberg
- Sarah Ramberg
- Sarah Ramberg
- Sarah Ramberg
- Sarah Ramberg
- Sarah Ramberg
- Sarah Ramberg


Have a question or like what you see? Please let me know!