As much as I love Ireland and even traveled there in my 20s, I REALLY haven’t done many Celtic-influenced projects. For St. Patrick’s Day or otherwise! But the upcycling fates clearly had plans for me to make some shamrock decor. Because I kept finding these vintage wooden bowls that were clover- or shamrock-shaped in my thrifting path.
First, I found this gorgeous bowl during my junkin’ journey to Greensboro, NC…

Image credit: Sadie Seasongoods.
And then this smaller one locally here in Charlotte, which was probably the “clubs” from a set of bowls fashioned after each deck of cards suit.

Image credit: Sadie Seasongoods.
To date, the only St. Patrick’s Day project I’ve ever made was this cute Irish scene in a vintage green mason jar.
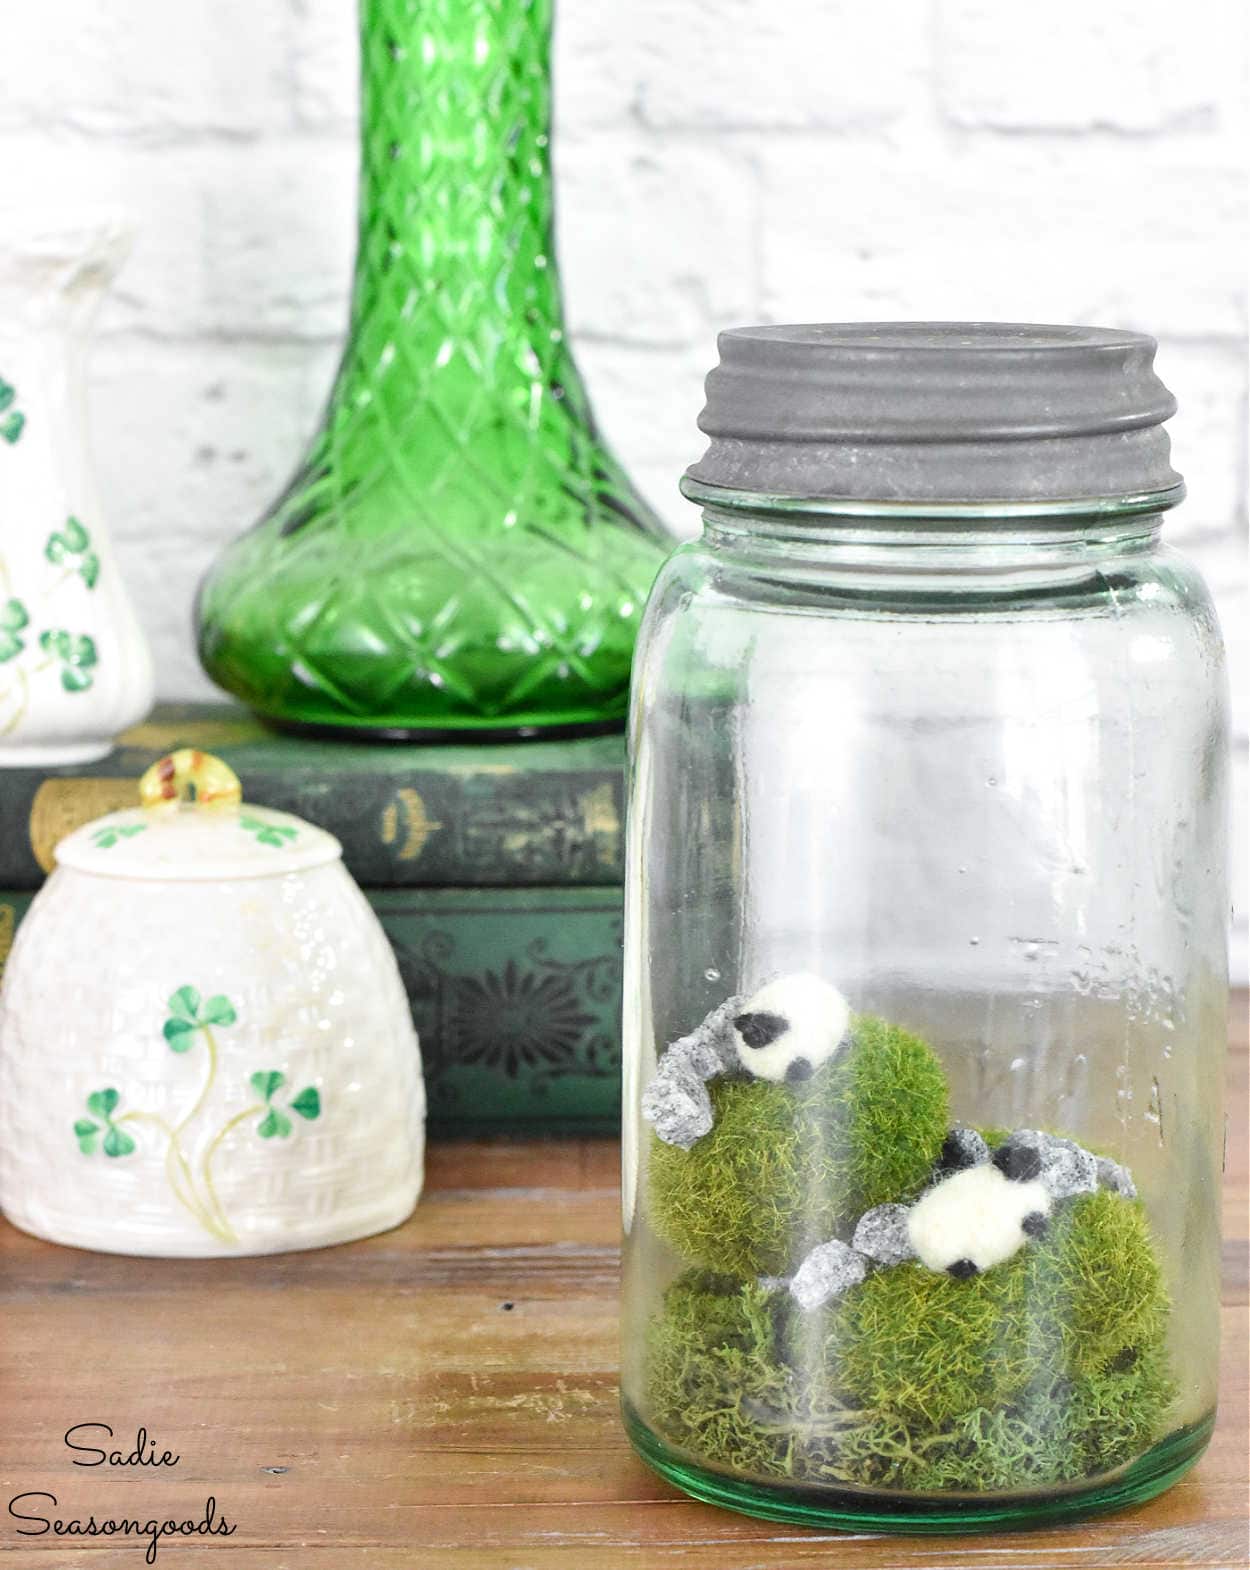
Image credit: Sadie Seasongoods.
But with these wooden bowls in my possession now, I was definitely itching to add a new St. Patrick’s Day project to my arsenal!

Image credit: Sadie Seasongoods.
This post contains affiliate links for your crafting convenience. As an Amazon Affiliate, I earn from qualifying purchases. All blue, bold, and underlined text is a clickable link, either to a product or to a related post.
Restoring a Vintage Wooden Bowl
First up, this large bowl that I found in Greensboro. It was a little beat up- scratched and nicked, here and there.

Image credit: Sadie Seasongoods.
But it was one solid piece of wood. No seams, just one piece. And there was NO WAY that I was going to let a drop of paint was get anywhere near it.
Restoring it was all I wanted to do- and I used this simple tutorial to guide me.
First, I washed the bowl with dish soap and hot water to scrub off any schmutz, grease, etc.

Image credit: Sadie Seasongoods.
After hand-drying the vintage wooden bowl and letting it fully air-dry overnight, I grabbed some Wise Owl Furniture Salve and a clean cloth.

Image credit: Sadie Seasongoods.
The tutorial that I referenced earlier used a different product. But I happened to have some of the Wise Owl furniture salve on hand, so it just made sense.
I rubbed the salve on and buffed it with the cloth and just SWOONED at the shamrock bowl. Isn’t it gorgeous now?

Image credit: Sadie Seasongoods.
Thank goodness I committed to restoring it instead of painting it. Now, the smaller shamrock bowl, well…that’s a different story.
Celtic Knot Stencil for Shamrock Decor
I thought it would be fun to go in a completely different direction for the smaller of the two wooden bowls. In other words: paint and stenciling!
First, I found a good jar of kelly green paint in my stash to give the piece a pop of color.

Image credit: Sadie Seasongoods.
Then, I grabbed a celtic knot stencil from this online store and some matte gold paint.

Image credit: Sadie Seasongoods.
Admittedly, stenciling this wasn’t as easy as I had hoped. The curves of the bowl required a lot of stencil trimming, and I had to use my fingers to hold it in place.
But, thankfully, the Celtic knot turned out pretty decently! I do love how that matte gold plays nicely with anything I stencil, that’s for sure.

Image credit: Sadie Seasongoods.
And just like that, my shamrock decor was done! I loved that I had “transformed” them both in two very different ways.

Image credit: Sadie Seasongoods.
Shamrock Decor from Vintage Wooden Bowls
Now I have a lovely set of shamrock bowls to set out each March! I also found a pretty little vintage plate at a thrift store, too, and it fits in swimmingly.
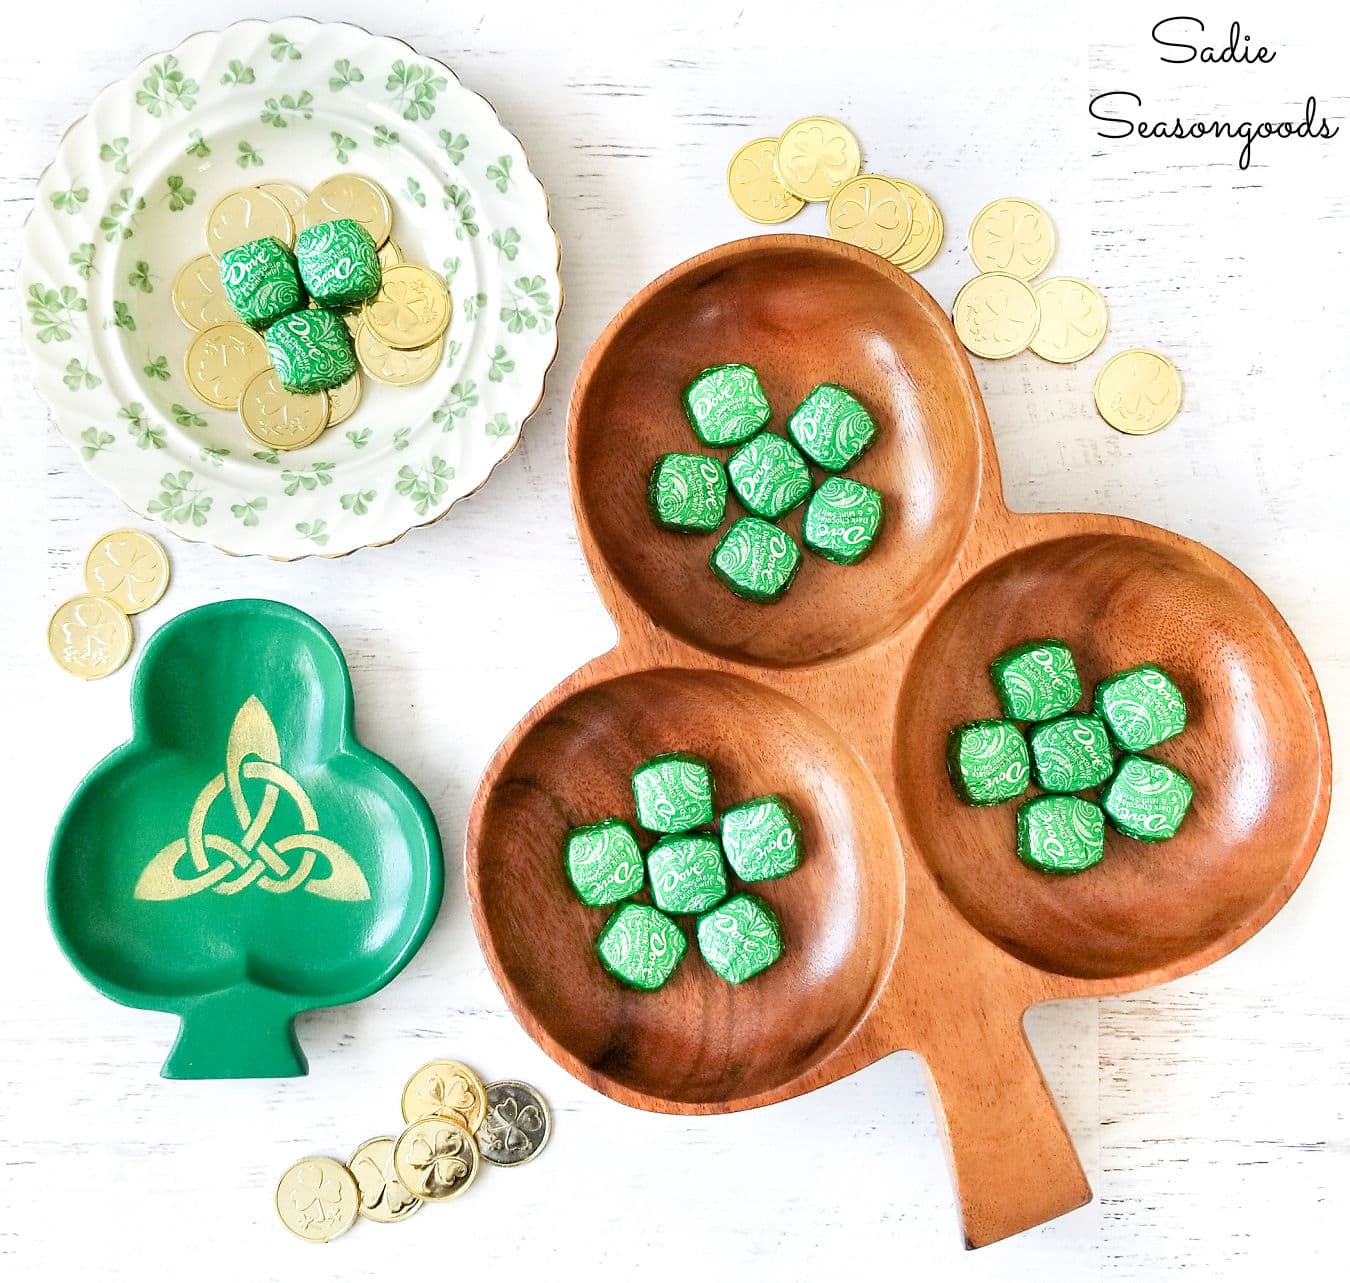
Image credit: Sadie Seasongoods.
***
And, guess what today is? It’s Thrift Store Decor Team Day, which means my friends have been upcycling their thrifted finds, too.

1. Baking Soda Paint Thrift Store Makeover – House of Hawthornes
2. Thrift Store Stacked Box Makeover – Organized Clutter
3. Vintage Garden Bench Upcycle – Shop at Blu
4. Thrift Store Urn Tablescape – Our Southern Home
5. Shamrock Decor from Vintage Wooden Bowls – Sadie Seasongoods
6. How to Paint a Wooden Mirror Frame – My Repurposed Life
7. Bird Nest Vintage Water Dipper Display – Petticoat Junktion
8. Succulent Terrarium Using Embroidery Hoops – My Uncommon Slice of Suburbia
9. Melamine Serving Tray Makeover – Reinvented Delaware
10. DIY Wood Bowl Candle – Domestically Speaking
***
So, which shamrock decoration is your favorite? The larger restored bowl or the smaller painted bowl?

Image credit: Sadie Seasongoods.
I have to admit, I think I love the bigger one better. The wood just GLEAMS, and I feel like that $4.00 price tag was an absolute steal. All it needed was a little upcycling TLC!
Speaking of Spring, here’s another upcycling idea to consider as we get closer to Easter. Best part? It only takes a few minutes to put together!
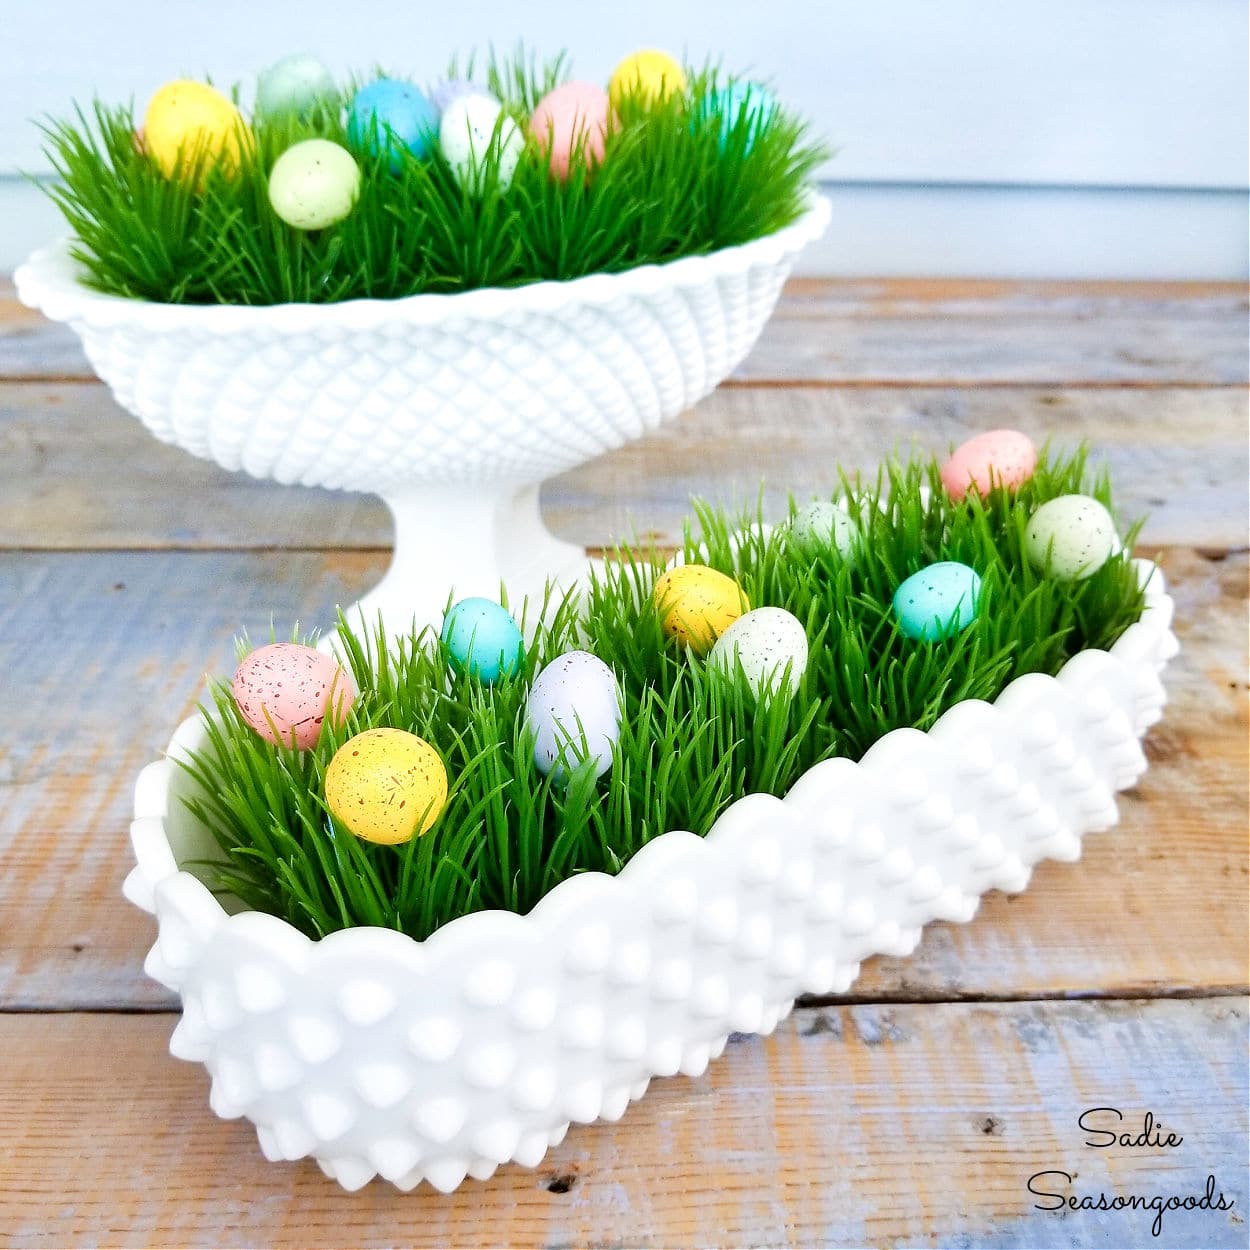
Image credit: Sadie Seasongoods.
Craft on!
S
Want to be notified when I publish my next upcycling project tutorial?
Join me on Social Media:


PIN ME!

Image credit: Sadie Seasongoods.

Image credit: Sadie Seasongoods.
Sarah Ramberg is the owner of Sadie Seasongoods, a website that celebrates all things secondhand. From upcycling ideas and thrifted decor to vintage-centric travel itineraries, Sadie Seasongoods is a one-stop shop for anyone who loves thrifting and approachable repurposing ideas. Sarah is also the author of “Crafting with Flannel” and has been featured in numerous media outlets and magazines.
- Sarah Ramberg
- Sarah Ramberg
- Sarah Ramberg
- Sarah Ramberg
- Sarah Ramberg
- Sarah Ramberg
- Sarah Ramberg
- Sarah Ramberg
- Sarah Ramberg
- Sarah Ramberg
- Sarah Ramberg
- Sarah Ramberg
- Sarah Ramberg
- Sarah Ramberg
- Sarah Ramberg
- Sarah Ramberg
- Sarah Ramberg
- Sarah Ramberg
- Sarah Ramberg
- Sarah Ramberg
- Sarah Ramberg
- Sarah Ramberg
- Sarah Ramberg
- Sarah Ramberg
- Sarah Ramberg
- Sarah Ramberg
- Sarah Ramberg
- Sarah Ramberg
- Sarah Ramberg
- Sarah Ramberg
- Sarah Ramberg
- Sarah Ramberg
- Sarah Ramberg
- Sarah Ramberg
- Sarah Ramberg
- Sarah Ramberg
- Sarah Ramberg
- Sarah Ramberg
- Sarah Ramberg
- Sarah Ramberg
- Sarah Ramberg
- Sarah Ramberg
- Sarah Ramberg
- Sarah Ramberg
- Sarah Ramberg
- Sarah Ramberg
- Sarah Ramberg
- Sarah Ramberg
- Sarah Ramberg
- Sarah Ramberg
- Sarah Ramberg
- Sarah Ramberg
- Sarah Ramberg
- Sarah Ramberg
- Sarah Ramberg
- Sarah Ramberg
- Sarah Ramberg
- Sarah Ramberg
- Sarah Ramberg
- Sarah Ramberg
- Sarah Ramberg
- Sarah Ramberg
- Sarah Ramberg
- Sarah Ramberg
- Sarah Ramberg
- Sarah Ramberg
- Sarah Ramberg
- Sarah Ramberg
- Sarah Ramberg
- Sarah Ramberg
- Sarah Ramberg
- Sarah Ramberg
- Sarah Ramberg
- Sarah Ramberg
- Sarah Ramberg
- Sarah Ramberg
- Sarah Ramberg
- Sarah Ramberg
- Sarah Ramberg
- Sarah Ramberg
- Sarah Ramberg
- Sarah Ramberg
- Sarah Ramberg
- Sarah Ramberg
- Sarah Ramberg
- Sarah Ramberg
- Sarah Ramberg
- Sarah Ramberg
- Sarah Ramberg
- Sarah Ramberg
- Sarah Ramberg
- Sarah Ramberg
- Sarah Ramberg
- Sarah Ramberg
- Sarah Ramberg
- Sarah Ramberg
- Sarah Ramberg
- Sarah Ramberg
- Sarah Ramberg
- Sarah Ramberg
- Sarah Ramberg
- Sarah Ramberg
- Sarah Ramberg
- Sarah Ramberg
- Sarah Ramberg
- Sarah Ramberg
- Sarah Ramberg
- Sarah Ramberg
- Sarah Ramberg
- Sarah Ramberg
- Sarah Ramberg
- Sarah Ramberg
- Sarah Ramberg
- Sarah Ramberg
- Sarah Ramberg
- Sarah Ramberg
- Sarah Ramberg
- Sarah Ramberg
- Sarah Ramberg
- Sarah Ramberg
- Sarah Ramberg
- Sarah Ramberg
- Sarah Ramberg
- Sarah Ramberg
- Sarah Ramberg
- Sarah Ramberg
- Sarah Ramberg
- Sarah Ramberg
- Sarah Ramberg
- Sarah Ramberg
- Sarah Ramberg
- Sarah Ramberg
- Sarah Ramberg
- Sarah Ramberg
- Sarah Ramberg
- Sarah Ramberg
- Sarah Ramberg
- Sarah Ramberg
- Sarah Ramberg
- Sarah Ramberg
- Sarah Ramberg
- Sarah Ramberg
- Sarah Ramberg
- Sarah Ramberg
- Sarah Ramberg
- Sarah Ramberg
- Sarah Ramberg
- Sarah Ramberg
- Sarah Ramberg
- Sarah Ramberg
- Sarah Ramberg
- Sarah Ramberg
- Sarah Ramberg
- Sarah Ramberg
- Sarah Ramberg
- Sarah Ramberg
- Sarah Ramberg
- Sarah Ramberg
- Sarah Ramberg
- Sarah Ramberg
- Sarah Ramberg
- Sarah Ramberg
- Sarah Ramberg
- Sarah Ramberg
- Sarah Ramberg
- Sarah Ramberg
- Sarah Ramberg
- Sarah Ramberg
- Sarah Ramberg
- Sarah Ramberg
- Sarah Ramberg
- Sarah Ramberg
- Sarah Ramberg
- Sarah Ramberg
- Sarah Ramberg
- Sarah Ramberg
- Sarah Ramberg
- Sarah Ramberg
- Sarah Ramberg
- Sarah Ramberg
- Sarah Ramberg
- Sarah Ramberg
- Sarah Ramberg
- Sarah Ramberg
- Sarah Ramberg
- Sarah Ramberg
- Sarah Ramberg
- Sarah Ramberg
- Sarah Ramberg
- Sarah Ramberg
- Sarah Ramberg
- Sarah Ramberg
- Sarah Ramberg
- Sarah Ramberg
- Sarah Ramberg
- Sarah Ramberg
- Sarah Ramberg
- Sarah Ramberg
- Sarah Ramberg
- Sarah Ramberg
- Sarah Ramberg
- Sarah Ramberg
- Sarah Ramberg
- Sarah Ramberg
- Sarah Ramberg
- Sarah Ramberg
- Sarah Ramberg
- Sarah Ramberg
- Sarah Ramberg
- Sarah Ramberg
- Sarah Ramberg
- Sarah Ramberg
- Sarah Ramberg
- Sarah Ramberg
- Sarah Ramberg
- Sarah Ramberg
- Sarah Ramberg
- Sarah Ramberg
- Sarah Ramberg
- Sarah Ramberg
- Sarah Ramberg
- Sarah Ramberg
- Sarah Ramberg
- Sarah Ramberg
- Sarah Ramberg
- Sarah Ramberg
- Sarah Ramberg
- Sarah Ramberg
- Sarah Ramberg
- Sarah Ramberg
- Sarah Ramberg
- Sarah Ramberg
- Sarah Ramberg
- Sarah Ramberg
- Sarah Ramberg
- Sarah Ramberg
- Sarah Ramberg
- Sarah Ramberg
- Sarah Ramberg
- Sarah Ramberg
- Sarah Ramberg
- Sarah Ramberg
- Sarah Ramberg
- Sarah Ramberg
- Sarah Ramberg
- Sarah Ramberg
- Sarah Ramberg
- Sarah Ramberg
- Sarah Ramberg
- Sarah Ramberg
- Sarah Ramberg
- Sarah Ramberg
- Sarah Ramberg
- Sarah Ramberg
- Sarah Ramberg
- Sarah Ramberg
- Sarah Ramberg
- Sarah Ramberg
- Sarah Ramberg
- Sarah Ramberg
- Sarah Ramberg
- Sarah Ramberg
- Sarah Ramberg
- Sarah Ramberg
- Sarah Ramberg
- Sarah Ramberg
- Sarah Ramberg
- Sarah Ramberg
- Sarah Ramberg
- Sarah Ramberg
- Sarah Ramberg
- Sarah Ramberg
- Sarah Ramberg
- Sarah Ramberg
- Sarah Ramberg
- Sarah Ramberg
- Sarah Ramberg
- Sarah Ramberg
- Sarah Ramberg
- Sarah Ramberg
- Sarah Ramberg
- Sarah Ramberg
- Sarah Ramberg
- Sarah Ramberg
- Sarah Ramberg
- Sarah Ramberg
- Sarah Ramberg
- Sarah Ramberg
- Sarah Ramberg
- Sarah Ramberg
- Sarah Ramberg
- Sarah Ramberg
- Sarah Ramberg
- Sarah Ramberg
- Sarah Ramberg
- Sarah Ramberg
- Sarah Ramberg
- Sarah Ramberg
- Sarah Ramberg
- Sarah Ramberg
- Sarah Ramberg
- Sarah Ramberg
- Sarah Ramberg
- Sarah Ramberg
- Sarah Ramberg
- Sarah Ramberg
- Sarah Ramberg
- Sarah Ramberg
- Sarah Ramberg
- Sarah Ramberg
- Sarah Ramberg
- Sarah Ramberg
- Sarah Ramberg
- Sarah Ramberg
- Sarah Ramberg
- Sarah Ramberg
- Sarah Ramberg
- Sarah Ramberg
- Sarah Ramberg
- Sarah Ramberg
- Sarah Ramberg
- Sarah Ramberg
- Sarah Ramberg
- Sarah Ramberg
- Sarah Ramberg
- Sarah Ramberg
- Sarah Ramberg
- Sarah Ramberg
- Sarah Ramberg
- Sarah Ramberg
- Sarah Ramberg
- Sarah Ramberg
- Sarah Ramberg
- Sarah Ramberg
- Sarah Ramberg
- Sarah Ramberg
- Sarah Ramberg
- Sarah Ramberg
- Sarah Ramberg
- Sarah Ramberg
- Sarah Ramberg
- Sarah Ramberg
- Sarah Ramberg
- Sarah Ramberg
- Sarah Ramberg
- Sarah Ramberg
- Sarah Ramberg
- Sarah Ramberg
- Sarah Ramberg
- Sarah Ramberg
- Sarah Ramberg
- Sarah Ramberg
- Sarah Ramberg
- Sarah Ramberg
- Sarah Ramberg
- Sarah Ramberg
- Sarah Ramberg
- Sarah Ramberg
- Sarah Ramberg
- Sarah Ramberg
- Sarah Ramberg
- Sarah Ramberg
- Sarah Ramberg
- Sarah Ramberg
- Sarah Ramberg
- Sarah Ramberg
- Sarah Ramberg
- Sarah Ramberg
- Sarah Ramberg
- Sarah Ramberg
- Sarah Ramberg
- Sarah Ramberg
- Sarah Ramberg
- Sarah Ramberg
- Sarah Ramberg
- Sarah Ramberg
- Sarah Ramberg
- Sarah Ramberg
- Sarah Ramberg
- Sarah Ramberg
- Sarah Ramberg
- Sarah Ramberg
- Sarah Ramberg
- Sarah Ramberg
- Sarah Ramberg
- Sarah Ramberg
- Sarah Ramberg
- Sarah Ramberg
- Sarah Ramberg
- Sarah Ramberg
- Sarah Ramberg
- Sarah Ramberg
- Sarah Ramberg
- Sarah Ramberg
- Sarah Ramberg
- Sarah Ramberg
- Sarah Ramberg
- Sarah Ramberg
- Sarah Ramberg
- Sarah Ramberg
- Sarah Ramberg
- Sarah Ramberg
- Sarah Ramberg
- Sarah Ramberg
- Sarah Ramberg
- Sarah Ramberg
- Sarah Ramberg
- Sarah Ramberg
- Sarah Ramberg
- Sarah Ramberg
- Sarah Ramberg
- Sarah Ramberg
- Sarah Ramberg
- Sarah Ramberg
- Sarah Ramberg
- Sarah Ramberg
- Sarah Ramberg
- Sarah Ramberg
- Sarah Ramberg
- Sarah Ramberg
- Sarah Ramberg
- Sarah Ramberg
- Sarah Ramberg
- Sarah Ramberg
- Sarah Ramberg
- Sarah Ramberg
- Sarah Ramberg
- Sarah Ramberg
- Sarah Ramberg
- Sarah Ramberg
- Sarah Ramberg
- Sarah Ramberg
- Sarah Ramberg
- Sarah Ramberg
- Sarah Ramberg
- Sarah Ramberg
- Sarah Ramberg
- Sarah Ramberg
- Sarah Ramberg
- Sarah Ramberg
- Sarah Ramberg
- Sarah Ramberg
- Sarah Ramberg
- Sarah Ramberg
- Sarah Ramberg
- Sarah Ramberg
- Sarah Ramberg
- Sarah Ramberg
- Sarah Ramberg
- Sarah Ramberg
- Sarah Ramberg
- Sarah Ramberg
- Sarah Ramberg
- Sarah Ramberg
- Sarah Ramberg
- Sarah Ramberg
- Sarah Ramberg
- Sarah Ramberg
- Sarah Ramberg
- Sarah Ramberg
- Sarah Ramberg
- Sarah Ramberg
- Sarah Ramberg
- Sarah Ramberg
- Sarah Ramberg
- Sarah Ramberg
- Sarah Ramberg
- Sarah Ramberg
- Sarah Ramberg
- Sarah Ramberg
- Sarah Ramberg
- Sarah Ramberg
- Sarah Ramberg
- Sarah Ramberg
- Sarah Ramberg
- Sarah Ramberg
- Sarah Ramberg
- Sarah Ramberg
- Sarah Ramberg
- Sarah Ramberg
- Sarah Ramberg
- Sarah Ramberg
- Sarah Ramberg
- Sarah Ramberg
- Sarah Ramberg
- Sarah Ramberg
- Sarah Ramberg
- Sarah Ramberg
- Sarah Ramberg
- Sarah Ramberg
- Sarah Ramberg
- Sarah Ramberg
- Sarah Ramberg
- Sarah Ramberg
- Sarah Ramberg
- Sarah Ramberg
- Sarah Ramberg
- Sarah Ramberg
- Sarah Ramberg
- Sarah Ramberg
- Sarah Ramberg
- Sarah Ramberg
- Sarah Ramberg
- Sarah Ramberg
- Sarah Ramberg
- Sarah Ramberg
- Sarah Ramberg
- Sarah Ramberg
- Sarah Ramberg
- Sarah Ramberg
- Sarah Ramberg
- Sarah Ramberg
- Sarah Ramberg
- Sarah Ramberg
- Sarah Ramberg
- Sarah Ramberg
- Sarah Ramberg
- Sarah Ramberg
- Sarah Ramberg
- Sarah Ramberg
- Sarah Ramberg
- Sarah Ramberg
- Sarah Ramberg
- Sarah Ramberg
- Sarah Ramberg
- Sarah Ramberg
- Sarah Ramberg
- Sarah Ramberg
- Sarah Ramberg
- Sarah Ramberg
- Sarah Ramberg
- Sarah Ramberg
- Sarah Ramberg
- Sarah Ramberg
- Sarah Ramberg
- Sarah Ramberg
- Sarah Ramberg
- Sarah Ramberg
- Sarah Ramberg
- Sarah Ramberg
- Sarah Ramberg
- Sarah Ramberg
- Sarah Ramberg
- Sarah Ramberg
- Sarah Ramberg
- Sarah Ramberg
- Sarah Ramberg
- Sarah Ramberg
- Sarah Ramberg
- Sarah Ramberg
- Sarah Ramberg
- Sarah Ramberg
- Sarah Ramberg
- Sarah Ramberg
- Sarah Ramberg
- Sarah Ramberg
- Sarah Ramberg
- Sarah Ramberg
- Sarah Ramberg
- Sarah Ramberg
- Sarah Ramberg
- Sarah Ramberg
- Sarah Ramberg
- Sarah Ramberg
- Sarah Ramberg
- Sarah Ramberg
- Sarah Ramberg
- Sarah Ramberg
- Sarah Ramberg
- Sarah Ramberg
- Sarah Ramberg
- Sarah Ramberg
- Sarah Ramberg
- Sarah Ramberg
- Sarah Ramberg
- Sarah Ramberg
- Sarah Ramberg
- Sarah Ramberg
- Sarah Ramberg
- Sarah Ramberg
- Sarah Ramberg
- Sarah Ramberg
- Sarah Ramberg
- Sarah Ramberg
- Sarah Ramberg
- Sarah Ramberg
- Sarah Ramberg
- Sarah Ramberg
- Sarah Ramberg
- Sarah Ramberg
- Sarah Ramberg
- Sarah Ramberg
- Sarah Ramberg
- Sarah Ramberg
- Sarah Ramberg
- Sarah Ramberg
- Sarah Ramberg
- Sarah Ramberg
- Sarah Ramberg
- Sarah Ramberg
- Sarah Ramberg
- Sarah Ramberg
- Sarah Ramberg
- Sarah Ramberg
- Sarah Ramberg
- Sarah Ramberg
- Sarah Ramberg
- Sarah Ramberg
- Sarah Ramberg
- Sarah Ramberg
- Sarah Ramberg
- Sarah Ramberg
- Sarah Ramberg
- Sarah Ramberg
- Sarah Ramberg
- Sarah Ramberg
- Sarah Ramberg
- Sarah Ramberg
- Sarah Ramberg
- Sarah Ramberg
- Sarah Ramberg
- Sarah Ramberg
- Sarah Ramberg
- Sarah Ramberg
- Sarah Ramberg
- Sarah Ramberg
- Sarah Ramberg
- Sarah Ramberg
- Sarah Ramberg
- Sarah Ramberg
- Sarah Ramberg
- Sarah Ramberg
- Sarah Ramberg
- Sarah Ramberg
- Sarah Ramberg
- Sarah Ramberg
- Sarah Ramberg
- Sarah Ramberg
- Sarah Ramberg
- Sarah Ramberg
- Sarah Ramberg
- Sarah Ramberg
- Sarah Ramberg
- Sarah Ramberg
- Sarah Ramberg
- Sarah Ramberg
- Sarah Ramberg
- Sarah Ramberg
- Sarah Ramberg
- Sarah Ramberg
- Sarah Ramberg
- Sarah Ramberg


What a sweet collection for St. Pats! You are so creative. I need to get some of that wood salve for a few wooden bowls that I’ve picked up at the thrift store.
Thank you so much- and YES! You’ll love that wood salve!
Perfect for St. Patrick’s decor! The wooden bowl looks fantastic.
Thank you so much!!
LOVE monkey pod wood (acacia)!! I pick it up whether I have a plan or not.
Try stripping it-the natural wood it gorgeous. I then use a mineral oil-beeswax combo to make the grain pop.
Ooooh, I’ll have to do that! I’ve done several projects with Acacia/Monkey pod pieces, but never stripped them. Mmmm, must try- thanks for the tip!
I need to try out that wood restore – amazing!
It’s so good!!
I love your bowls, so cute and that plate is adorable!
Thank you so much, Kristin!
Sarah,
You find the BEST wooden projects at thrift stores. I guess I’m always perusing booths for furniture, so I overlook the “smalls”. I love how your shamrock decor turned out. So happy you didn’t paint the large one, but the other one just makes me smile with that gold stencil.
Pinned!
gail
I always figure we’d be good shopping buddies- you’d get the big pieces and I’d get the small ones, LOL!
Which is my favorite? The wood shamrock! And that’s coming from a lady who paints everything 😊 Great makeover Sarah! Pinned!
Enjoyed your post! My last name was O’Malley for 15 years and I love all things Irish! One of my faves is your Irish Mason jar with the sheep! Always good to see it. I also love the eggs in the “grass” as I am a milk glass addict!
Well, heck. Who knew a little cleaning and waxing would do so much good! Thanks for the tips!
Right?? And it smells sooooooo good, too (well, this scent does- there are lots to choose from).