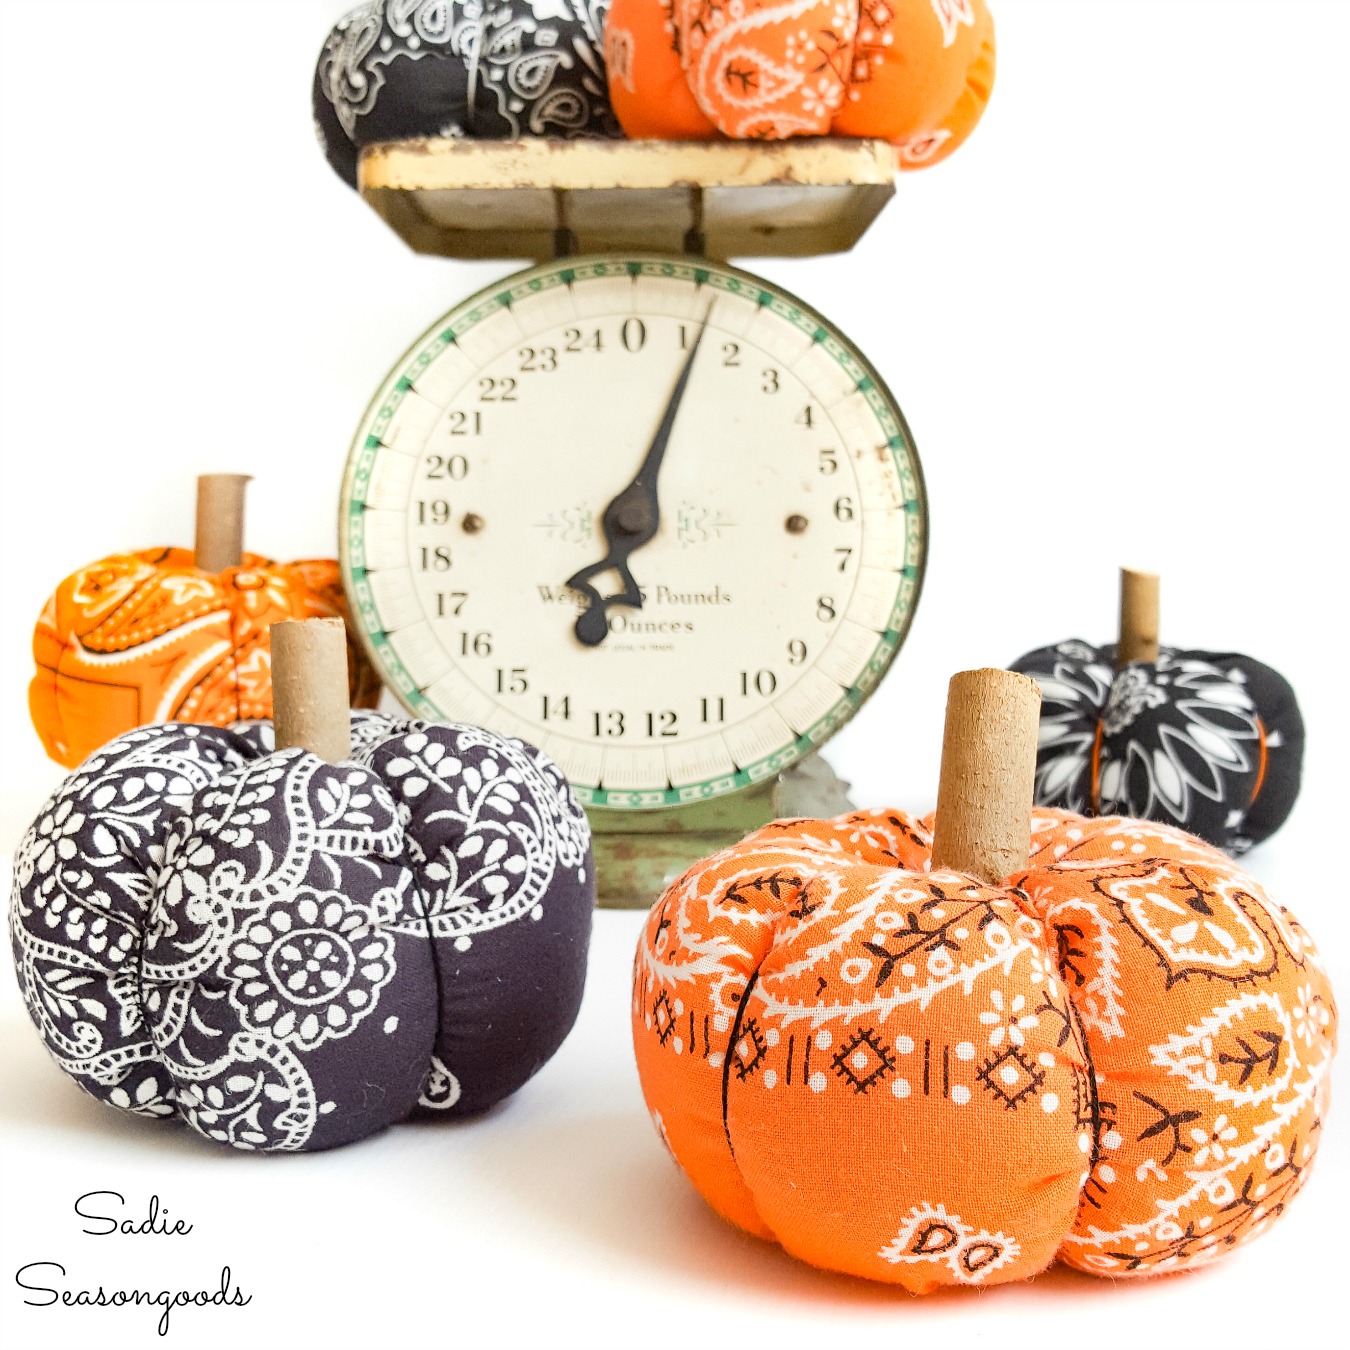
After making these vintage bandana bowl covers, I couldn’t stop myself from snapping up vintage bandanas wherever I went. Over the years, I’ve collected them in all the colors of the rainbow, including plenty in orange and black. So I decided they would be perfect for some fabric pumpkins for Halloween decor.
These are the bandana bowl covers that I was talking about. Aren’t they cute?
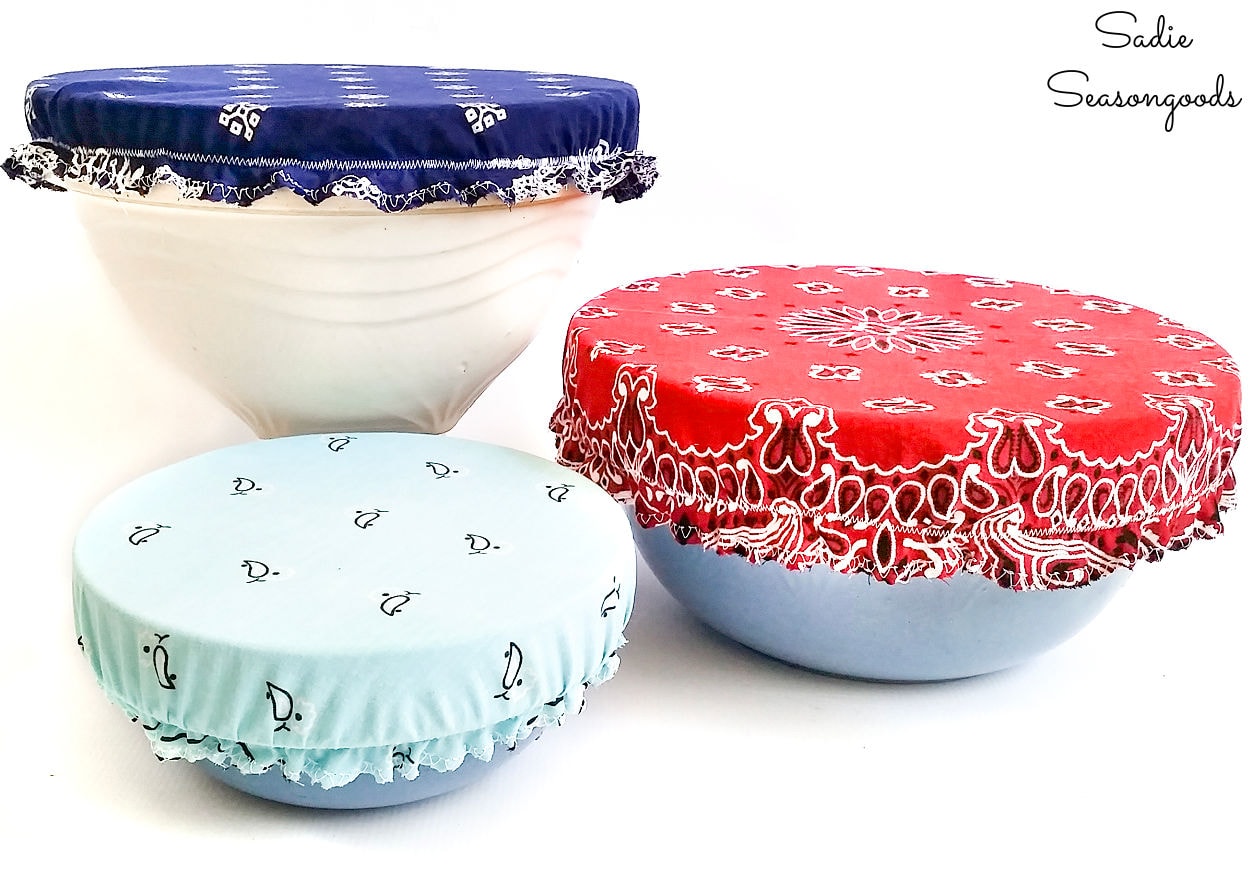
Image credit: Sadie Seasongoods.
But let’s get back to my Halloween idea and the appropriately-colorful vintage bandanas that I collected for my project.

Image credit: Sadie Seasongoods.
I also bought some embroidery floss in matching hues.

Image credit: Sadie Seasongoods.
I have a sneaking suspicion that bandana pumpkins are just going to be ADORABLE – what do you think?
Now, these fabric pumpkins are not a new idea and tutorials for them are all over the internet. In fact, I believe Martha Stewart might be the originator of the idea.
But, I just think they will be extra special when made with Halloween bandanas. Ready to find out?
This post contains affiliate links for your crafting convenience. As an Amazon Associate, I earn from qualifying purchases. All blue, bold, and underlined text is a clickable link, either to a product or to a related post.
Beginning Steps for Fabric Pumpkins
To create a bandana pumpkin for Halloween decor, I needed a piece of bandana fabric that was twice as long as it was wide (14” x 7”, 13” x 6.5”…etc.).

Image credit: Sadie Seasongoods.
Next, I cut out my bandana rectangle, trying to capture as much fabric pattern as possible.

Image credit: Sadie Seasongoods.
Next, I folded the rectangle of bandana fabric over on itself, short ends together and “good” sides of the fabric facing together (on the inside).
Then, I stitched along those short edges on my sewing machine so that it formed a fabric tube/cylinder.

Image credit: Sadie Seasongoods.
After that was done, I ran a wide running stitch along one edge of the fabric, all the way around the “tube”.

Image credit: Sadie Seasongoods.
I know it still doesn’t look anything like a fabric pumpkin yet, but bear with me!
Filling the Fabric Pumpkins
Next, I gathered the fabric by pulling the thread tightly (but not pulling the knotted end through).

Image credit: Sadie Seasongoods.
After it was cinched, I pushed my needle through the ruffled fabric a few times before knotting off the end.

Image credit: Sadie Seasongoods.
Then, I turned my Halloween bandana my right-side-out. What had once been a fabric tube was now like a little bag.

Image credit: Sadie Seasongoods.
Then, I stuffed it positively FULL with fiber fill. When it was positively stuffed, I once again ran a wide running stitch along the raw edge.

Image credit: Sadie Seasongoods.
The first of my fabric pumpkins was coming together!
Next, I gathered the bandana fabric like I had before, tucking the fiberfill in as much as possible. Finally, I stitched the opening closed and knotted off the thread.

Image credit: Sadie Seasongoods.
Now came the fun part – turning my bandana sphere into a bandana pumpkin!
Finishing the Fabric Pumpkins for Halloween Decor
I still needed to add “ridges” to my fabric pumpkins. So, gathered some embroidery floss and a doll needle for this step.

Image credit: Sadie Seasongoods.
First, I pulled a long strand of floss (triple-knotted at one end) through the center and pushed it back into my bandana pumpkin at the top.

Image credit: Sadie Seasongoods.
I pushed the doll needle all the way through the other puckered end and pulled the floss super tight, squishing the fabric pumpkin. I did this over and over again, pulling super tight, to create ridges.

Image credit: Sadie Seasongoods.
I’m telling ya, the doll needle made this SO much easier than an embroidery needle would have. I tried it with an embroidery needle and nearly lost it inside my bandana pumpkin!
After pulling my floss through about 6 or 7 times around the fabric pumpkin, I knotted off the floss (while pulled tight).
And there it was…a little fabric pumpkin that was very much indeed a bandana pumpkin.

Image credit: Sadie Seasongoods.
To finish off my bandana pumpkin, I just needed a stem. And while you weren’t looking, I made a several more fabric pumpkins from my Halloween bandana collection!
But back to the stems – I wanted a rustic look to complement the bandana pumpkins. So, I grabbed some sticks from the yard. Can I check “yard work” off my to-do list now?

Image credit: Sadie Seasongoods.
Fabric Pumpkins from a Halloween Bandana
I lopped off 1” and 1½” stick stems and hot-glued them to the center of each fabric pumpkin.
So easy and the sticks had the perfect against the Halloween bandana fabric.

Image credit: Sadie Seasongoods.
And that was it! I had a whole collection of fabric pumpkins or bandana pumpkins for my Halloween decor. I mean, DOES IT GET ANY CUTER THAN THIS?

Image credit: Sadie Seasongoods.
Aren’t they adorable?? I think the bandana fabric is just divine, and you can get at least two fabric pumpkins out of each one. That makes this a really affordable Halloween craft project, as well.
I loved these so much that I even made a version in my book, “Crafting with Flannel”! So, if bandana material isn’t really your style, may I suggest flannel instead?

Image credit: Sadie Seasongoods.
Now I can fill a bowl or small vintage crate with my fabric pumpkins and they’ll look wonderful for autumn and Halloween!
If you also enjoyed this upcycling idea for Halloween decor, then you’ll also love my Trick-or-Treat stand made from a vintage sewing bucket!
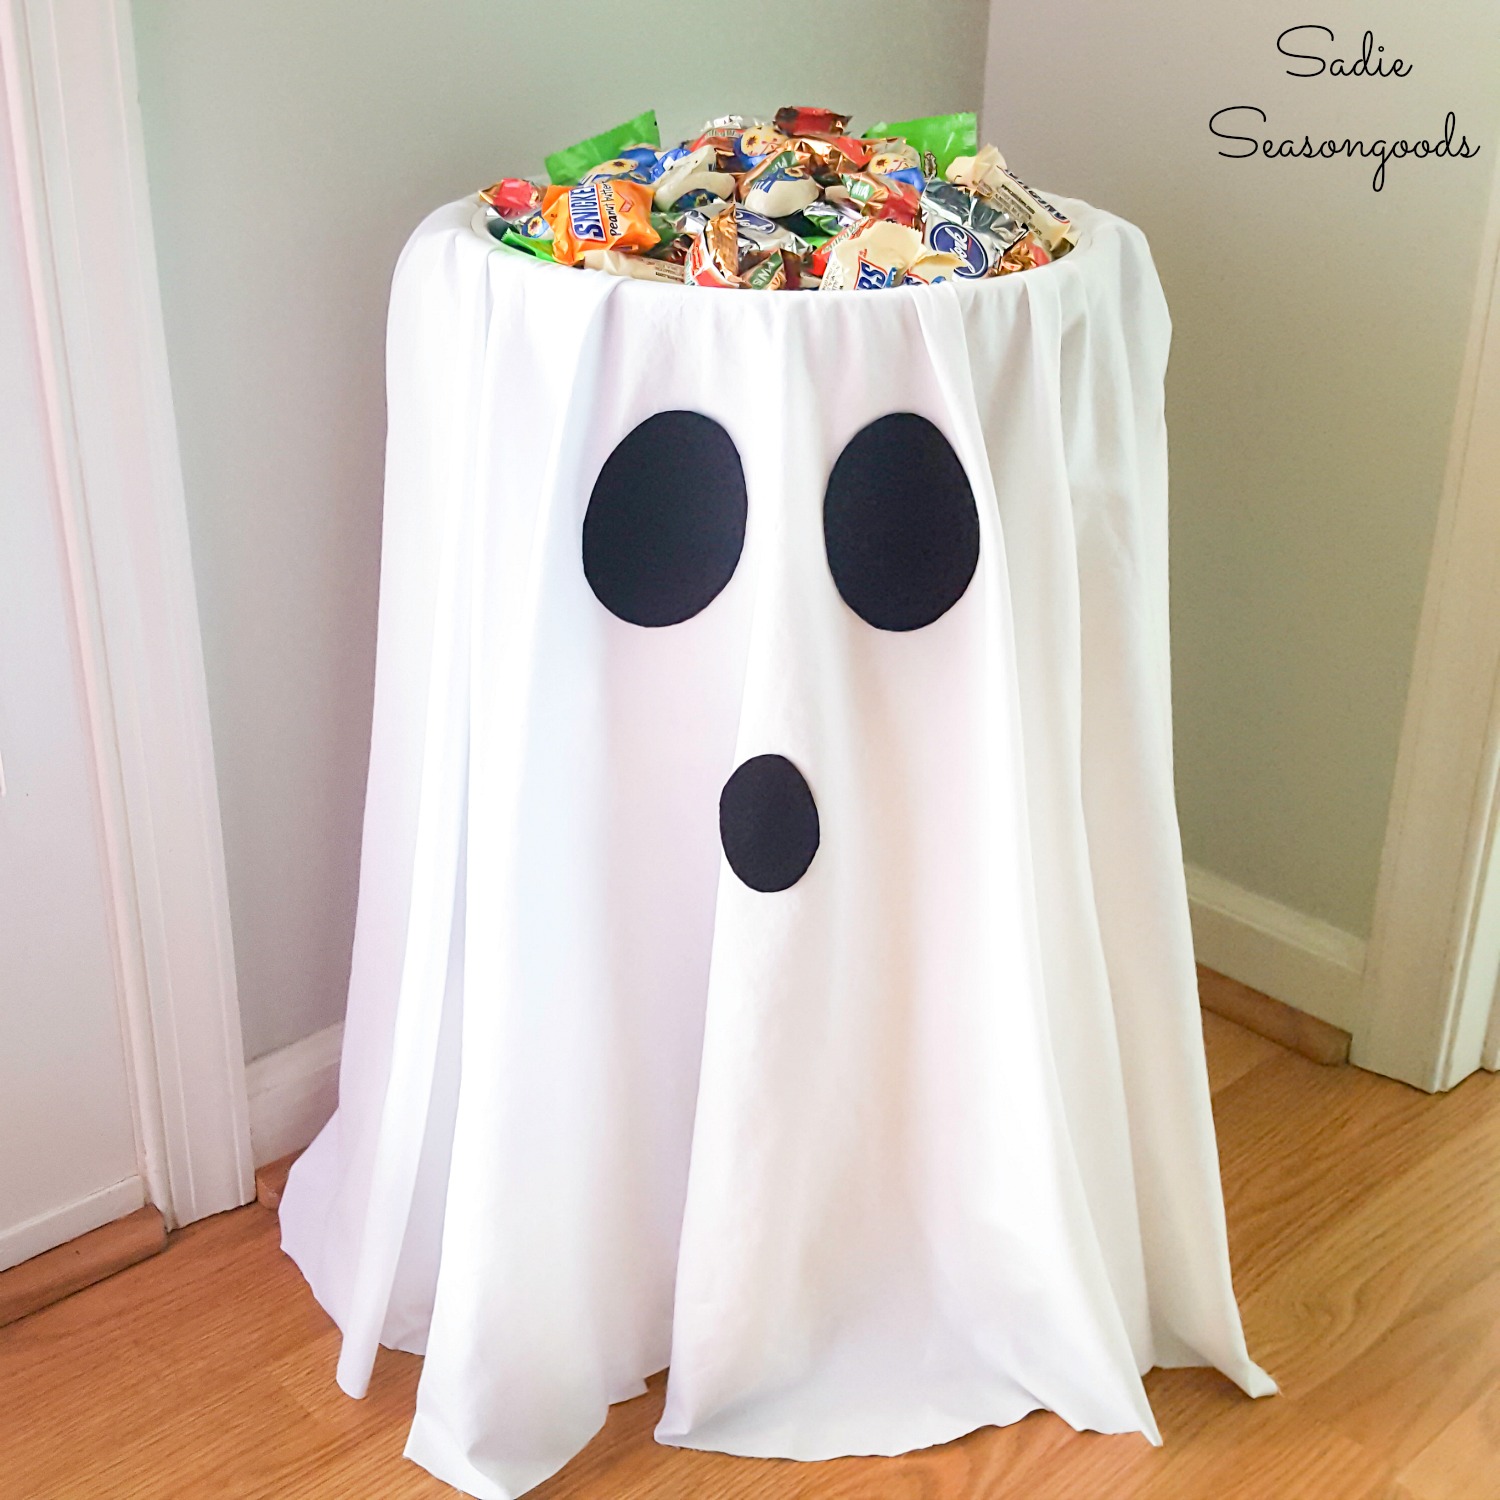
Image credit: Sadie Seasongoods.
And don’t forget to check out these faux rust jack-o-lanterns from candy buckets, too!
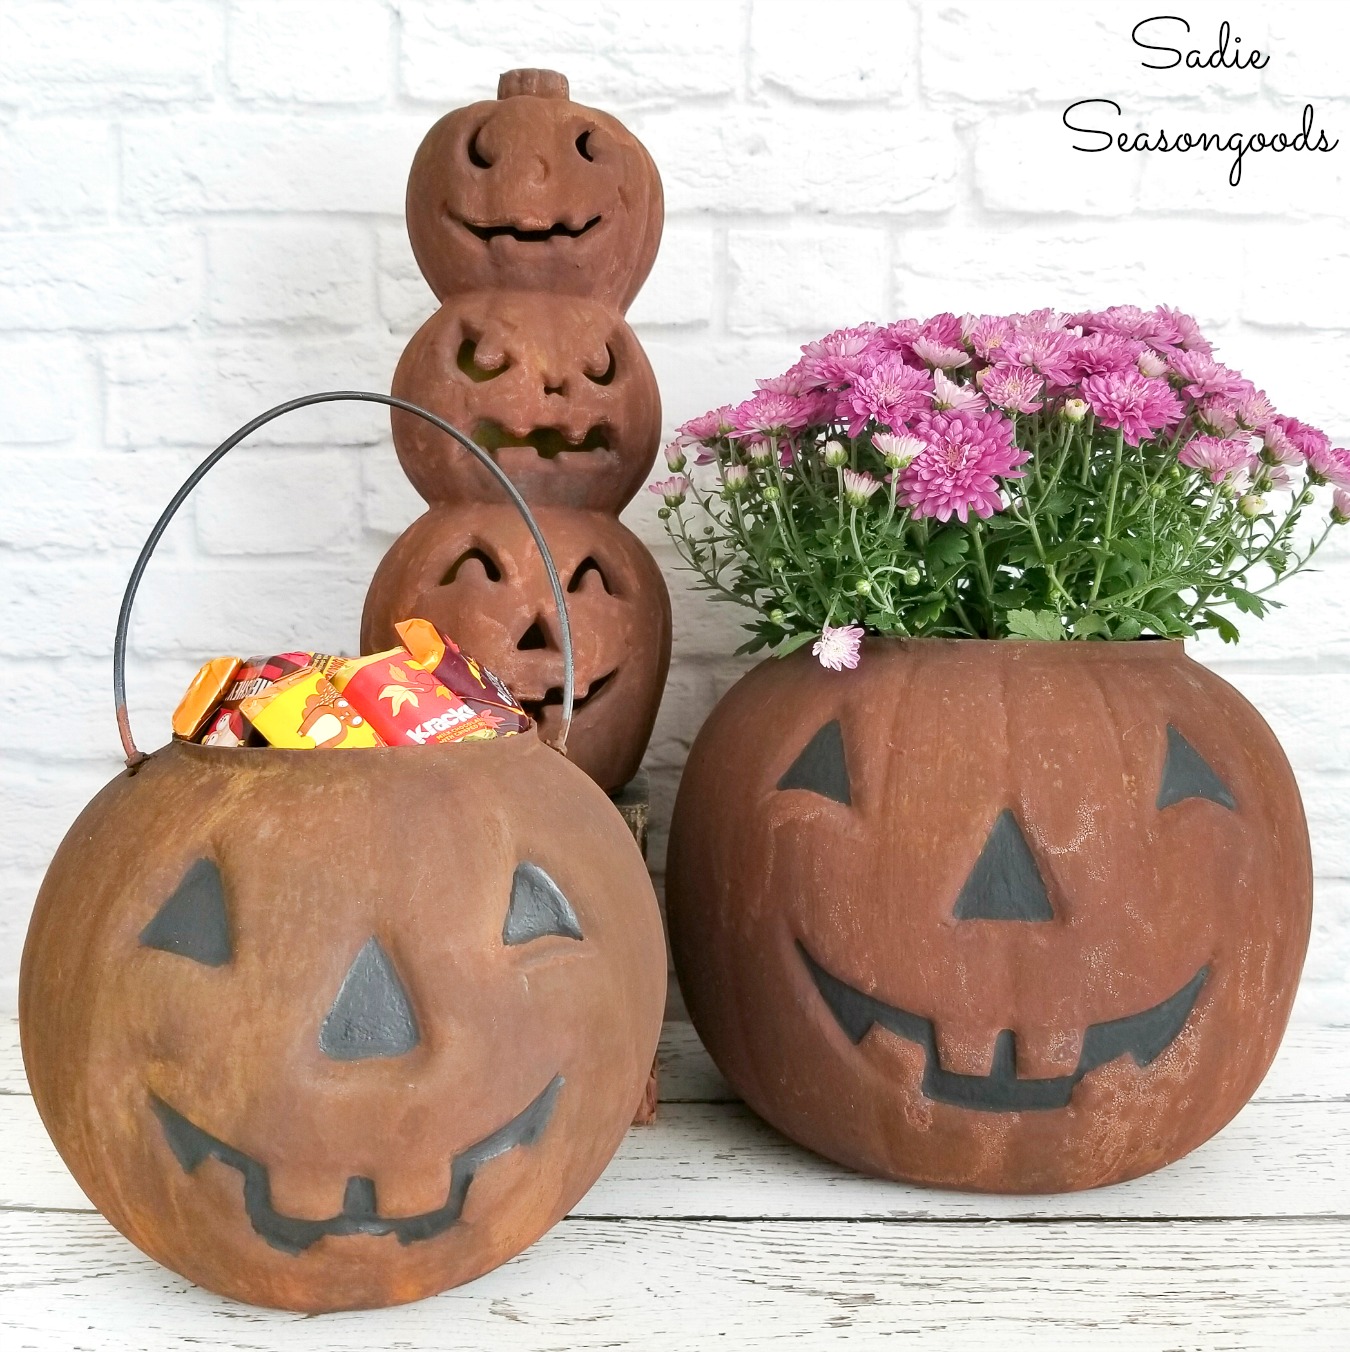
Image credit: Sadie Seasongoods.
Craft on!
S
Want to be notified when I publish my next upcycling project tutorial?
Join me on Social Media:


PIN ME!

Image credit: Sadie Seasongoods.
Image credit: Sadie Seasongoods.
Sarah Ramberg is the owner of Sadie Seasongoods, a website that celebrates all things secondhand. From upcycling ideas and thrifted decor to vintage-centric travel itineraries, Sadie Seasongoods is a one-stop shop for anyone who loves thrifting and approachable repurposing ideas. Sarah is also the author of “Crafting with Flannel” and has been featured in numerous media outlets and magazines.
- Sarah Ramberg
- Sarah Ramberg
- Sarah Ramberg
- Sarah Ramberg
- Sarah Ramberg
- Sarah Ramberg
- Sarah Ramberg
- Sarah Ramberg
- Sarah Ramberg
- Sarah Ramberg
- Sarah Ramberg
- Sarah Ramberg
- Sarah Ramberg
- Sarah Ramberg
- Sarah Ramberg
- Sarah Ramberg
- Sarah Ramberg
- Sarah Ramberg
- Sarah Ramberg
- Sarah Ramberg
- Sarah Ramberg
- Sarah Ramberg
- Sarah Ramberg
- Sarah Ramberg
- Sarah Ramberg
- Sarah Ramberg
- Sarah Ramberg
- Sarah Ramberg
- Sarah Ramberg
- Sarah Ramberg
- Sarah Ramberg
- Sarah Ramberg
- Sarah Ramberg
- Sarah Ramberg
- Sarah Ramberg
- Sarah Ramberg
- Sarah Ramberg
- Sarah Ramberg
- Sarah Ramberg
- Sarah Ramberg
- Sarah Ramberg
- Sarah Ramberg
- Sarah Ramberg
- Sarah Ramberg
- Sarah Ramberg
- Sarah Ramberg
- Sarah Ramberg
- Sarah Ramberg
- Sarah Ramberg
- Sarah Ramberg
- Sarah Ramberg
- Sarah Ramberg
- Sarah Ramberg
- Sarah Ramberg
- Sarah Ramberg
- Sarah Ramberg
- Sarah Ramberg
- Sarah Ramberg
- Sarah Ramberg
- Sarah Ramberg
- Sarah Ramberg
- Sarah Ramberg
- Sarah Ramberg
- Sarah Ramberg
- Sarah Ramberg
- Sarah Ramberg
- Sarah Ramberg
- Sarah Ramberg
- Sarah Ramberg
- Sarah Ramberg
- Sarah Ramberg
- Sarah Ramberg
- Sarah Ramberg
- Sarah Ramberg
- Sarah Ramberg
- Sarah Ramberg
- Sarah Ramberg
- Sarah Ramberg
- Sarah Ramberg
- Sarah Ramberg
- Sarah Ramberg
- Sarah Ramberg
- Sarah Ramberg
- Sarah Ramberg
- Sarah Ramberg
- Sarah Ramberg
- Sarah Ramberg
- Sarah Ramberg
- Sarah Ramberg
- Sarah Ramberg
- Sarah Ramberg
- Sarah Ramberg
- Sarah Ramberg
- Sarah Ramberg
- Sarah Ramberg
- Sarah Ramberg
- Sarah Ramberg
- Sarah Ramberg
- Sarah Ramberg
- Sarah Ramberg
- Sarah Ramberg
- Sarah Ramberg
- Sarah Ramberg
- Sarah Ramberg
- Sarah Ramberg
- Sarah Ramberg
- Sarah Ramberg
- Sarah Ramberg
- Sarah Ramberg
- Sarah Ramberg
- Sarah Ramberg
- Sarah Ramberg
- Sarah Ramberg
- Sarah Ramberg
- Sarah Ramberg
- Sarah Ramberg
- Sarah Ramberg
- Sarah Ramberg
- Sarah Ramberg
- Sarah Ramberg
- Sarah Ramberg
- Sarah Ramberg
- Sarah Ramberg
- Sarah Ramberg
- Sarah Ramberg
- Sarah Ramberg
- Sarah Ramberg
- Sarah Ramberg
- Sarah Ramberg
- Sarah Ramberg
- Sarah Ramberg
- Sarah Ramberg
- Sarah Ramberg
- Sarah Ramberg
- Sarah Ramberg
- Sarah Ramberg
- Sarah Ramberg
- Sarah Ramberg
- Sarah Ramberg
- Sarah Ramberg
- Sarah Ramberg
- Sarah Ramberg
- Sarah Ramberg
- Sarah Ramberg
- Sarah Ramberg
- Sarah Ramberg
- Sarah Ramberg
- Sarah Ramberg
- Sarah Ramberg
- Sarah Ramberg
- Sarah Ramberg
- Sarah Ramberg
- Sarah Ramberg
- Sarah Ramberg
- Sarah Ramberg
- Sarah Ramberg
- Sarah Ramberg
- Sarah Ramberg
- Sarah Ramberg
- Sarah Ramberg
- Sarah Ramberg
- Sarah Ramberg
- Sarah Ramberg
- Sarah Ramberg
- Sarah Ramberg
- Sarah Ramberg
- Sarah Ramberg
- Sarah Ramberg
- Sarah Ramberg
- Sarah Ramberg
- Sarah Ramberg
- Sarah Ramberg
- Sarah Ramberg
- Sarah Ramberg
- Sarah Ramberg
- Sarah Ramberg
- Sarah Ramberg
- Sarah Ramberg
- Sarah Ramberg
- Sarah Ramberg
- Sarah Ramberg
- Sarah Ramberg
- Sarah Ramberg
- Sarah Ramberg
- Sarah Ramberg
- Sarah Ramberg
- Sarah Ramberg
- Sarah Ramberg
- Sarah Ramberg
- Sarah Ramberg
- Sarah Ramberg
- Sarah Ramberg
- Sarah Ramberg
- Sarah Ramberg
- Sarah Ramberg
- Sarah Ramberg
- Sarah Ramberg
- Sarah Ramberg
- Sarah Ramberg
- Sarah Ramberg
- Sarah Ramberg
- Sarah Ramberg
- Sarah Ramberg
- Sarah Ramberg
- Sarah Ramberg
- Sarah Ramberg
- Sarah Ramberg
- Sarah Ramberg
- Sarah Ramberg
- Sarah Ramberg
- Sarah Ramberg
- Sarah Ramberg
- Sarah Ramberg
- Sarah Ramberg
- Sarah Ramberg
- Sarah Ramberg
- Sarah Ramberg
- Sarah Ramberg
- Sarah Ramberg
- Sarah Ramberg
- Sarah Ramberg
- Sarah Ramberg
- Sarah Ramberg
- Sarah Ramberg
- Sarah Ramberg
- Sarah Ramberg
- Sarah Ramberg
- Sarah Ramberg
- Sarah Ramberg
- Sarah Ramberg
- Sarah Ramberg
- Sarah Ramberg
- Sarah Ramberg
- Sarah Ramberg
- Sarah Ramberg
- Sarah Ramberg
- Sarah Ramberg
- Sarah Ramberg
- Sarah Ramberg
- Sarah Ramberg
- Sarah Ramberg
- Sarah Ramberg
- Sarah Ramberg
- Sarah Ramberg
- Sarah Ramberg
- Sarah Ramberg
- Sarah Ramberg
- Sarah Ramberg
- Sarah Ramberg
- Sarah Ramberg
- Sarah Ramberg
- Sarah Ramberg
- Sarah Ramberg
- Sarah Ramberg
- Sarah Ramberg
- Sarah Ramberg
- Sarah Ramberg
- Sarah Ramberg
- Sarah Ramberg
- Sarah Ramberg
- Sarah Ramberg
- Sarah Ramberg
- Sarah Ramberg
- Sarah Ramberg
- Sarah Ramberg
- Sarah Ramberg
- Sarah Ramberg
- Sarah Ramberg
- Sarah Ramberg
- Sarah Ramberg
- Sarah Ramberg
- Sarah Ramberg
- Sarah Ramberg
- Sarah Ramberg
- Sarah Ramberg
- Sarah Ramberg
- Sarah Ramberg
- Sarah Ramberg
- Sarah Ramberg
- Sarah Ramberg
- Sarah Ramberg
- Sarah Ramberg
- Sarah Ramberg
- Sarah Ramberg
- Sarah Ramberg
- Sarah Ramberg
- Sarah Ramberg
- Sarah Ramberg
- Sarah Ramberg
- Sarah Ramberg
- Sarah Ramberg
- Sarah Ramberg
- Sarah Ramberg
- Sarah Ramberg
- Sarah Ramberg
- Sarah Ramberg
- Sarah Ramberg
- Sarah Ramberg
- Sarah Ramberg
- Sarah Ramberg
- Sarah Ramberg
- Sarah Ramberg
- Sarah Ramberg
- Sarah Ramberg
- Sarah Ramberg
- Sarah Ramberg
- Sarah Ramberg
- Sarah Ramberg
- Sarah Ramberg
- Sarah Ramberg
- Sarah Ramberg
- Sarah Ramberg
- Sarah Ramberg
- Sarah Ramberg
- Sarah Ramberg
- Sarah Ramberg
- Sarah Ramberg
- Sarah Ramberg
- Sarah Ramberg
- Sarah Ramberg
- Sarah Ramberg
- Sarah Ramberg
- Sarah Ramberg
- Sarah Ramberg
- Sarah Ramberg
- Sarah Ramberg
- Sarah Ramberg
- Sarah Ramberg
- Sarah Ramberg
- Sarah Ramberg
- Sarah Ramberg
- Sarah Ramberg
- Sarah Ramberg
- Sarah Ramberg
- Sarah Ramberg
- Sarah Ramberg
- Sarah Ramberg
- Sarah Ramberg
- Sarah Ramberg
- Sarah Ramberg
- Sarah Ramberg
- Sarah Ramberg
- Sarah Ramberg
- Sarah Ramberg
- Sarah Ramberg
- Sarah Ramberg
- Sarah Ramberg
- Sarah Ramberg
- Sarah Ramberg
- Sarah Ramberg
- Sarah Ramberg
- Sarah Ramberg
- Sarah Ramberg
- Sarah Ramberg
- Sarah Ramberg
- Sarah Ramberg
- Sarah Ramberg
- Sarah Ramberg
- Sarah Ramberg
- Sarah Ramberg
- Sarah Ramberg
- Sarah Ramberg
- Sarah Ramberg
- Sarah Ramberg
- Sarah Ramberg
- Sarah Ramberg
- Sarah Ramberg
- Sarah Ramberg
- Sarah Ramberg
- Sarah Ramberg
- Sarah Ramberg
- Sarah Ramberg
- Sarah Ramberg
- Sarah Ramberg
- Sarah Ramberg
- Sarah Ramberg
- Sarah Ramberg
- Sarah Ramberg
- Sarah Ramberg
- Sarah Ramberg
- Sarah Ramberg
- Sarah Ramberg
- Sarah Ramberg
- Sarah Ramberg
- Sarah Ramberg
- Sarah Ramberg
- Sarah Ramberg
- Sarah Ramberg
- Sarah Ramberg
- Sarah Ramberg
- Sarah Ramberg
- Sarah Ramberg
- Sarah Ramberg
- Sarah Ramberg
- Sarah Ramberg
- Sarah Ramberg
- Sarah Ramberg
- Sarah Ramberg
- Sarah Ramberg
- Sarah Ramberg
- Sarah Ramberg
- Sarah Ramberg
- Sarah Ramberg
- Sarah Ramberg
- Sarah Ramberg
- Sarah Ramberg
- Sarah Ramberg
- Sarah Ramberg
- Sarah Ramberg
- Sarah Ramberg
- Sarah Ramberg
- Sarah Ramberg
- Sarah Ramberg
- Sarah Ramberg
- Sarah Ramberg
- Sarah Ramberg
- Sarah Ramberg
- Sarah Ramberg
- Sarah Ramberg
- Sarah Ramberg
- Sarah Ramberg
- Sarah Ramberg
- Sarah Ramberg
- Sarah Ramberg
- Sarah Ramberg
- Sarah Ramberg
- Sarah Ramberg
- Sarah Ramberg
- Sarah Ramberg
- Sarah Ramberg
- Sarah Ramberg
- Sarah Ramberg
- Sarah Ramberg
- Sarah Ramberg
- Sarah Ramberg
- Sarah Ramberg
- Sarah Ramberg
- Sarah Ramberg
- Sarah Ramberg
- Sarah Ramberg
- Sarah Ramberg
- Sarah Ramberg
- Sarah Ramberg
- Sarah Ramberg
- Sarah Ramberg
- Sarah Ramberg
- Sarah Ramberg
- Sarah Ramberg
- Sarah Ramberg
- Sarah Ramberg
- Sarah Ramberg
- Sarah Ramberg
- Sarah Ramberg
- Sarah Ramberg
- Sarah Ramberg
- Sarah Ramberg
- Sarah Ramberg
- Sarah Ramberg
- Sarah Ramberg
- Sarah Ramberg
- Sarah Ramberg
- Sarah Ramberg
- Sarah Ramberg
- Sarah Ramberg
- Sarah Ramberg
- Sarah Ramberg
- Sarah Ramberg
- Sarah Ramberg
- Sarah Ramberg
- Sarah Ramberg
- Sarah Ramberg
- Sarah Ramberg
- Sarah Ramberg
- Sarah Ramberg
- Sarah Ramberg
- Sarah Ramberg
- Sarah Ramberg
- Sarah Ramberg
- Sarah Ramberg
- Sarah Ramberg
- Sarah Ramberg
- Sarah Ramberg
- Sarah Ramberg
- Sarah Ramberg
- Sarah Ramberg
- Sarah Ramberg
- Sarah Ramberg
- Sarah Ramberg
- Sarah Ramberg
- Sarah Ramberg
- Sarah Ramberg
- Sarah Ramberg
- Sarah Ramberg
- Sarah Ramberg
- Sarah Ramberg
- Sarah Ramberg
- Sarah Ramberg
- Sarah Ramberg
- Sarah Ramberg
- Sarah Ramberg
- Sarah Ramberg
- Sarah Ramberg
- Sarah Ramberg
- Sarah Ramberg
- Sarah Ramberg
- Sarah Ramberg
- Sarah Ramberg
- Sarah Ramberg
- Sarah Ramberg
- Sarah Ramberg
- Sarah Ramberg
- Sarah Ramberg
- Sarah Ramberg
- Sarah Ramberg
- Sarah Ramberg
- Sarah Ramberg
- Sarah Ramberg
- Sarah Ramberg
- Sarah Ramberg
- Sarah Ramberg
- Sarah Ramberg
- Sarah Ramberg
- Sarah Ramberg
- Sarah Ramberg
- Sarah Ramberg
- Sarah Ramberg
- Sarah Ramberg
- Sarah Ramberg
- Sarah Ramberg
- Sarah Ramberg
- Sarah Ramberg
- Sarah Ramberg
- Sarah Ramberg
- Sarah Ramberg
- Sarah Ramberg
- Sarah Ramberg
- Sarah Ramberg
- Sarah Ramberg
- Sarah Ramberg
- Sarah Ramberg
- Sarah Ramberg
- Sarah Ramberg
- Sarah Ramberg
- Sarah Ramberg
- Sarah Ramberg
- Sarah Ramberg
- Sarah Ramberg
- Sarah Ramberg
- Sarah Ramberg
- Sarah Ramberg
- Sarah Ramberg
- Sarah Ramberg
- Sarah Ramberg
- Sarah Ramberg
- Sarah Ramberg
- Sarah Ramberg
- Sarah Ramberg
- Sarah Ramberg
- Sarah Ramberg
- Sarah Ramberg
- Sarah Ramberg
- Sarah Ramberg
- Sarah Ramberg
- Sarah Ramberg
- Sarah Ramberg
- Sarah Ramberg
- Sarah Ramberg
- Sarah Ramberg
- Sarah Ramberg
- Sarah Ramberg
- Sarah Ramberg
- Sarah Ramberg
- Sarah Ramberg
- Sarah Ramberg
- Sarah Ramberg
- Sarah Ramberg
- Sarah Ramberg
- Sarah Ramberg
- Sarah Ramberg
- Sarah Ramberg
- Sarah Ramberg
- Sarah Ramberg
- Sarah Ramberg
- Sarah Ramberg
- Sarah Ramberg
- Sarah Ramberg
- Sarah Ramberg
- Sarah Ramberg
- Sarah Ramberg
- Sarah Ramberg
- Sarah Ramberg
- Sarah Ramberg
- Sarah Ramberg
- Sarah Ramberg
- Sarah Ramberg
- Sarah Ramberg
- Sarah Ramberg
- Sarah Ramberg
- Sarah Ramberg
- Sarah Ramberg
- Sarah Ramberg
- Sarah Ramberg
- Sarah Ramberg
- Sarah Ramberg
- Sarah Ramberg
- Sarah Ramberg
- Sarah Ramberg
- Sarah Ramberg
- Sarah Ramberg
- Sarah Ramberg
- Sarah Ramberg
- Sarah Ramberg
- Sarah Ramberg
- Sarah Ramberg
- Sarah Ramberg
- Sarah Ramberg
- Sarah Ramberg
- Sarah Ramberg
- Sarah Ramberg
- Sarah Ramberg
- Sarah Ramberg
- Sarah Ramberg
- Sarah Ramberg
- Sarah Ramberg
- Sarah Ramberg
- Sarah Ramberg
- Sarah Ramberg
- Sarah Ramberg
- Sarah Ramberg
- Sarah Ramberg
- Sarah Ramberg
- Sarah Ramberg
- Sarah Ramberg
- Sarah Ramberg
- Sarah Ramberg
- Sarah Ramberg
- Sarah Ramberg
- Sarah Ramberg
- Sarah Ramberg
- Sarah Ramberg
- Sarah Ramberg
- Sarah Ramberg
- Sarah Ramberg
- Sarah Ramberg
- Sarah Ramberg
- Sarah Ramberg
- Sarah Ramberg
- Sarah Ramberg
- Sarah Ramberg
- Sarah Ramberg
- Sarah Ramberg
- Sarah Ramberg
- Sarah Ramberg
- Sarah Ramberg
- Sarah Ramberg
- Sarah Ramberg


These have got to be the coolest pumpkins going around!!! Can’t wait to make them! Thank you for sharing them 🙂
Thank you, Sam!!!
These are so cute! Pinning to my fall board!
Thanks, Rachael!
These little guys are truly stunning!
Thanks, Colleen!
These pumpkins are beyond cute – I love love them!! This looks like something I could whip up in a jiff. Thanks for a great tutorial.
Thanks so much, Carole- they are crazy-easy to make, but I really believe the doll needle is key!
Super cute Sadie!
Thank you!!
These are so cute!
Thank you so much- I think so, too! Obviously, as I couldn’t stop making them. 😉
If you feel like making some more and selling them.. I’d be interested in buying 🙂
I will be selling these, for sure! I haven’t listed them yet, but will send you links when they are in my Etsy shop!
Thanks!
The first pair is listed and I’ll be adding the others shortly! https://www.etsy.com/listing/479012739/vintage-halloween-bandana-pumpkins-set
have just posted your gorgeous pumpkins.
Thank you.
I appreciate the gesture, but if you do this, please link the photo to the direct post (http://www.sadieseasongoods.com/halloween-bandana-pumpkin/) and the link to the direct post (not just my blog). Thank you for understanding!
love these pumpkins have never done a fabric one this has been added to my to do list thanks for sharing pinned and shared
Thanks, Lorraine!
These are sew cute! I love the idea of using bandanas and you make it look so easy! Pinning!
Thanks, Lisa!
These are so adorable! Thanks for sharing 🙂
You are very welcome, Lisa!
I made a mountain of stuffed pumpkins this fall, all of them from cut material. I considered making some from dollar store tea towels because they are pre seam sealed. I had not though of bandanas. What a terrific idea, next year I will do this for sure. Thanks for Sharing Leanna
Thanks, Leanna!
Those are so doggoned cute, just might have to make up a few to give for gifts. You make it look so easy with your excellent tutorial. Will be good reason to get my sewing machine going again. Think bandannas make perfect little pumpkins over and above other fabrics, even classy velvet ones.
Think next year making bandanna pumpkins will be one of first things made to start season off with a bang. Wouldn’t bunch of little ones make perfect banner?
Will have to write these ideas down to remember for future seasons.
Have happy, lovely Fall weekend
Thank you so very much!!!
what a great way to use bandana’s…..I have always loved the pattern on them. I love these!
Thank you so much, AnnMarie!
Very cute project Sadie, and I thought the salad bowl pumpkin was cute, you did it again girl… Pinned!
LOL- thank you!!! 😀
Super, super cute. I bet red and light green bandanas and a different stem would make for darling little apples. Love that scale, too 🙂
Thanks, Linda- I don’t know why I never thought to incorporate my little scale before now!!
These are fantastic! You need to write a book…100 crafty things to do with bandanas…although, I’m sure you could come up with more! Another clever idea for the books! 😉
Hahaha…there will definitely be a book someday!! (and thank you so much!)
Ok, these are seriously the cutest! Love the bandana idea!
Thank you so very much, Heidi!
These bandana pumpkins are as cute as a button!
Would love to have you drop by and share on the Friday Features Linky Party
Hope you have a wonderful weekend!:)
Karren
Thanks so much, Karren!
These are so cute! Adding to my list of things to make for fall!
Thank you so very much!
Charming and EASY, my kind of project!
Yes, yes, and yes!!! 🙂
Sarah, These are adorable! Very clever to use bandanas! Love them.
Pinned and shared 🙂 Thanks for sharing at Snickerdoodle!
~Laurie
Thank you for the party and share!! 🙂
These are adorable. Great idea to use bandanas.
Thank you so very much!
The little pumpkins are so cute!
Thanks, Carol!
I absolutely love these!! Had to pin! Thanks for sharing on the Pleasures of the NW’s DIY party-
Thanks, Helen!
These are so awesome! I’ve got to give it a try with some fabric glue or something… My machine has quit. Thank you for such a clear tutorial!
You could definitely make these without a machine!! Happy crafting. 🙂
Love these! What a fanastic idea …. Now I need to go shopping!
Thanks for sharing!
Thanks so much, Cara!
Using bandanas is a great idea! Pinning this idea.
Thank you, Ann!
Hey Sarah! I love your bandana pumpkins. Cute new take! Pinning. I spotted this post on the Funtastic Friday Link Party and Merry Monday Link Party.
Awww, thanks, Lacie!! :*
Thank you for posting at Inspiration Galore Project Pty, your beautiful turquoise clutch was my featured for this week pty. Love the bandanas pumpkins.
Thank you so much!!
These are really cute. The pattern is visually interesting but doesn’t over power the pumpkin 🙂 Thanks for sharing with us at Family Joy Linky Party
That’s what I was hoping for- thanks so much!
So smart to use bandanas! They look great!
Katie
button-jar.com
Many thanks, Katie!
Your bandana pumpkins are just adorable. I bought some ticking that I am planning to use for pumpkins. I love your tutorial and plan to use it. Thank you for sharing it with us at Vintage Charm.
Thank you so much, Sharon!
These are absolutely adorable! I’ve got some old scarves in these types of shades, so maybe I should have a go at this! – Tasha
Thanks, Tasha!!
More than welcome!
Sarah,
Your bandana pumpkin are so creative, and your tutorial is excellent. We would love for you to share them at our new linky party, Monday Social. http://botanicbleu.blogspot.com/2016/09/monday-social-2.html You can link up Instagram, Pinterest, and Facebook photos, as well as photos from your blog. This is a great forum for finding addresses of social media sites and for sharing your addresses for others to find.
Judith
Thank you, Judith- and appreciate the invite!
Sarah,
Thank you for sharing this fabulous craft at Monday Social.
Judith
Thanks, Judith!
I’m really dense when it comes to sewing. You lost me when you started making the running stitch. Is is around the open end of the tube? Really cute idea. I’ll be shopping for a doll making needle and adding real stems I gathered from a local pumpkin farm.
Hi, Teddee- I totally understand! Yes, the running stitch goes along one of the open ends…then you cinch it, stuff it, and do the running stitch along the other open end before cinching it closed, too! Does that help?
Yes! Thanks for responding
I SO pinned this! SO adorbs!! LOVE them! 🙂
I would love for you to share this with my Facebook Group for recipes, crafts, tips, and tricks: https://www.facebook.com/groups/pluckyrecipescraftstips/
Thanks for joining Cooking and Crafting with J & J!
These are really cute Sarah and l love your tutorials! Thank you for sharing with us this week at Celebrate Your Story, have a great weekend!
Thank you so much, Sandra!
These are adorable and love how easy you create yours. I make these different but like your way better. I pinned!
Thank you so much, Vanessa! These really are a cinch to make, I promise!
I think these are the cutest pumpkins I have seen by far!
Awww, thank you, Mary!
Yes very unique pumpkins the bandanna’s fabric is really cool for your creations, so cute
Thank you, Janice!
So cute! I’m putting together my church’s annual fall festival and we need lots of pumpkins for decor so this would be so great for me to do to ensure we have pumpkins to use for years to come!
These would be perfect, Hollie!!
These are adorable! I’ve never seen them done in this pattern before, and it’s perfect! Pinning to try! 🙂
Thank you so much- I think it worked out ok! I wasn’t sure at first. 🙂
THANK YOU FOR SHARING!!!!! Love them 🙂
Hello! I was wondering how large of a pumpkin I can create with the bandana? They are so cute!!
The biggest you could make would be from using the entire length of the bandana, cut at half that for the width!
Thank you!
These are super cute! Thanks for sharing at Merry Monday. 🙂
Thanks, Dee!
Sarah, these are adorable! This was our most clicked link at last week’s Snickerdoodle Party. You’ll be featured on all the hosts’ blogs at today’s party.
Thanks, Beverly!!
SO cute for Halloween decorating- my favorite yet – the fabric is perfect. Well done,
Thanks, Michele!
Now these pumpkins I love! I’m as country as they come. I love how simple it is to make too.
Thank you for sharing this with us on the #HomeMattersParty. We hope to see you next Fri. at 12 AM EST when we open our doors.
Thank you so much, Crystal!
Thanks for linking up to Monday Social. Come by at 4:00. You’ve been featured.
Thank you, Katie!
Your adorable bandana pumpkins are featured at Monday Social today.
Awesome! Thank you!
This is such a great idea! I always love your projects! Thanks for linking up!
Thanks so much, Crystal!
Oh, these are just so unique and cute! Thank you so much for joining us at Dishing It & Digging It. Hope to see you back again this week!
Thank you so much, Angie!
So,cute! I am gong to use wine corks for the stems.
Happy crafting, Kay!
Adorable and clever idea
Thanks so much, JoAnn!
These are great, I have to make some asap. Fill a basket and add some artificial vines…great display idea.
Thanks, Katie!
Really cute!
Thank you, Olya!
These are so cute, thanks for sharing.
Thank you, Marion!
You could potentially toss some potpourri inside, or use a chunk of cinnamon stick for the stem, to throw some scent around the house too 🙂
You totally could! Happy crafting! 🙂
Those are so cute I want to make some right now! instead of dinner. The kids won’t mind, right? LOL! Have a great week!
Hahaha, no, not at all!! 😉 Thank you so very much!
I love these, making them out of tea towels and an old skirt with a fun stripe pattern. I am going to use them as my thanksgiving centerpiece and then give them to guests to bring home! Thanks for sharing!
Looking forward to making these with my wine cork pumpkins as well! I think I will try to use the wine corks as the stems for your bandana pumpkins! Thanks for sharing.
I can’t wait for Fall!
Thank you so much for this tutorial! This is such a good idea, and it turns out so cute! I’ve just made 4, with cinnamon sticks for the stems, and they were so satisfying to make. My roommate passed away in October of last year, and he was a motorcycle enthusiast and stumbling upon this tutorial reminded me that I still have some of his motorcycle bandanas. It seems so fitting to turn his bandanas into pumpkins, and though it might be odd, I am finding some amount of closure in, well, including him into the holiday in some way, even though he’s not with us anymore. So again, thank you!
I love the idea of making memorial pumpkins from his bandanas! It’s just a lovely idea – I know I’ve had readers do that using my various flannel shirt blog projects, but it never dawned on me that the bandana pumpkins could become a memorial project. Thank you for sharing your plans with me, Erin- it warms my heart!
Se ven hermosas y aunque no soy una experta en la costura, voy a tratar de realizarlas.
¡Son fáciles de hacer, lo prometo! Incluso para un novato.