
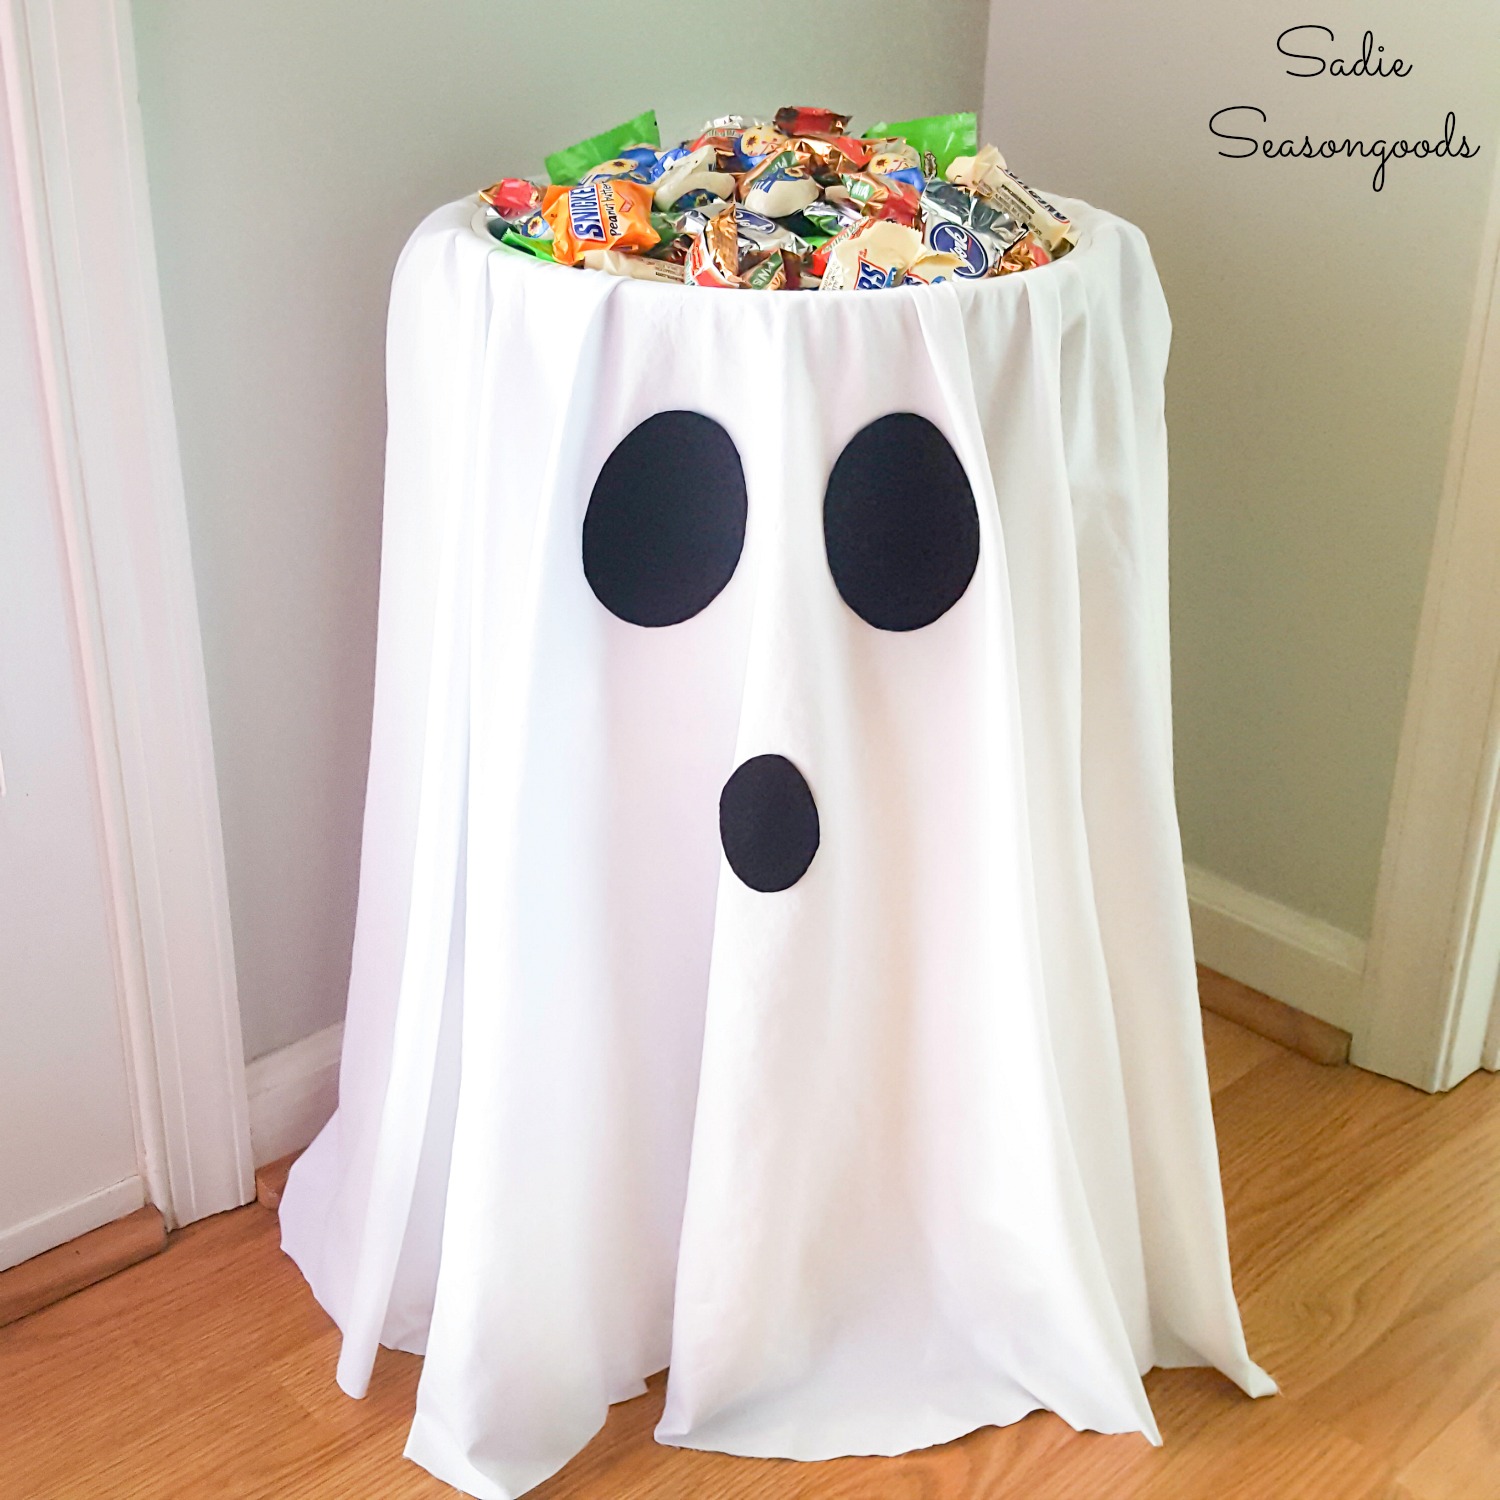
After last Halloween when I created this fun candy holder, I was determined to create another project for a Halloween ghost decoration. I wanted it to appear to be a floating ghost that could sit on a tabletop. So, the first order of business was to find some metal candlesticks at a thrift store.

And here’s the candy bowl holder that I mentioned earlier…
But, back to the current ghost project at hand. I see these types of candlesticks all the time when I’m thrifting. So, they seemed like the perfect thing to repurpose and upcycle in a surprising new way!

This post contains affiliate links for your crafting convenience. As an Amazon Associate, I earn from qualifying purchases. All blue, bold, and underlined text is a clickable link, either to a product or to a related post.
Ghost Decorations for Halloween
First, I spray painted the metal candlesticks white. I suppose this was an optional step, but I wanted to make sure that they wouldn’t be visible later on.

After the paint had dried, I used my hot glue gun to attach different sized foam balls to the tops of the candlesticks.
I used the largest styrofoam ball for the tallest brass candlestick, and so forth.

Now it was time to turn them into floating ghosts!
I searched the thrift store linen sections for the right fabric, but came up short. So, I resorted to hunting the remnants section of my local Joann Fabrics. I needed fabric that was heavy enough to drape well.
BUT, had I found an old white tablecloth at the thrift, that probably would have worked just fine!

Next, I draped a section of fabric over my “ghost mannequin”, ensuring that fabric pooled on the ground all the way around.

Then, I carefully trimmed the fabric so that it just skimmed the ground. I also made sure it adequately concealed the base of the metal candlestick.

To secure the fabric in place, I used a simple straight pin (the kind with a flat head). I then dabbed a touch of white paint to it so that it blended in with the white fabric.
It was another optional step, but it just helped to hide it a bit more.

Almost done!! Now I just needed to add a face to each floating ghost with an old favorite craft supply: peel-and-stick black felt.
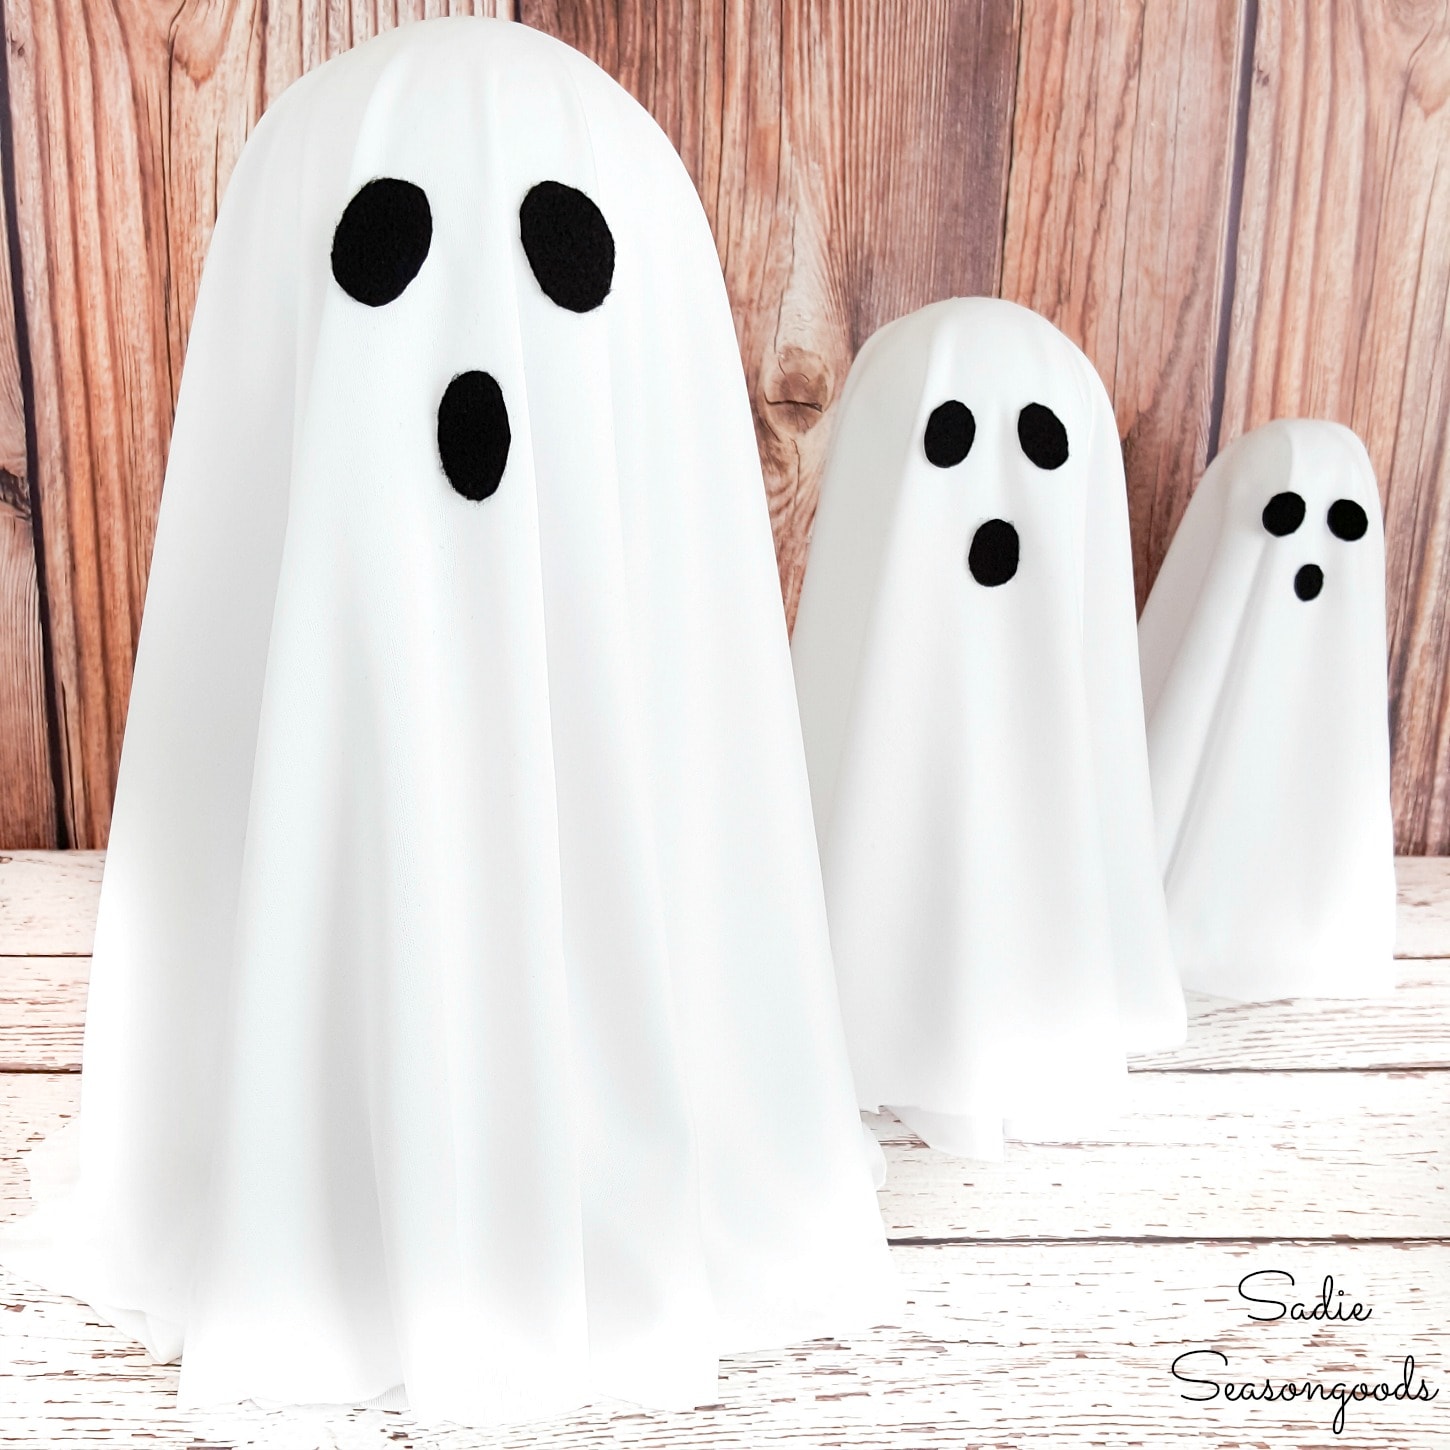
How to Make a Floating Ghost with a Metal Candlestick
I cut out ovals and circles from the adhesive felt and simply stuck them on my floating ghosts. I mean, honestly, does it get any simpler than that?

And that was it! My Halloween ghosts was ready to be placed around the house. Aren’t they cute? And so easy to make.

The metal candlesticks were the perfect thing to upcycle for these ghost decorations.
I love that it really does look like they’re floating. And there’s no need to hang them from anything, either.
If you enjoyed this upcycling idea for Halloween decor, then you’ll love these faux rust jack-o-lanterns, too!

And for a more magical change of pace, check out these Halloween spell books made from a thrift store staple!

Craft on!
S
Want to be notified when I publish my next upcycling project tutorial?
Join me on Social Media:


PIN ME!
Sarah Ramberg is the owner of Sadie Seasongoods, a website that celebrates all things secondhand. From upcycling ideas and thrifted decor to vintage-centric travel itineraries, Sadie Seasongoods is a one-stop shop for anyone who loves thrifting and approachable repurposing ideas. Sarah is also the author of “Crafting with Flannel” and has been featured in numerous media outlets and magazines.


Boo-tiful! (Couldn’t resist.) 🙂
Hahaha, love it- thank you, Jen!
What a great way to upcycle those brass candle sticks. Your ghosts are so cute and such an adorable Halloween décor, Sarah!
Thank you so very much, Julia!
Dear Sadie, I’m retired so have time to ‘surf’ craft and recycled craft sites. I think your’s is the most original, most varied site I have found. You truly have a gift and take the time to share it with others of us who love to do what you do but don’t have the imagination to do it. Thank you for this. jacquey
Aww, thank you so much for that, Jacquey- I so appreciate it!
I love this ghost idea! Your instructions are always so easy to follow. Thank you.
Thank you very much, Patti!
Really nice project.
You did it AGAIN! Gave me another thing to add to my thrift store look-for list! I thot of you yesterday in Michael’s when I saw the yellow/orange cnadle bulbs on clearance! You are SOOO good at this Halloween stuff! I’m wondering if tall glass candlesticks would save me the white paint step! Plus give it a bit of weight so cats don’t knock them over! Nothing is sacred to Squeak and Dutchess!
Hahaha, thank you, Kathy!!
Very cute and oh so easy! Pinned to my Halloween board.
Thank you, Marie!! I was worried that it was TOO basic/simply/silly, but I suppose it’s ok. 🙂
Cut! Look like a singing ghost trio to me! Ha!
Hahaha! You are so right- they do! 🙂
adorbs xx
Thank you so much, Chris!
Yup, only you could come up with something that ‘s so unique and different Sarah. Aren’t they just the cutest little ghosts ever, love how you made them
Thanks, girl!!!
I literally just picked up those exact candlesticks at an estate sale. Spooky re-purpose! Visiting from Remodelaholic.
Thank you!!
Such a clever repurpose for those candlesticks! Great idea as always!
Thank you, Florence!
Oh my!! These are too cute Sarah!!
Thank you so very much, Mary!!
Well these are the cutest ghosts ever.
Awww, thank you so much!!
Very cute & great job Sadie. They are looking so cool now! Thanks for sharing with us.
Have a great day.
Khadija
http://creativekhadija.com/
So so easy and adorable, I always need your boost to get me started! Thank you ?
Thank you so much, Scotty!!
Such a cute idea! Thanks for sharing @Vintage Charm!
These are so cute! I just purchased a couple of candle holders just like the ones you used! I may try this myself.
Thanks so much!
This is the cutest idea! I wish I could come up with things like this on my own…you truly have a gift to see the potential in everyday items.
Thank you so very much, Mary!
I love this! I even have some candlesticks in my hall closet that I was about to donate…but now I am going to make some ghosts. We just started the Whisk It Wednesday link party and I thought you might be interested in sharing there too! Thanks, Carrie
Thanks so much, Carrie!
Hahaha! It is the first time I am not afraid of ghosts! So cute!!! Brilliant idea, thank you for sharing at Sweet Inspiration Link Party 🙂
http://www.artdecorationcrafting.gr
Hahaha! Thank you so much, Christina!