In the year since my mom passed, I’ve slowly been going through her keepsakes whenever I visit my dad. And I must say, finding my old library card in one of her (many) trinket boxes sent me down quite the nostalgic rabbit hole. So, I began a quest to collect other memorabilia from my hometown to create some shadow box art.
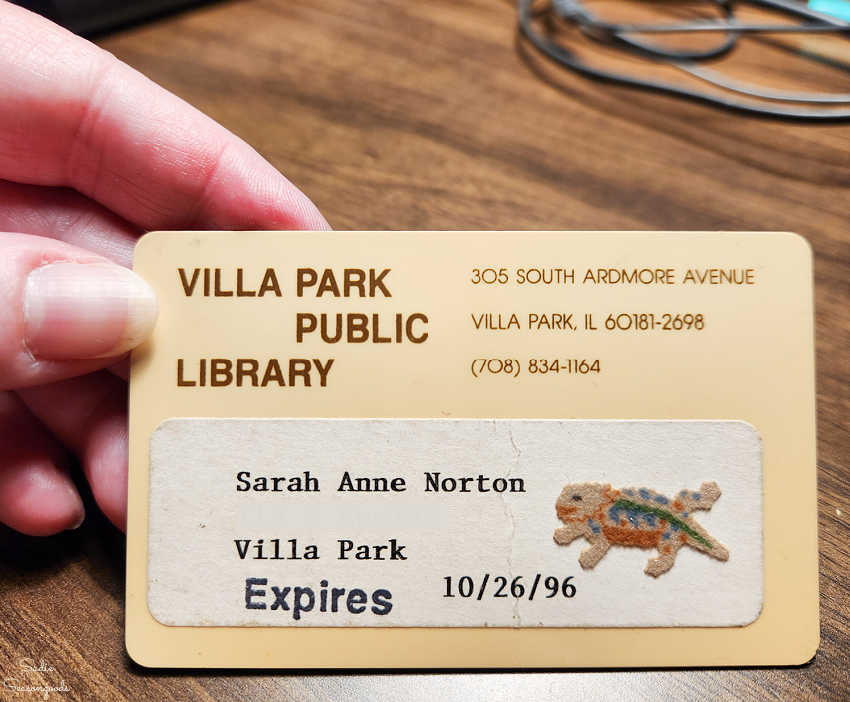
Image credit: Sadie Seasongoods.
Yes, I “disappeared” my street address for this post. And yes, I added the little horny toad sticker to the card when I was a teenager.
The truth is, I moved away from home (Villa Park, IL- a Chicago suburb) more than 30 years ago now. Back then, I was so excited to move away and see the world at the time. But now, as a middle-aged woman, I look back at it through kinder, gentler eyes.
Thanks to Etsy and eBay, I was able to find all sorts of hometown goodies- old matchbooks (from restaurants and stores my family frequented), a vintage map, and a few other assorted goodies for my shadow box.
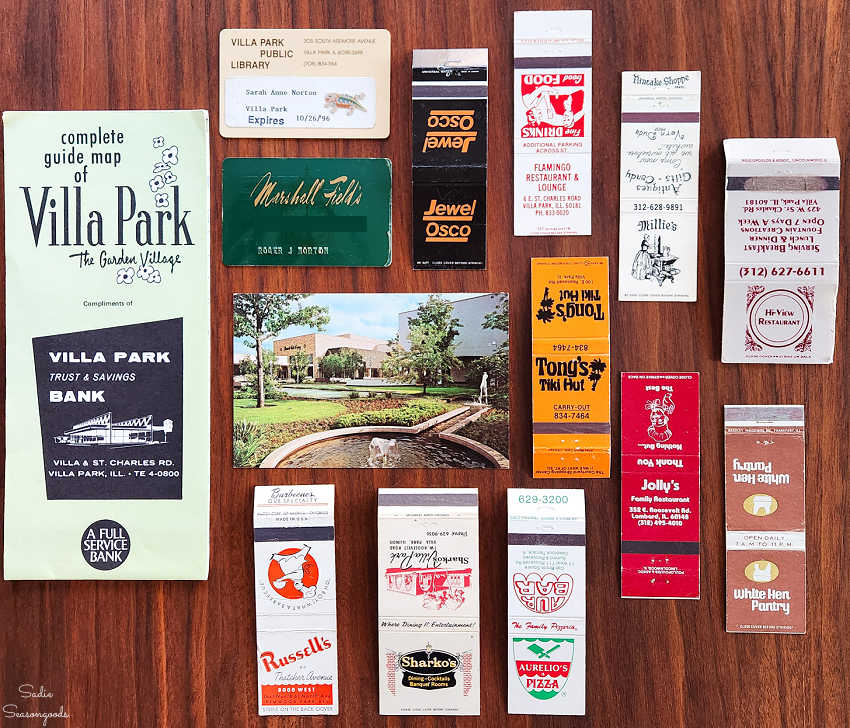
Image credit: Sadie Seasongoods.
And while rifling through some scrap fabric at a Creative Reuse Center, I happened upon a gorgeous swatch of upholstery fabric. I assumed it was a sample from one of those big upholstery sample swatch books that designers have. And I decided it would look quite nice as the background in my shadow box art.
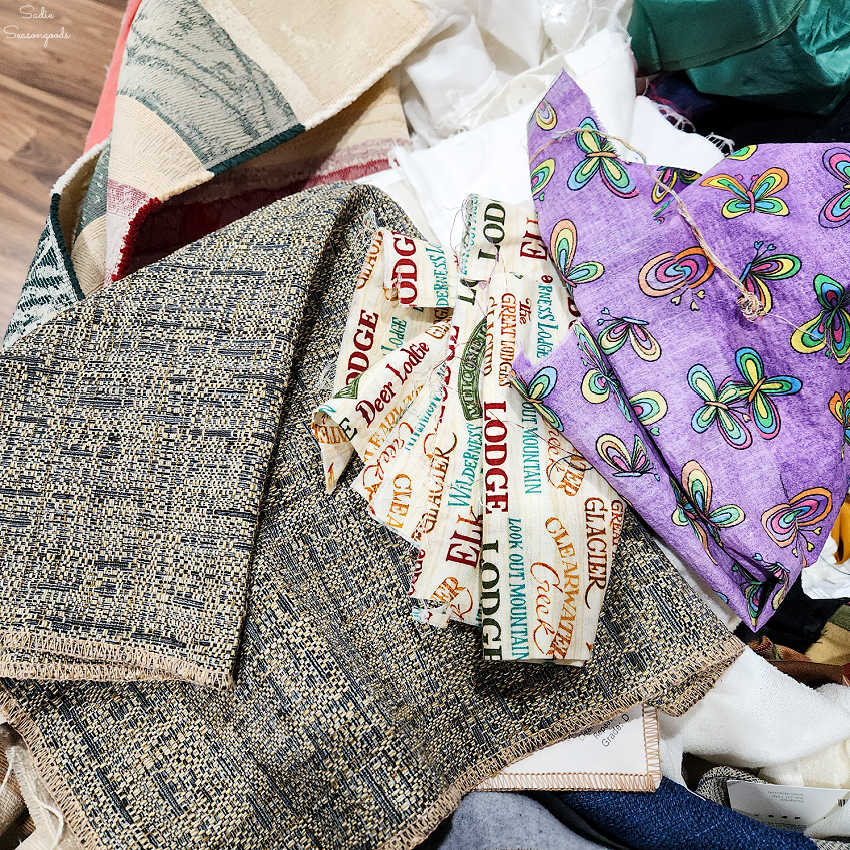
Image credit: Sadie Seasongoods.
So, let me show you how everything came together. I realize this exact shadow box art won’t make anyone else swoon- it’s very specific, geographically! But hunting down pieces for your own version can be a very special and meaningful scavenger hunt.
This post contains affiliate links for your crafting convenience. As an Amazon Affiliate, I earn from qualifying purchases. All blue, bold, and underlined text is a clickable link, either to a product or to a related post.
Vintage Matchbooks and Other Nostalgic Elements
Unfortunately, I never did find the right shadow box while thrifting. So, I picked up a natural wood frame one (11” x 14” size) at Michaels.
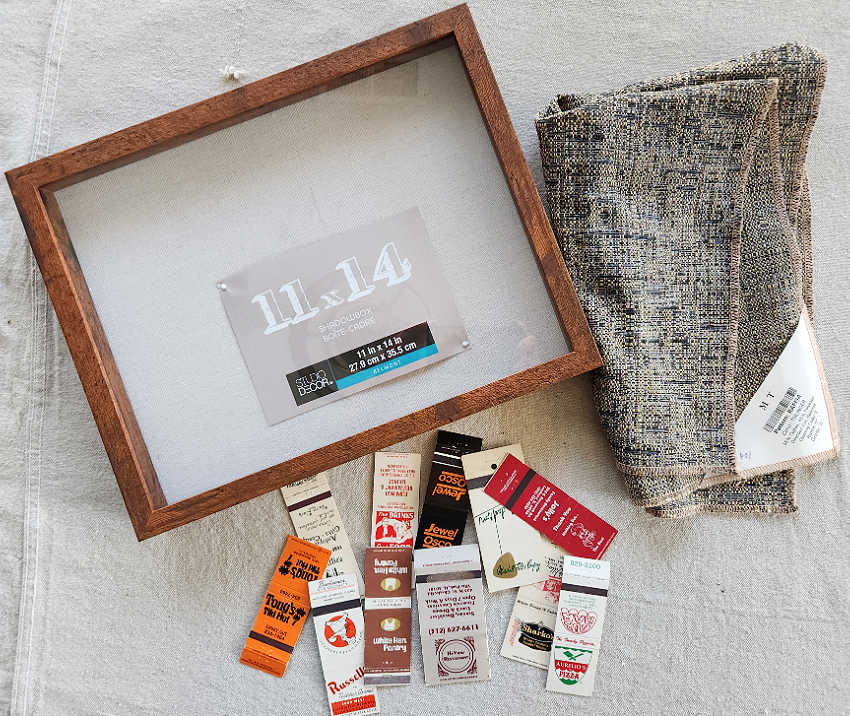
Image credit: Sadie Seasongoods.
First things first, I needed to glue most of the vintage matchbooks shut. To be shipped safely, eBay sellers remove the matches and mail them flat.
So, I used the edge of a basic glue stick to seal them shut.
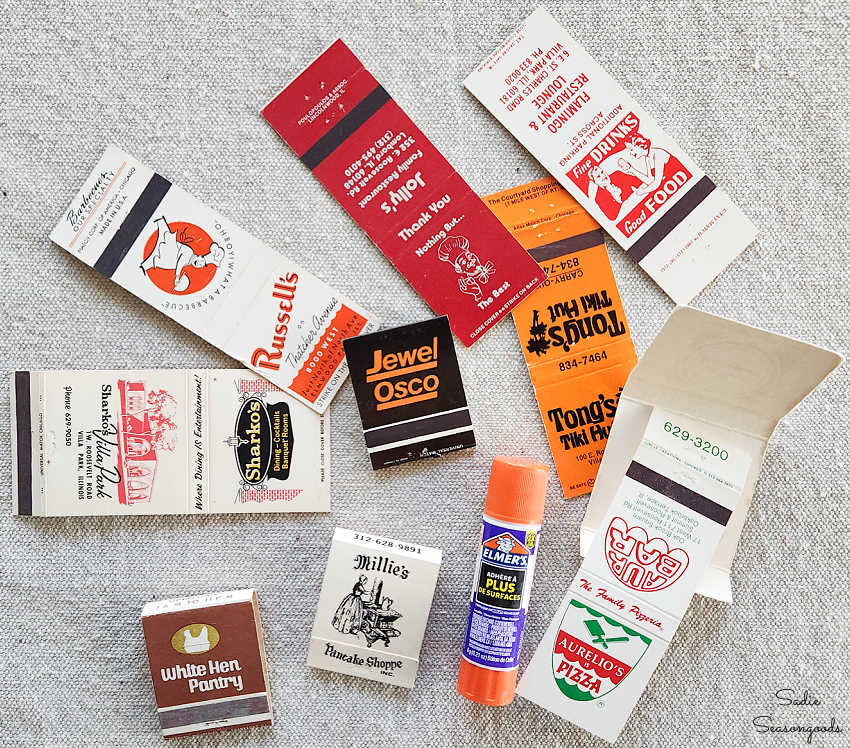
Image credit: Sadie Seasongoods.
I didn’t seal all of them, though. Some had memorable graphics, front and back, so I left those open (for now).
Next, I disassembled the shadow box and removed the backing. I spent time arranging and rearranging all my elements to find the right layout.
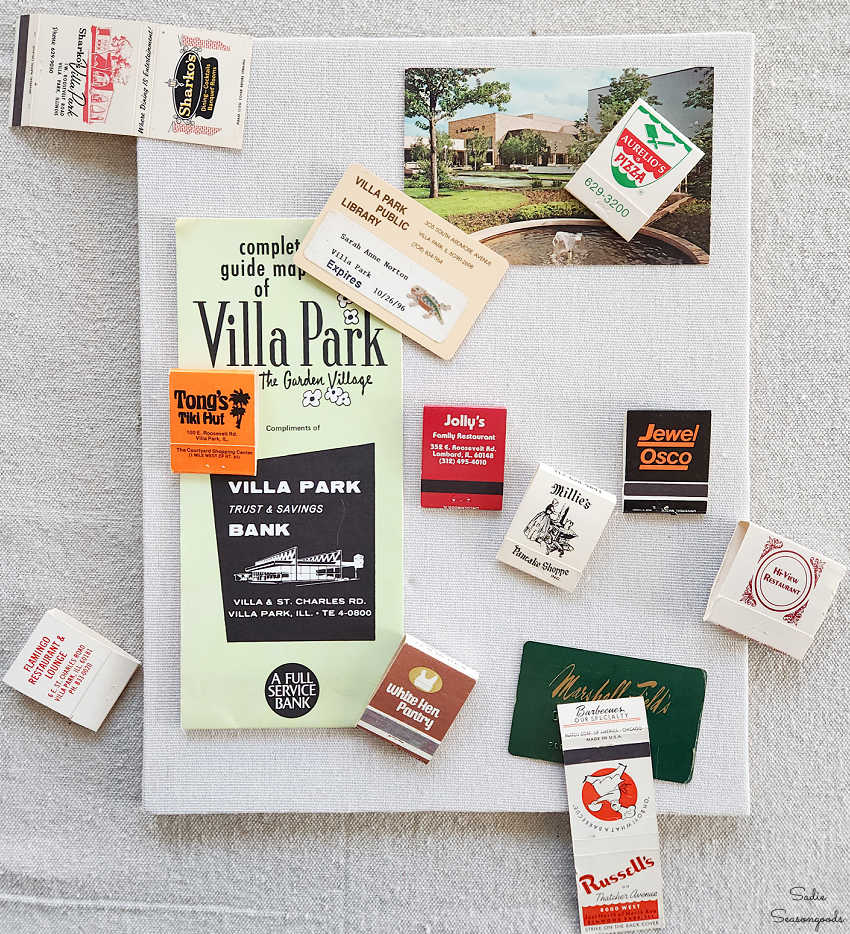
Image credit: Sadie Seasongoods.
And yes, one of the treasures my mom kept in her trinket boxes was one of my dad’s old credit cards. It was a Marshall Field’s card, which was her favorite department store of all time. If you’re from the Chicago area, then you, too, know the importance of Marshall Field’s!
Finally, I settled on a layout for my shadow box art and snapped a photo. This way, I could recreate it later. But I didn’t glue anything down because there was still one more step to take!
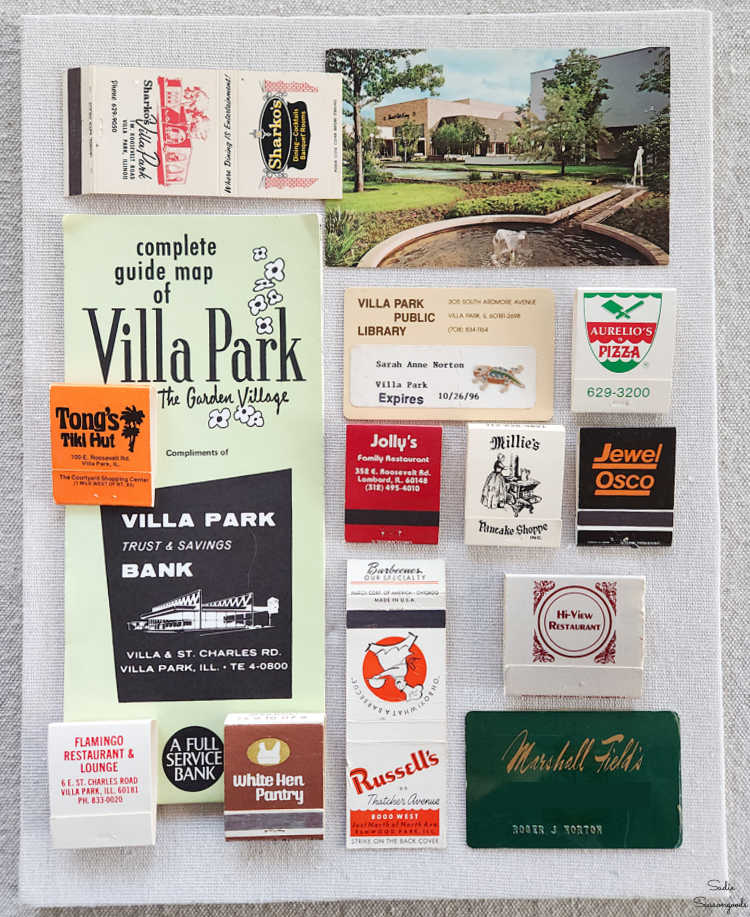
Image credit: Sadie Seasongoods.
I did, however, end up sealing a couple other matchbooks shut so that everything could fit on the back drop.
Creating Nostalgic Shadow Box Art
Next, I needed to cover the back of the shadow box with the upholstery fabric sample that I’d gotten for a whopping $0.25. So, I grabbed a can of spray-on adhesive for this step.

Image credit: Sadie Seasongoods.
After ironing the upholstery fabric, I sprayed both the shadow box backing and the back of my fabric. Then, I carefully laid the fabric over the backing and pressed down firmly.
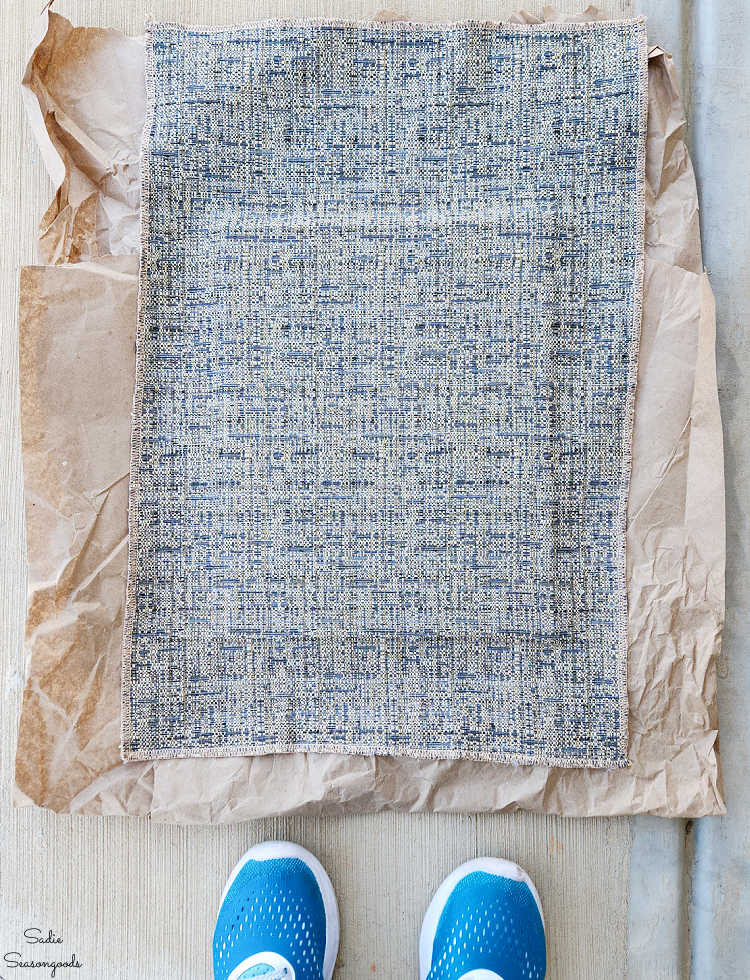
Image credit: Sadie Seasongoods.
Then, I brough it inside, flipped the whole thing over, and trimmed the excess fabric. I left about an inch of overhang and snipped diagonal lines straight out at each corner. Using my hot glue gun (yes…a third type of adhesive in this project), I wrapped the edges over the back of the frame back.
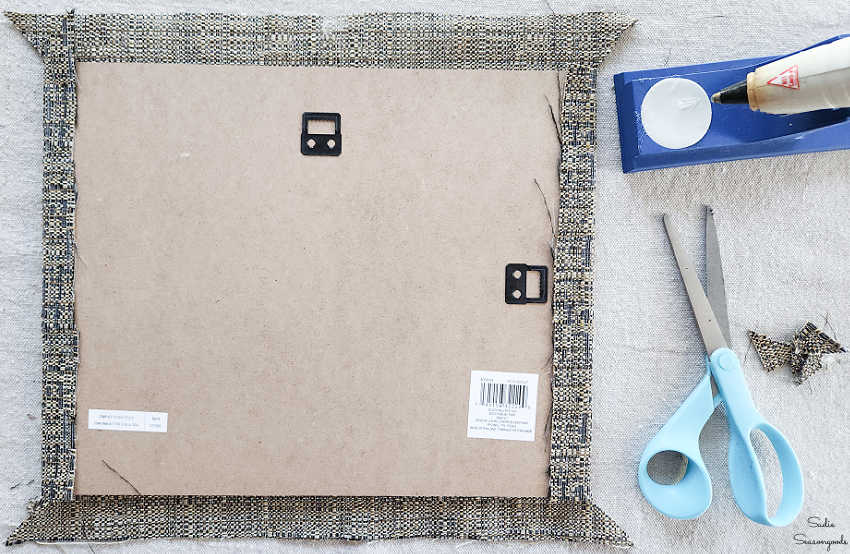
Image credit: Sadie Seasongoods.
I trimmed off the triangle “tabs” as I wrapped. Once I was done wrapping the fabric, I applied strips of masking tape along the fabric edges. This way, nothing could fray or snag, etc.
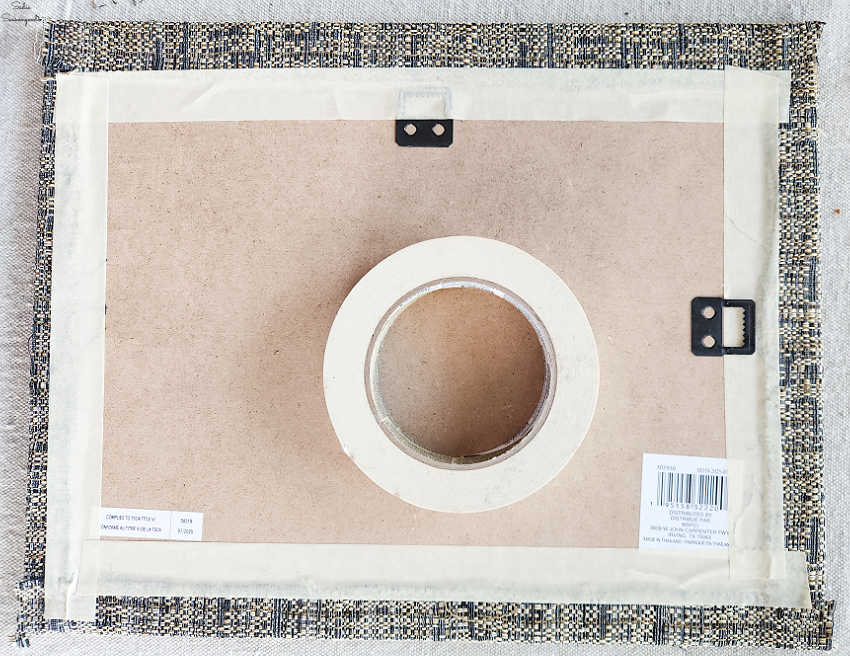
Image credit: Sadie Seasongoods.
Now it was time to truly assemble my shadow box art! Using the photo I snapped earlier, I recreated the arrangement and used hot glue to attach all the pieces.
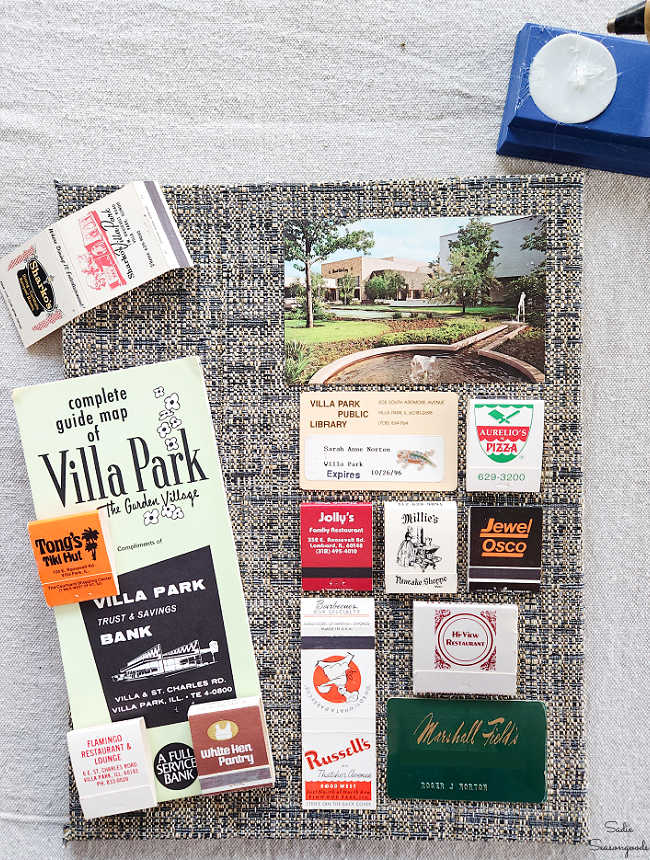
Image credit: Sadie Seasongoods.
Lastly, I inspected everything very, very closely and removed errant strings of glue with my tweezers. I HATE seeing glue strings on projects, so I spent an obscene amount of time doing this.
Holding it at every angle, looking for the shimmering telltale lines of hot glue. If you know, you know…
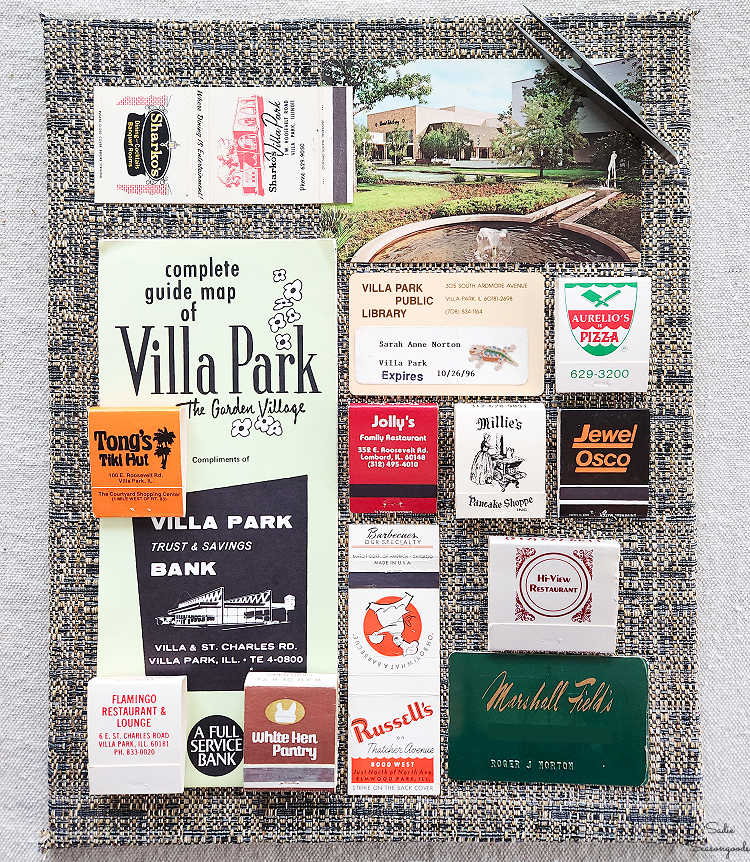
Image credit: Sadie Seasongoods.
Shadow Box Art with Vintage Matchbooks
When I was satisfied with the glue string removal, I cleaned the shadow box glass and re-assembled the frame. And I am ABSOLUTELY in love with how it turned out.
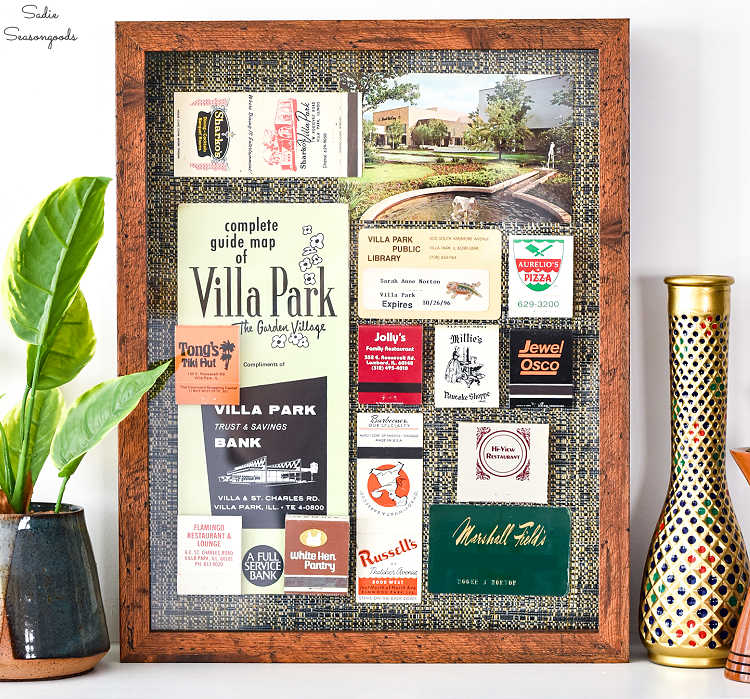
Image credit: Sadie Seasongoods.
Every single nostalgic “bit” makes me smile. My beloved local library where I worked my senior year in high school. Matchbooks from restaurants I ate at growing up. A postcard of the outdoor shopping center my mom and I would go to.
And even though you don’t see much of the fabric now, I love how everything looks against that nubby blue and tan upholstery swatch. I think it just adds so much depth, visual interest, style to my shadow box art.
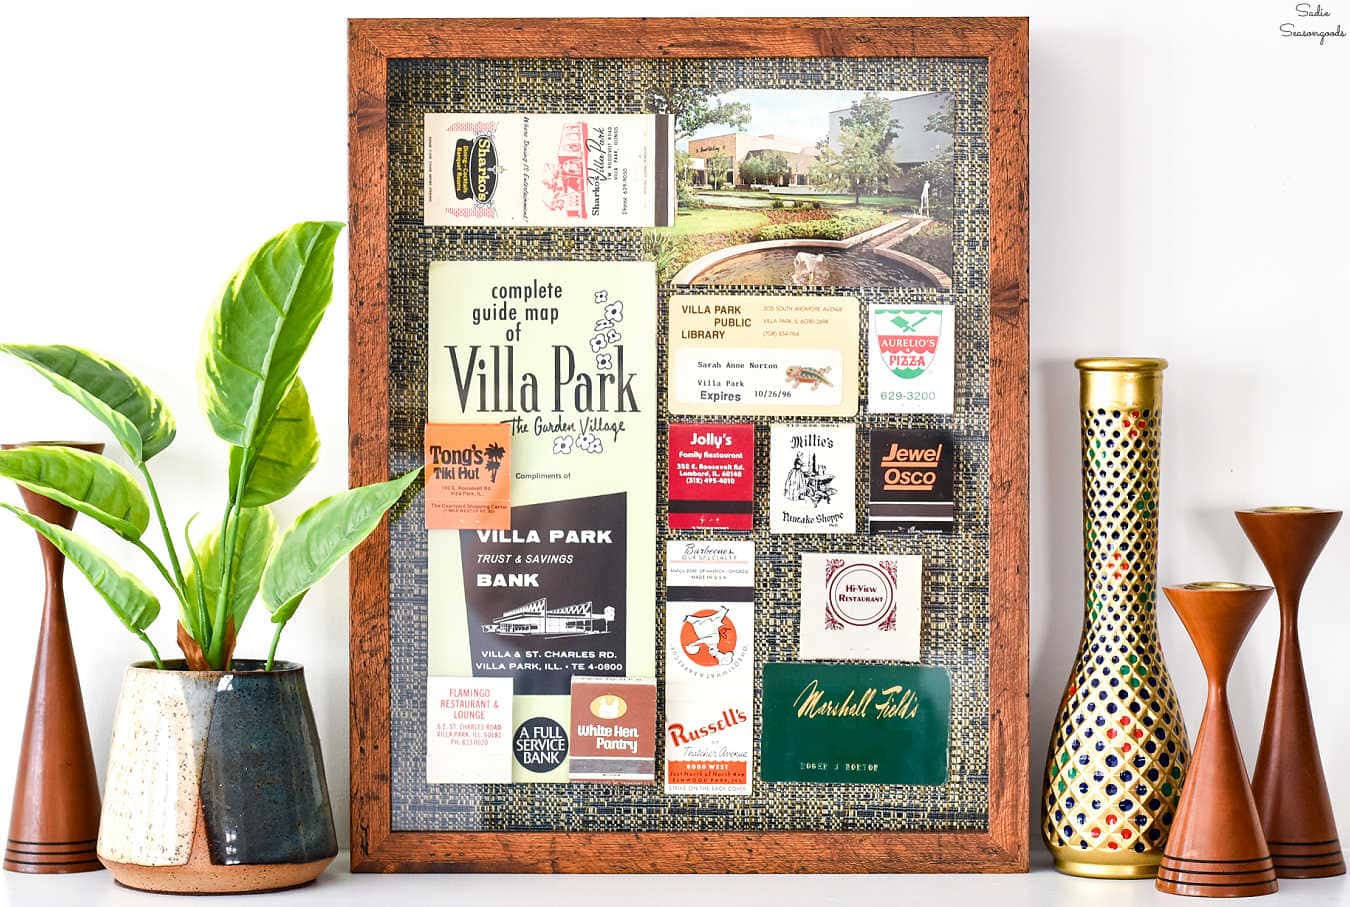
Image credit: Sadie Seasongoods.
Even though none of these pieces mean anything to my husband, he loved how it turned out, too. I wish I could show it to my mom- I know she would have adored it as much as I do. And I know we would have sat for hours reminiscing over all the places these pieces represent.
So, what do you think? Maybe creating your own nostalgic shadow box might be added to your “to-craft” list? It’s such a meaningful piece for me, and I know yours would be just as special. Plus, collecting all the memory-soaked bits is awfully fun.
Even if it turns out a little crooked, like mine did. It just adds to the personal charm, right?
Craft on!
S
Want to be notified when I publish my next upcycling project tutorial?
Join me on Social Media:


PIN ME!
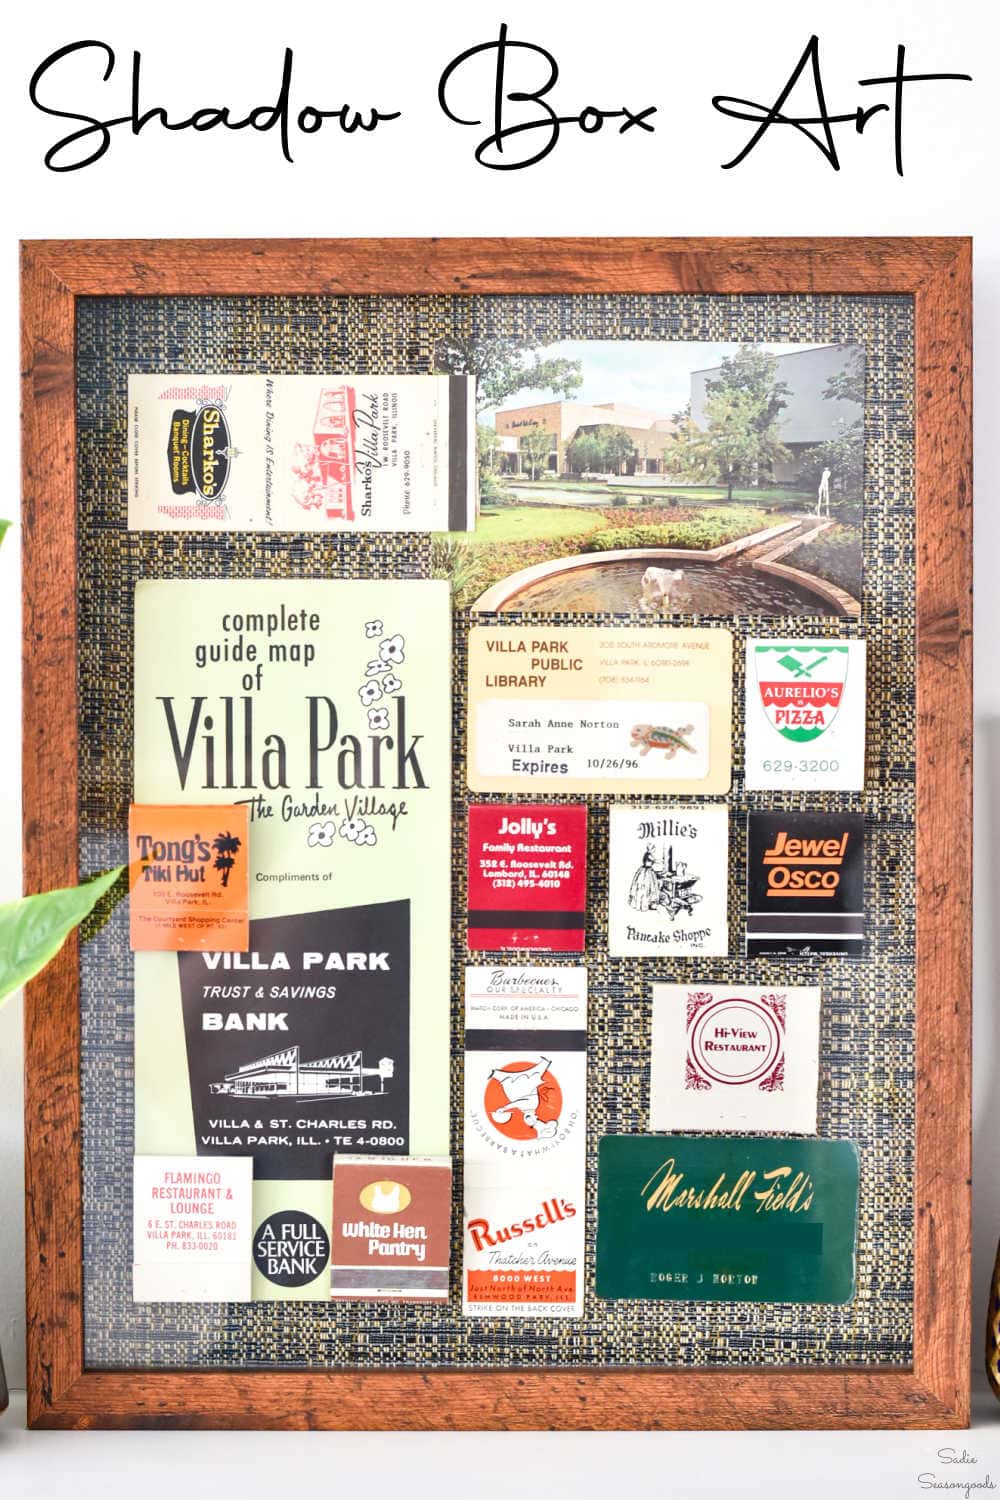
Image credit: Sadie Seasongoods.
Sarah Ramberg is the owner of Sadie Seasongoods, a website that celebrates all things secondhand. From upcycling ideas and thrifted decor to vintage-centric travel itineraries, Sadie Seasongoods is a one-stop shop for anyone who loves thrifting and approachable repurposing ideas. Sarah is also the author of “Crafting with Flannel” and has been featured in numerous media outlets and magazines.


Have a question or like what you see? Please let me know!